Making changes to your website, or updating it, can potentially involve a great deal of danger. You might possibly run into issues that could knock your website out of action – or even wipe it out completely if the update fails.
Yet, even with all of the risks associated with maintaing an online presence, 96% of businesses do not back up their websites.
Fortunately, preventing your website from disaster can be done by setting up automated WordPress backups, which can take as little as five minutes.
In this post, you’ll learn three different ways to easily backup your WordPress website, at varying levels of complexity, so that you can avoid a catastrophic disaster from ever happening to you.
Why Backing Up Your Website Is Important
Backing up your website can save you a huge amount of stress should things go wrong.
However, what most people fail to realize is that WordPress backups aren’t just there to protect you from your own clumsiness or mistakes. Your site can get attacked by hackers, or something as simple as a new WordPress update can cause things to break beyond repair – you just never know.
The risk is very real, with 2 out of 3 midsize companies affected by Ransomware in the past 18 months.
Unfortunately, 60% of businesses that suffer a data loss event will close down within six months.
Backing up your site is like getting insurance for your car. You may never need to use it, but it’s nice to have a safety net in place just in case.
How Often Should You Back Up Your WordPress Site?
You should tailor your backup schedule depending on what type of site you run.
It could be after you’ve made a major change, before an update, or just set it on a regular schedule and forget about it. A new site publishing multiple blog posts every hour will need to back up much more often than a personal portfolio site that only updates every week or two.
And in the case of an e-commerce site, you’ll want to use real-time backups which makes copies of data automatically any time any changes are made. That way, you can ensure that no customer order data is lost should something happen to the site.
How To Back Up Your WordPress Site
The easiest way to backup your site is to install a plugin and let it do the work for you.
For those of you who don’t want to rely on plugins due to security risks or the effects they can have on website performance, we’ll also cover other paid (and more reliable methods later).
Method 1 – Backing Up Your WordPress Website for Free
This method takes as little as just a few minutes and requires no experience with backups.
Step 1: Install The UpdraftPlus WordPress Backup Plugin
A simple search for “backup” in the WordPress plugin library gives us a huge number of results.

Each plugin offers something different, so spend time experimenting with them to figure out which one is right for you. In this section, we’ll be focusing on the most popular plugin, UpdraftPlus. It’s incredibly easy to install and set up, and is great for anyone looking to install a fast backup solution in a few minutes.
Go ahead and find UpdraftPlus in the plugin library and click ‘Install now‘, and then click the “Activate now” button that pops up afterwards.
Once done, you’ll need to set up the plugin – just following their step-by-step tutorial will do the trick.
Step 2: Configure Your UpdraftPlus Backup Settings
Press the ‘Backup Now’ button in the ‘Backup/Restore’ section of the plugin, and UpdraftPlus will automatically backup your site.

You can also set up a recurring schedule by heading over to the “Settings” tab, selecting the dropdown that says ‘Manual’ and choosing whatever time period you want.

If you want to have the backups saved in a remote location, you can invest in their premium version, which costs $84 a year. Once you’ve done this, don’t forget to save your settings and you’re good to go. It really is that simple to back up your WordPress files with a plugin.
Method 2 – Use A Professional WordPress Backup Solution
If you’re looking for something more comprehensive, you’ll find free plugins limited in what they offer.
You may need to manage multiple websites, add team members, and update plugins across sites with one click. For these cases, we’ve found BlogVault to be the best option.
Step 1: Create An Account on BlogVault And Add Your Website
The first thing you need to do is to set up your account and add your first website. Head over to BlogVault and get started by clicking on the ‘Start Free Trial‘ button.

You’ll be guided through the onboarding process and, after creating an account, you’ll be asked to add a website. There are three ways to set up BlogVault on your site:
- Automatic installation using your WordPress login credentials.
- Manually download Blogvault and install it via the WP admin panel.
- Install the BlogVault plugin and run the automated setup.

For this tutorial, we’ll be using the ‘Auto Installation‘ option.
Step 2: Initiate Sync And Set Up Your Backup
After you’ve clicked ‘Continue‘ and logged in using your WordPress details, a button will appear prompting you to start syncing your website.

It should only take a few minutes to get everything synced up, and once it’s finished you should be able to see an overview of your website in the BlogVault dashboard.

Clicking ‘BACKUP’ in the top panel will take you to the backup dashboard, which is where you’ll be able to customize your backups or restore files.

To get the most out of BlogVault, such as enabling real-time updates, you’ll need their paid plan, but for busy developers and agencies the paid version more than makes up for its cost.
Plus, since BlogVault has a one-click setup, managing multiple sites takes less time than using a plugin, where you have to manually set it up for every website you manage.
Method 3 – Server-Level Backups
Most websites are hosted through a company like HostGator, Kinsta, SiteGround, WP Engine, or Cloudways. There’s no end to the list, so it’s going to be impossible for us to cover all of them in this article. However, backing up your site isn’t going to be too different regardless of which hosting platform you use.
In our example, we’ll be using RunCloud, a fantastic all-in-one server management platform that makes creating backups a breeze.

The benefit of using a service like RunCloud or Cloudways to back up your website is that everything is done on the server level, avoiding any possibility of slowing down your website using a plugin – which often has size limitations and isn’t suitable for bigger or more complex websites.
Step 1: Log in to RunCloud (Or Your Hosting Provider Of Choice)
Head over to RunCloud’s login page and sign into your account.

Step 2: Create Your Backups
Navigate to the ‘Backup’ tab in the dashboard, and follow the instructions to start backing up your website.
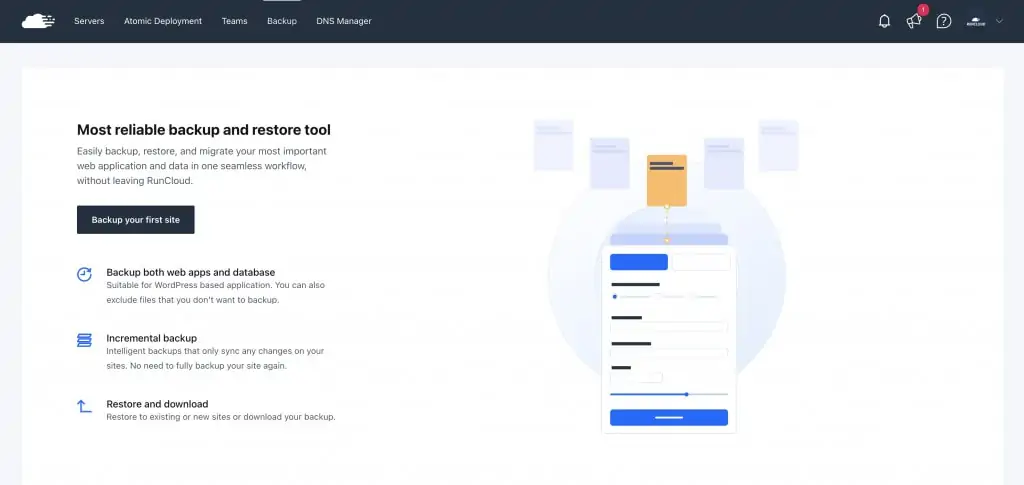
Clicking ‘Back up your first site’ will take you to a configuration page.
If you’re used to basic WordPress plugins, you’ll find much more customization options available to you, such as:
- Frequency of backups
- How long you want to keep files
- Notification settings (RunCloud notifies you via Slack, Telegram, or Email if there’s a problem with your backup)
- What time you want the backup to start

Depending on your hosting provider, you may need to purchase additional storage space to save your backups. For instance, Cloudways will charge you if you exceed your plan’s bandwidth limit, while RunCloud gives you 50GB of free storage if you are one of their paid plans.
When you’re finished configuring your backup instance, hit the ‘Create’ button and you’re good to go!
Summary – Protecting Your Website is Easier Than You Think
If you haven’t already implemented one of these backup solutions, now is the time to do it.
Why? Well, because (speaking from experience here) having a proper backup & disaster recovery system in place is essential if you manage and host websites for your clients on website care plans.
Our go-to backup solution is using a combination of multiple solutions for redundancy – such as RunCloud’s built-in backups, and a paid solution like BlogVault, that can even run real-time backups, which are essential for absolutely critical sites such as eCommerce websites where any loss of information or data has serious business effects.
If you’re looking for additional WordPress-related tips, you can check these resources below:
- The 14 Best WordPress Plugins for Agencies in 2023
- 12 Best WordPress Blogs You Should Read & Follow (in 2023)
- The 10 Best Collaboration Tools for Productive Teams
If you have any questions or need anything in general, you can always reach us on support@atarim.io where we are always happy to help!