Managing Your Account Settings in Atarim
Configure your workspace once — brand, AI context, permissions, email, and integrations — so every project and client that follows inherits it automatically.
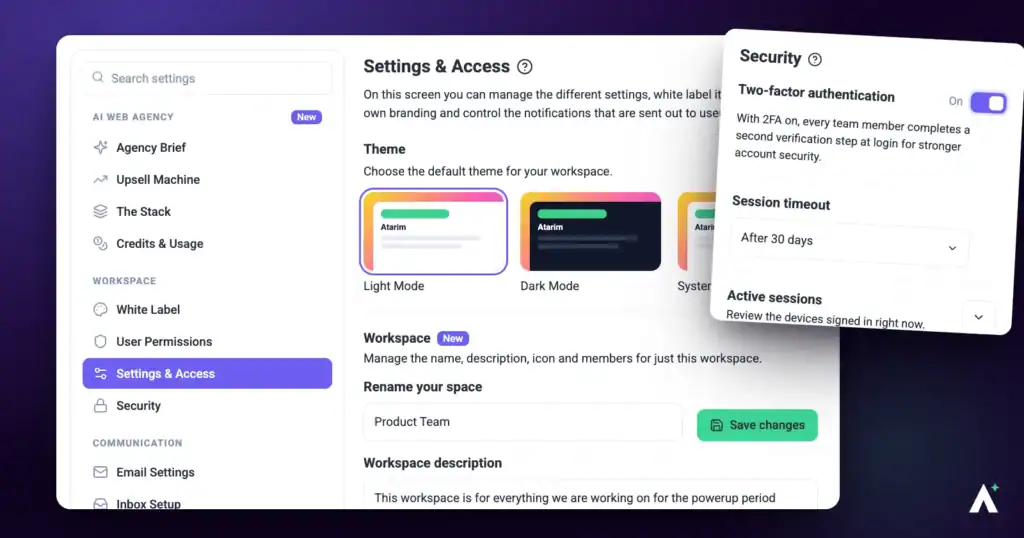
Account settings are where you configure everything that applies across your whole workspace — how the AI understands your agency, what your clients see, who on your team can do what, which emails go out, and which outside tools Atarim connects to. These are global settings that flow through to every project attached to your dashboard, rather than something you configure project by project.
That makes Settings the highest-leverage half hour in Atarim. Most of it is a one-time job, and most of it only applies to what happens after you save it — which is why doing it before your first client invite saves re-doing work later.
In this guide, you'll learn what each of the five sections controls, the exact click path to every setting, and how to tell whether a change actually saved.
What Can You Configure?
Settings is organised into five sections in the left sidebar:
- AI Web Agency — Agency Brief, Upsell Machine, The Stack, Context Files, Memory, Credits & Usage
- Workspace — White Label, Workspace Permissions, Settings & Access, Security
- Communication — Email Settings, Inbox Setup, Notifications, Responses & Prompts
- Connected Apps — Atarim MCP, Integrations
- Account — Workspaces, Personal Settings, Account & Billing
Step-by-Step Guide
Step 1: Opening Your Account Settings
Everything in this guide is reached the same way. Settings opens on Agency Brief by default, with the settings menu on the left and the selected screen on the right. On screens narrower than 1024px, the menu becomes a dropdown labeled Settings.
Instructions:
- Log in to your Atarim account.
- Select Settings in the sidebar.
- In the menu on the left, find what you need under one of the five headings — AI Web Agency, Workspace, Communication, Connected Apps, or Account.
- Select it. The row highlights in purple and that screen opens in the panel on the right.
- To find something fast, type into the Search settings… field at the top of the menu. The list filters as you type and headings with no matches are hidden.
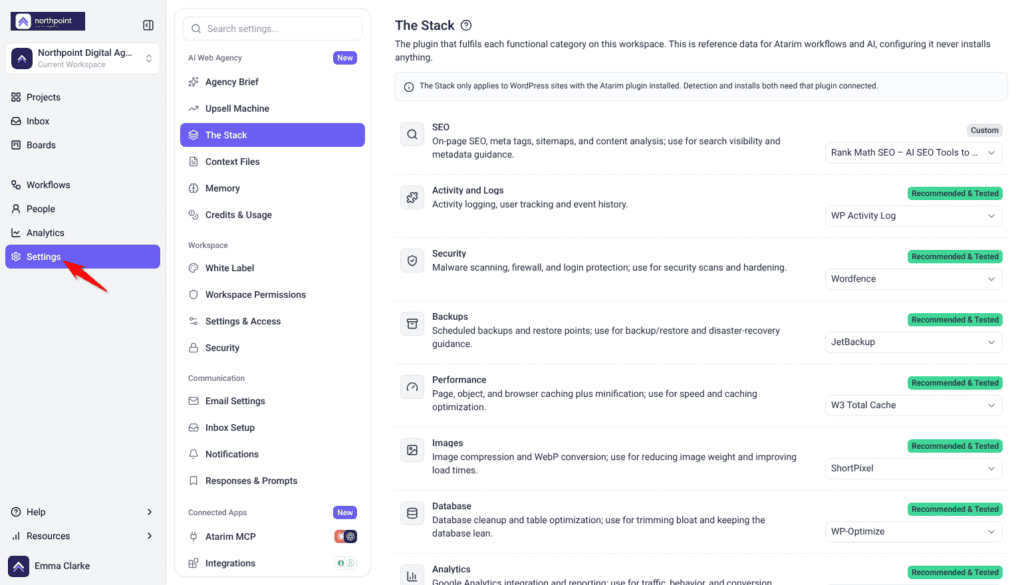
The Settings Panel and Its Five Sections
Step 2: Setting Up Your AI Web Agency
This section is what your AI reads before it does anything — your brand, your services, your preferred tooling, and your supporting documents.
Agency Brief
Agency Brief, under AI Web Agency, is your brand snapshot: what your business is, who it speaks to, how it sounds, and what it looks like. The AI can draft it from your website for you to review and edit. Explore Agency Brief: Building Your Brand Kit
Upsell Machine
The Upsell Machine, under AI Web Agency, describes your agency’s services and rates in two fields: Agency Profile and Rates & Pricing Context. The AI uses them to identify opportunities for your team and to know when to bring you in rather than act autonomously. Explore The Upsell Machine: Turning Client Requests Into Billable Work
The Stack
The Stack, under AI Web Agency, maps the plugin that fulfils each of fourteen functional categories on this workspace. It is reference data for Atarim workflows and AI, and configuring it never installs anything. Explore The Stack: Mapping Your Preferred Plugin to Each Functional Category
Context Files
“The more context you add, the smarter the support. Upload brand guidelines, tone of voice docs, or agency briefs as PDF or TXT, and we use them to sharpen both page reviews and AI chat replies.”
Context Files is not included on every plan. If yours does not include it, a lock badge above the upload area names the plan you need, and you cannot add files.
Instructions:
- Under AI Web Agency, select Context Files.
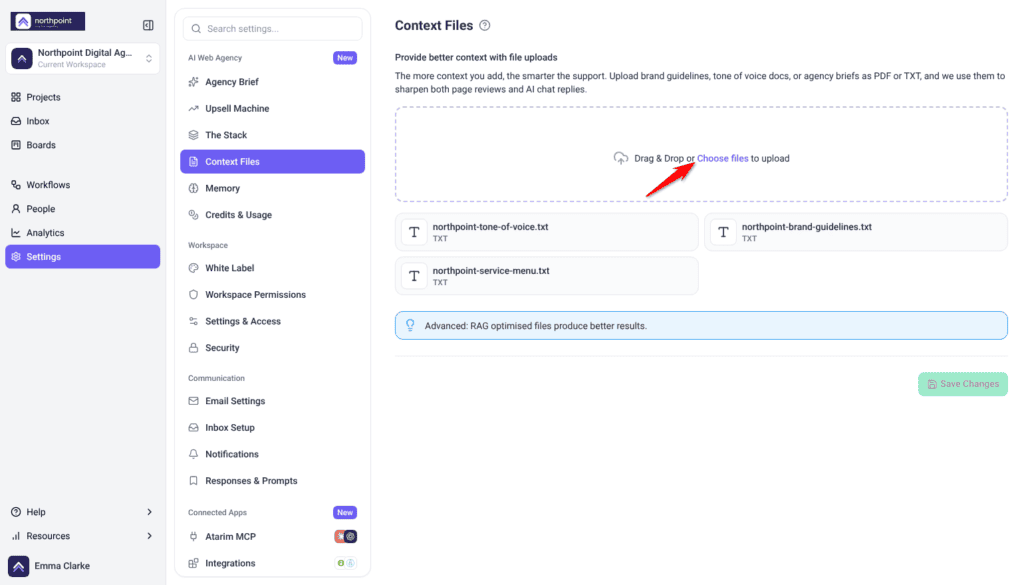
- Drag files onto the dashed upload area, or select Choose files.
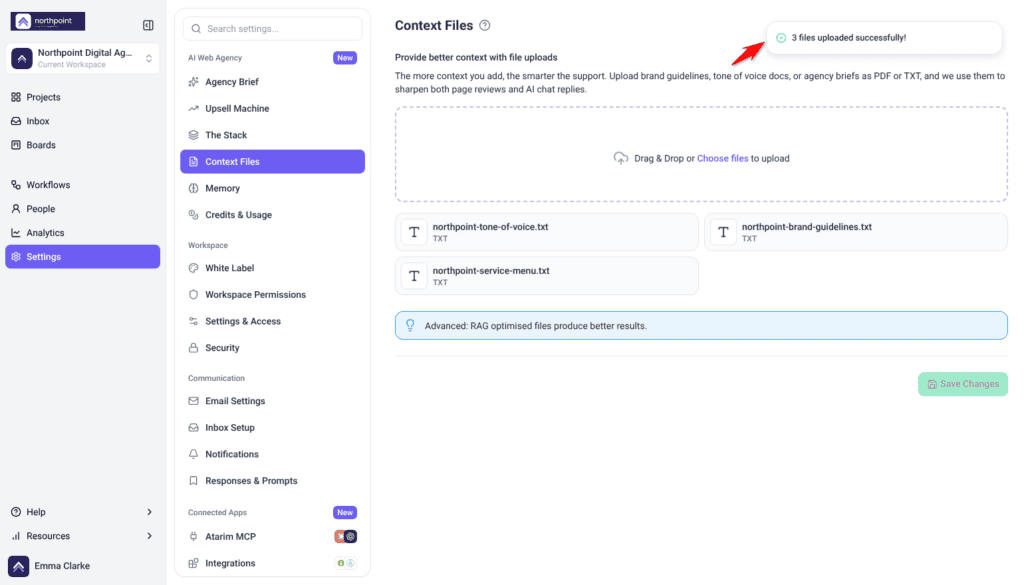
- Wait for the confirmation message, such as “3 files uploaded successfully!”, and check that the files appear in the grid below. New files carry a New badge.
- There is no need to select Save Changes. Uploaded files are saved straight away, so the button stays disabled.
Memory
Your experts keep notes on how you work, and write to them as they go, so you do not have to repeat yourself. Memory is where you read those notes and correct them.
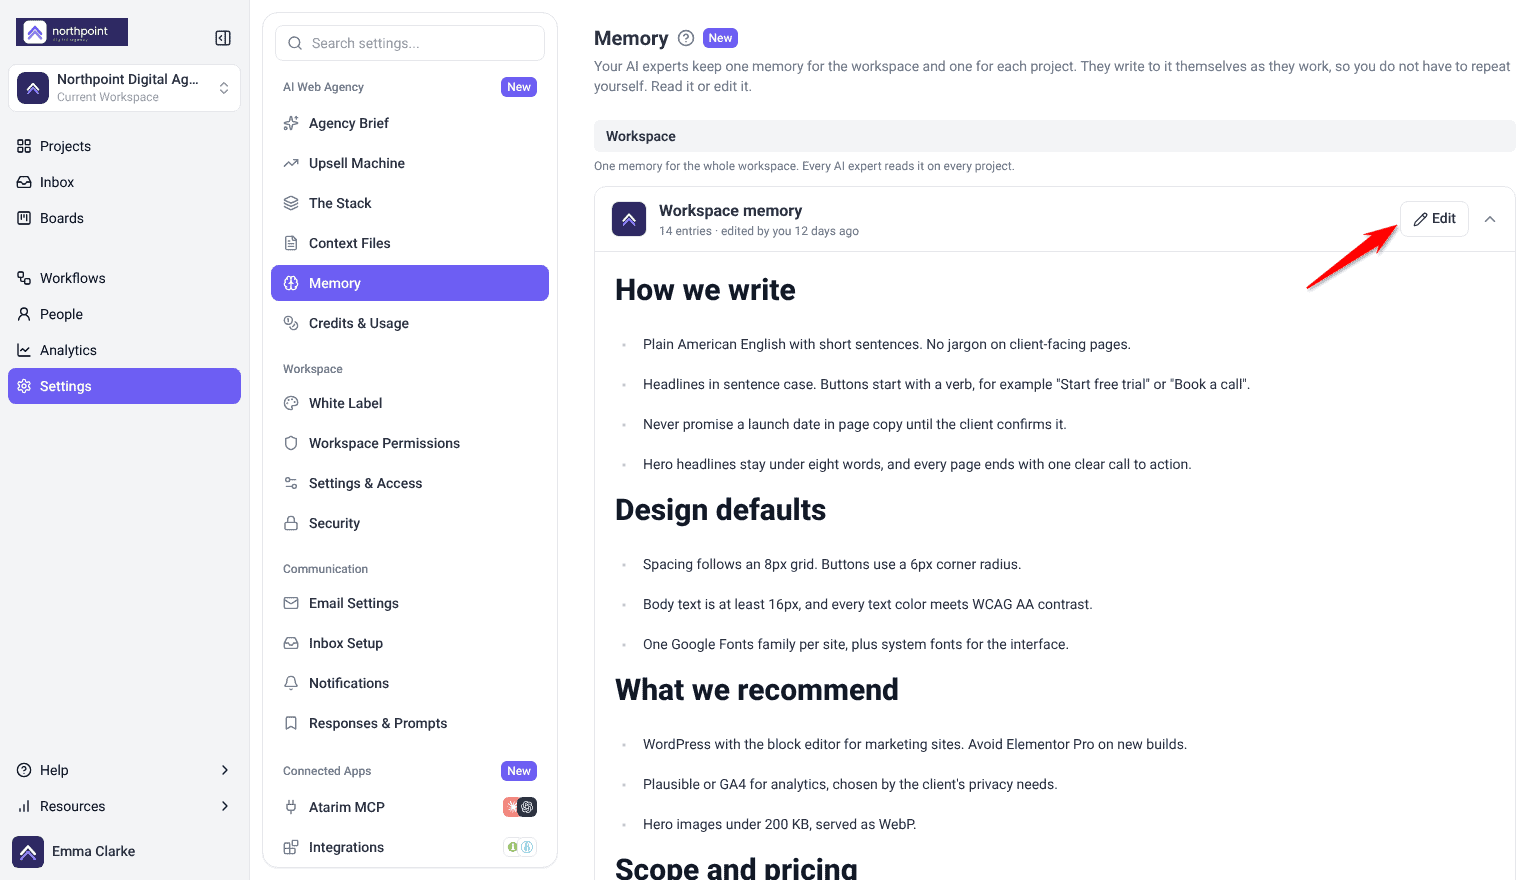
There are two. The workspace memory is your agency: how you write, what you recommend, how you price. The project memory is one client: their preferences, their constraints, the things that only apply to them. Workspace chat reads the workspace memory on every turn. Task chats read that project’s memory and look up the workspace memory when it bears on the request, and where the two disagree, the project memory wins. Page reviews don’t use memory.
Instructions:
- Under AI Web Agency, select Memory.
- Select a memory to open it. The workspace memory is at the top, and each project has its own in the Projects list below. Use Search projects… to find one.
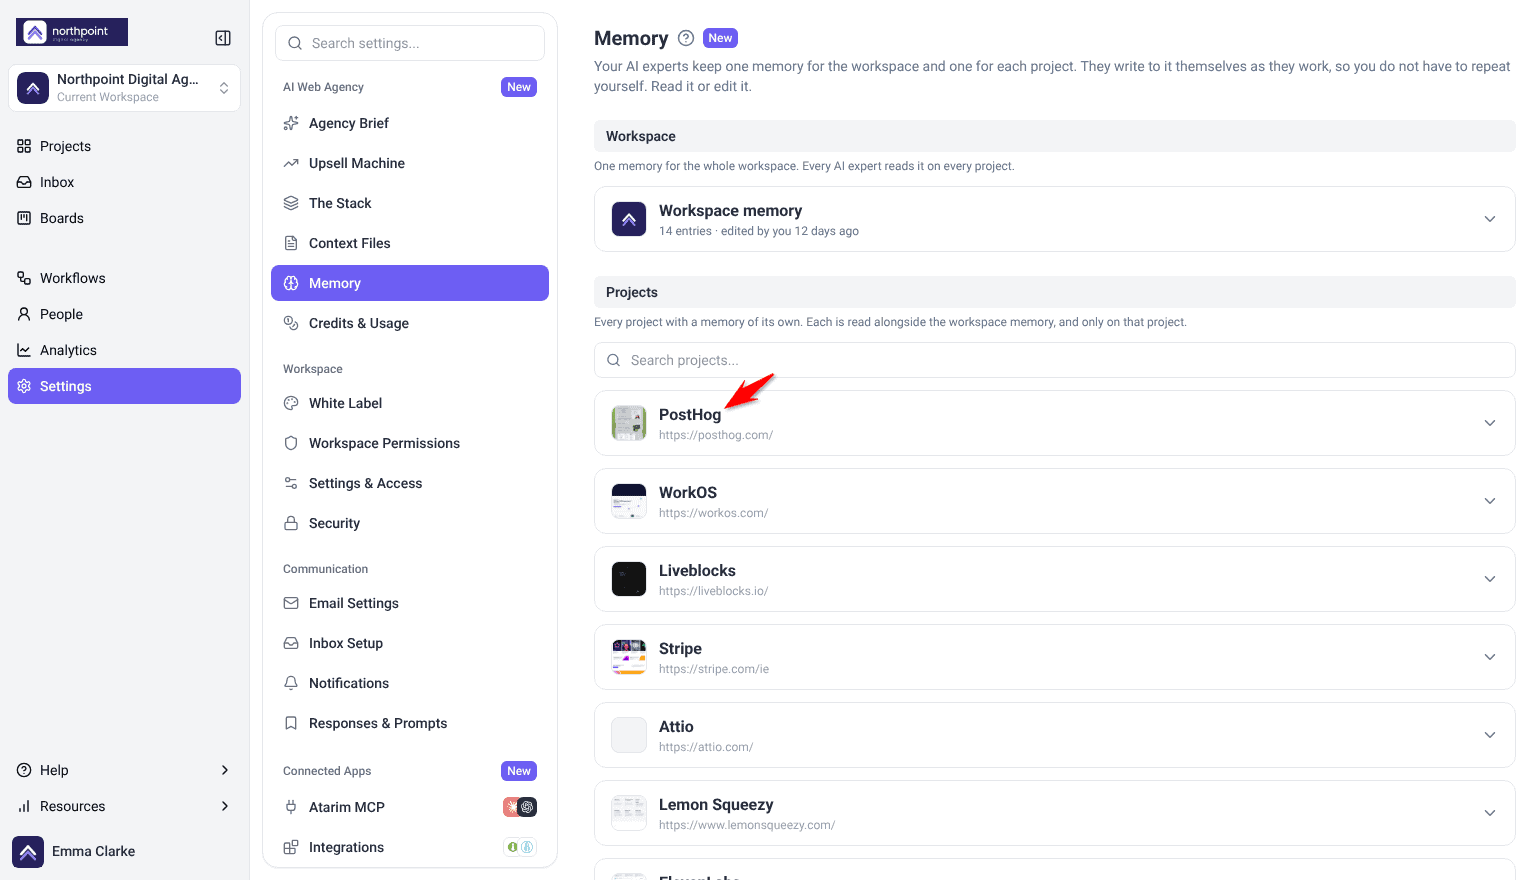
- To change the wording yourself, select Edit, make the change and select Save file.
- To ask for a change in plain language instead, type it in the box under Notes for your experts, for example “stop suggesting Elementor Pro”, and select Add note.
- A note is not applied the moment you write it. The sweep waits until your notes have been quiet for about fifteen minutes, so you can keep refining. Apply now skips the wait.
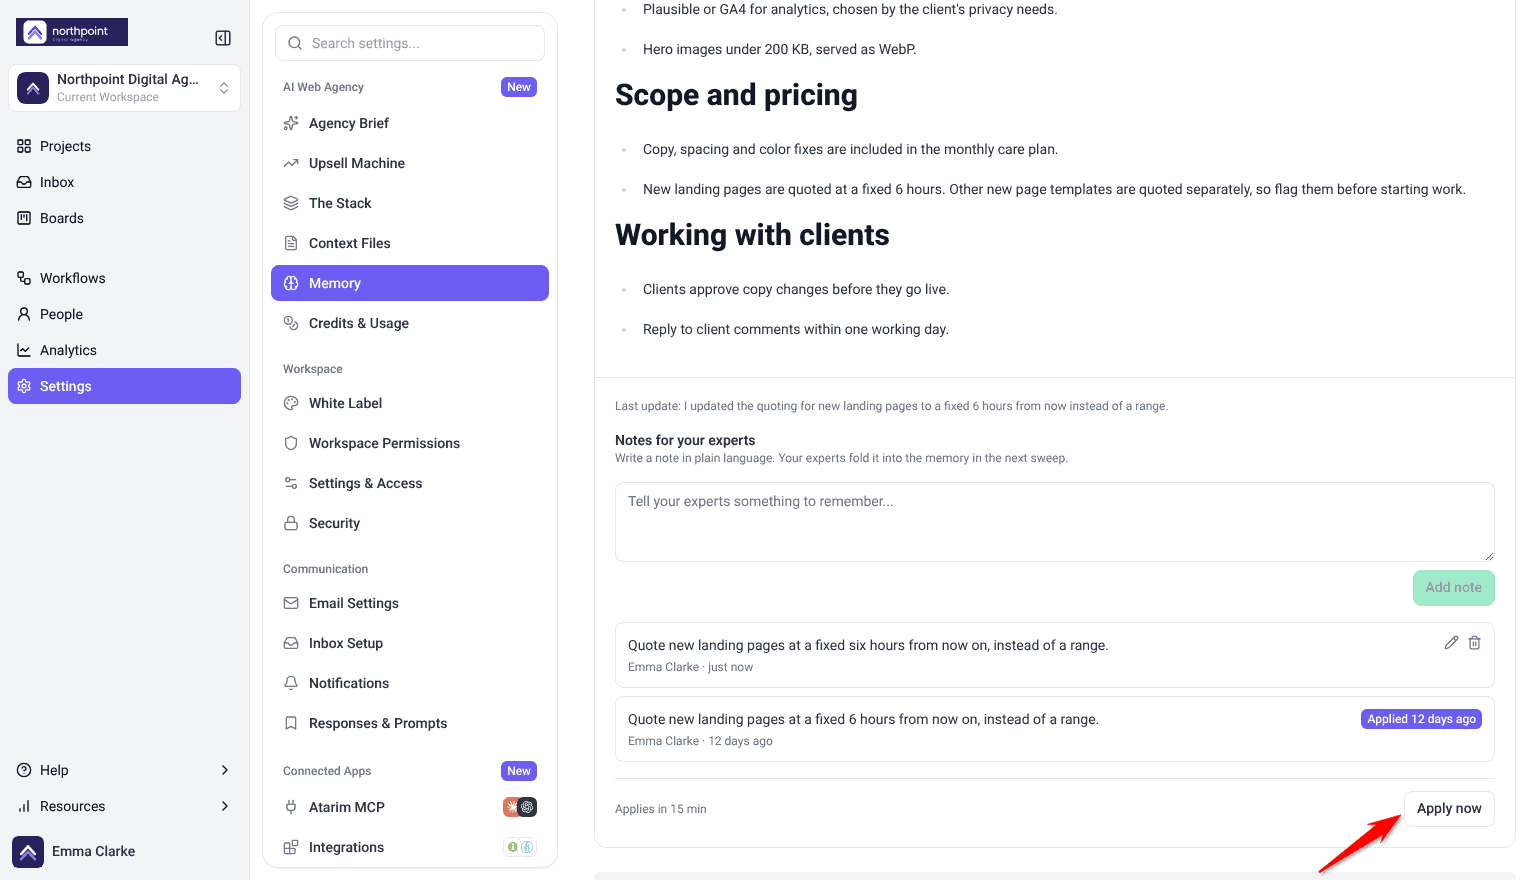
A note can be up to 10,000 characters. Until the sweep picks it up, you can still edit or delete it, and a countdown next to Apply now, such as “Applies in 14 min”, shows when it will run. After that, each note shows Claimed while your experts work on it, Applied once it is in the memory, or Failed if it could not be applied.
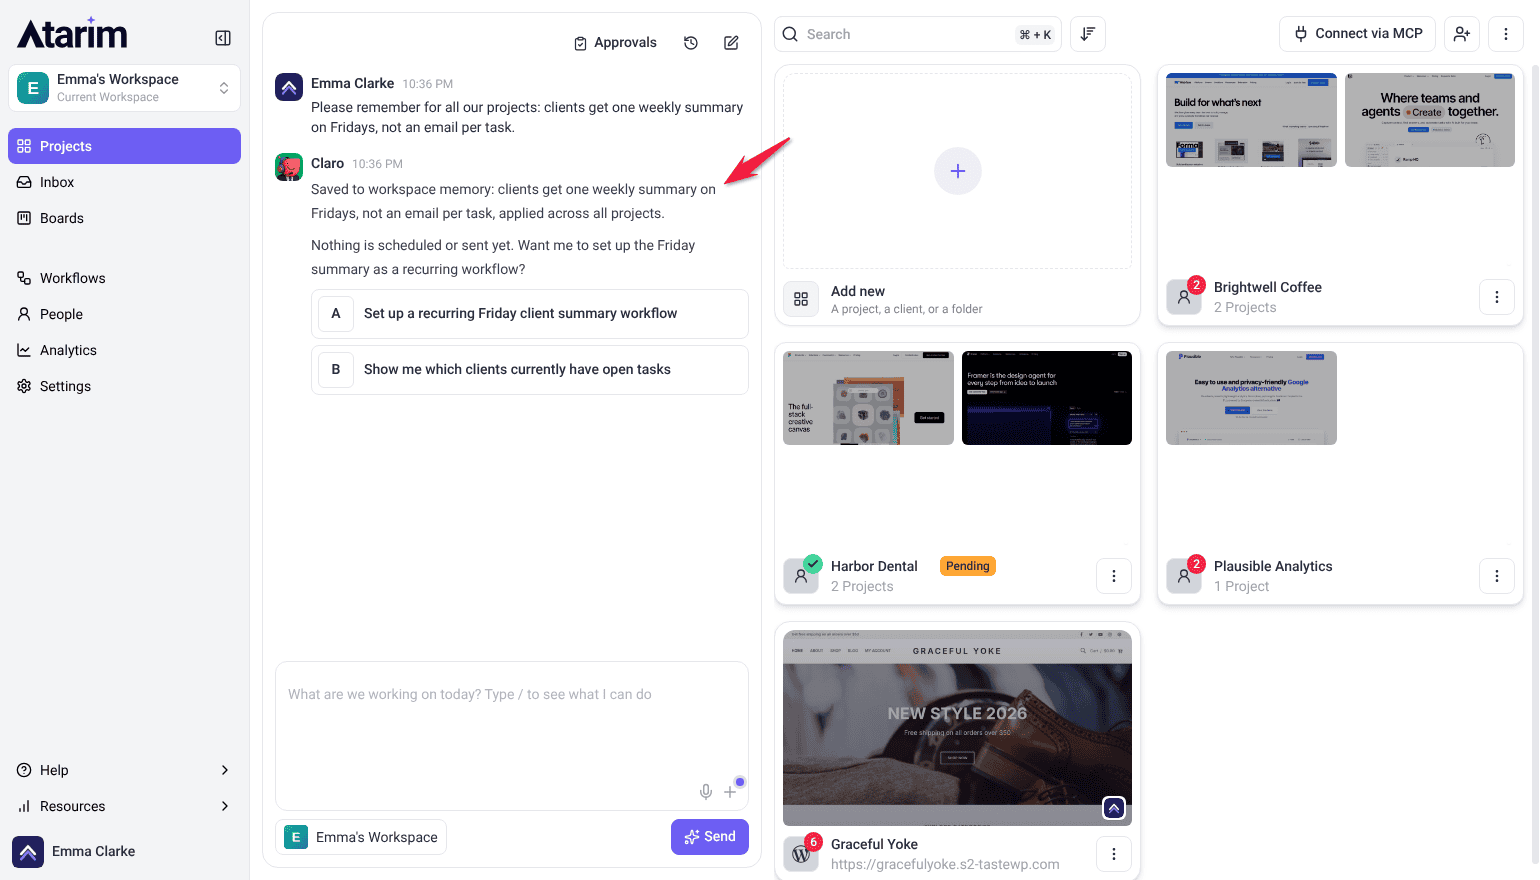
You can also ask Claro or an expert to remember something during a chat, or simply state a rule, such as “always” or “from now on”. They save it as one line in your own words, ending with the date and the reason, for example (2026-09-25, stated when rejecting a preview). If the memory already holds the same rule, they update that line instead of adding a second copy. Claro confirms the update in its reply, for example “Saved to workspace memory: …”. When an expert edits the file, a Memory card can also appear, and its View memory button opens Memory in Settings.
In workspace chat, Claro tells you when a remembered rule decides what it does, such as keeping a draft instead of publishing, and when it hands back finished work it quotes the rule it followed, word for word.
A project’s memory is also on the Memory tab of its Project Brief. See The Memory tab.
Credits & Usage
Overview
Credits are what every AI action actually costs. This screen, under AI Web Agency, shows your Used Credits bar and a running log of individual consumption events. Explore Credits & Usage: Tracking What Your AI Team Spends
Credit Balance and Usage
Credits are a single shared pool, so the usage log is the only place that shows which feature actually spent them.
Step 3: Configuring Your Workspace
White Label
“Rebrand the Atarim client interface by changing the main color, logo, and icon.” The Atarim logo is replaced across the project frontend — bottom bar, sidebar, notification emails, and every other element carrying it. The full-page loading screen shows your logo too. Set both a logo and a main color: with a color alone, the sign-in page and the loading screen keep Atarim’s logo and color, and client invitations use your color with Atarim’s logo. If your plan does not include White Label, a lock names the plan you need.
Instructions:
- Under Workspace, select White Label.
- Under Replace the Atarim logo, select Upload image and choose a 180×45px image.
- Under Replace the Atarim favicon, upload a 50×50px image. It replaces the Atarim icon at the top of the sidebar, including while a project is open in Collaborate. The browser tab still shows the Atarim icon.
- In Change the logo link, enter the address your logo should point to.
- Under Change the main color, type a hex value beside the swatch or select Select a color. The Atarim default is
#6D5DF3. - In Change the tutorial video, paste a link to replace the default client tutorial video, or leave it empty.
- Select Save Changes.
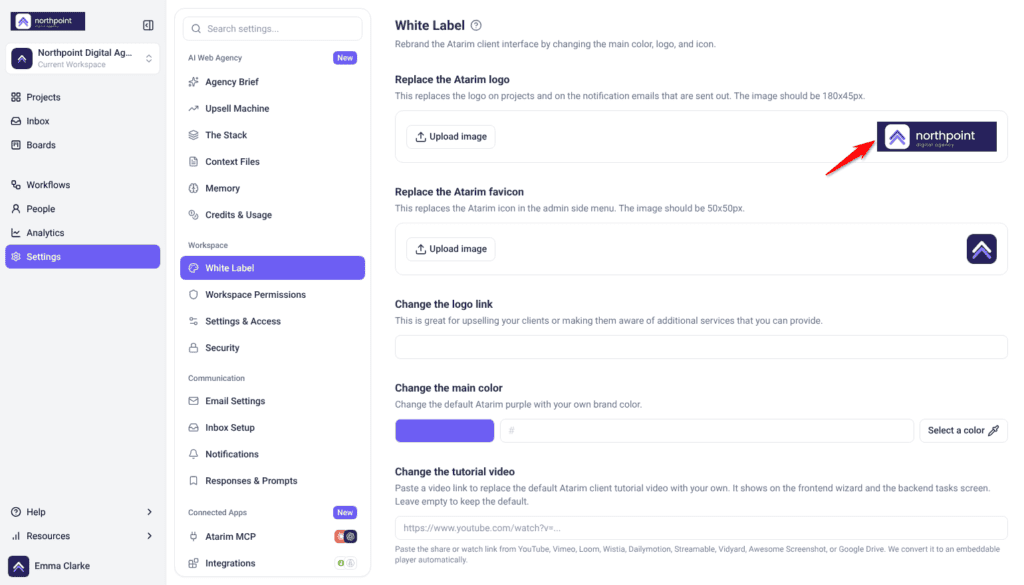
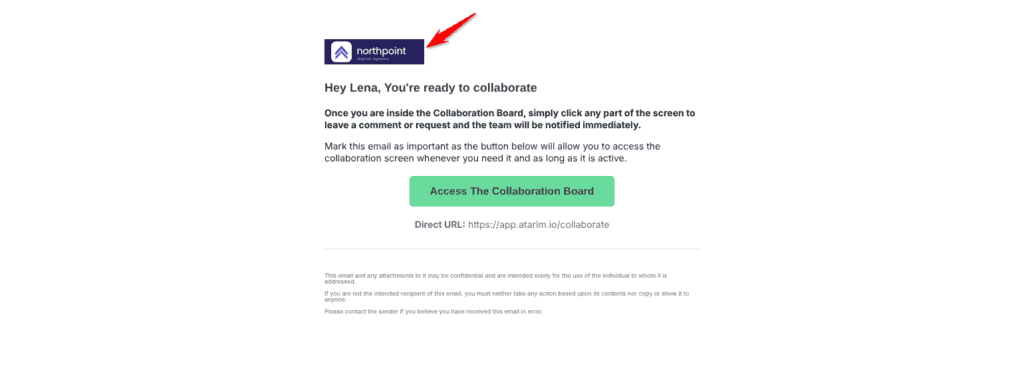
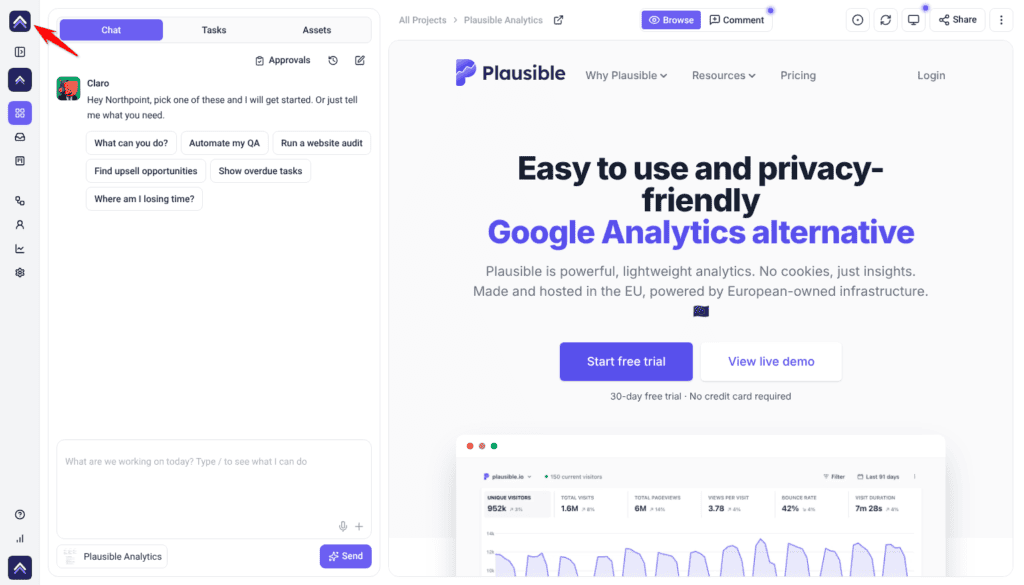
Rebrand the Client Interface With Your Own Assets
Links from YouTube, Vimeo, Loom, Wistia, Dailymotion, Streamable, Vidyard, Awesome Screenshot and Google Drive convert to an embeddable player automatically. Reset White Label Settings, near the bottom, reverts everything to Atarim’s defaults in one action.
Workspace Permissions
“Enable or disable features for each Atarim user type to override the defaults and shape your workflow.” A grid of capabilities down the left and five roles across the top: Owner, Administrator, Team Member, Website Owner, Collaborator. This grid is the workspace default, and a single project can override it from the Project Permissions tab in its Project Settings. Understanding User Roles and Permissions in Atarim
Instructions:
- From the main dashboard, select Settings.
- Under Workspace, select Workspace Permissions to see the capability table across five roles: Owner, Administrator, Team Member, Website Owner, Collaborator.
- Toggle any capability per role. If your plan does not include Workspace Permissions, a lock names the plan you need.
| Capability | What it allows | Default |
|---|---|---|
| Assign Users On Tasks | Assign teammates so the right person gets notified | Off for Collaborator |
| Change Status and Priority | Keep boards and workloads accurate | Off for Collaborator |
| View Auto Screenshot on tasks | See the screenshot captured at task creation | All roles |
| View More Info on Tasks | Browser, screen size, page URL, creator | All roles |
| Delete tasks | Remove tasks and their comments for everyone | All roles |
| Create Annotated Screenshot | Draw and comment directly on screenshots | All roles |
| AI Chat | Use the AI assistant inside task conversations | Off for Collaborator |
| Trigger Clarity Test | Score how clear a task is and suggest fixes | All roles |
| Collaborate Popover Show Me | The in-task AI walkthrough action | All roles |
| Collaborate Popover Do It | The in-task AI execution action | Off for Collaborator |
| Color Coded Stickers | Colour-coded task stickers on the page | All roles |
| Display Number on Completed Tasks | Show the task number on completed items | All roles |
| Keyboard Shortcuts | Faster navigation while collaborating | All roles |
| AI Mode by Default in Tasks | Open new tasks with AI mode already on | Off for Collaborator |
| Collaborate Popover Project Brief | Open the project brief from the Collaborate menu | Off for Team Member and Collaborator |
Capability Grid Across the Five Roles
Settings & Access
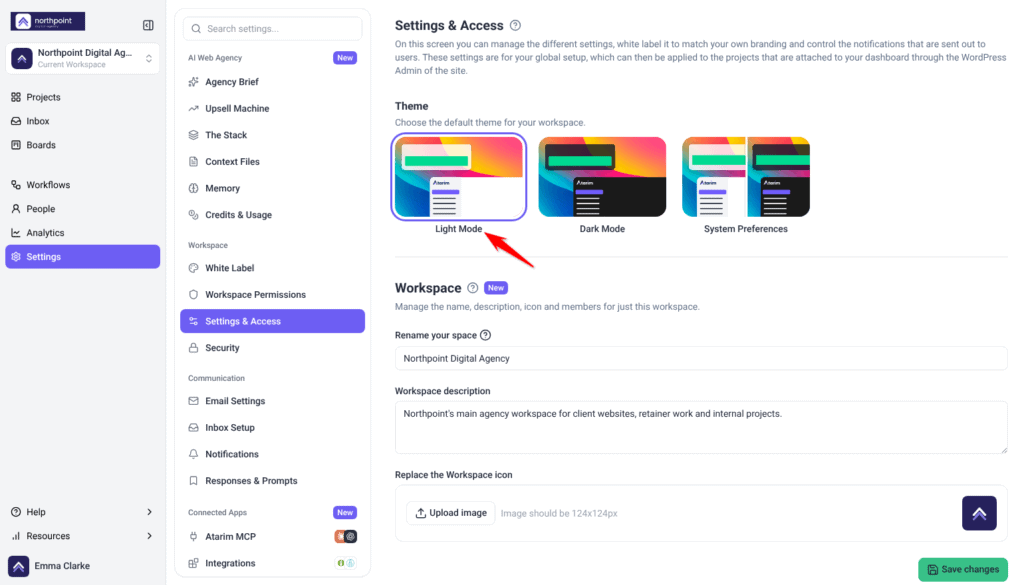
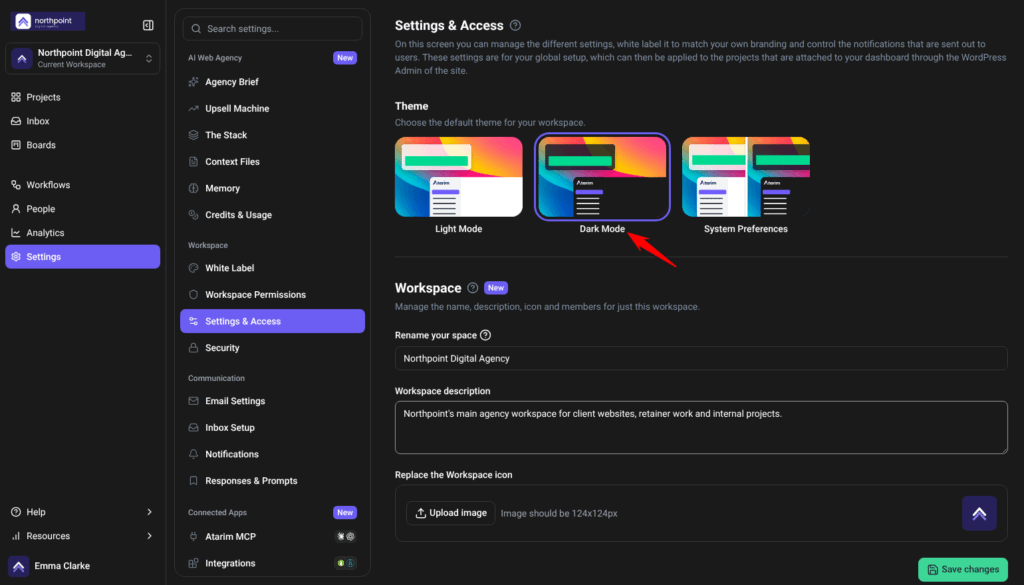
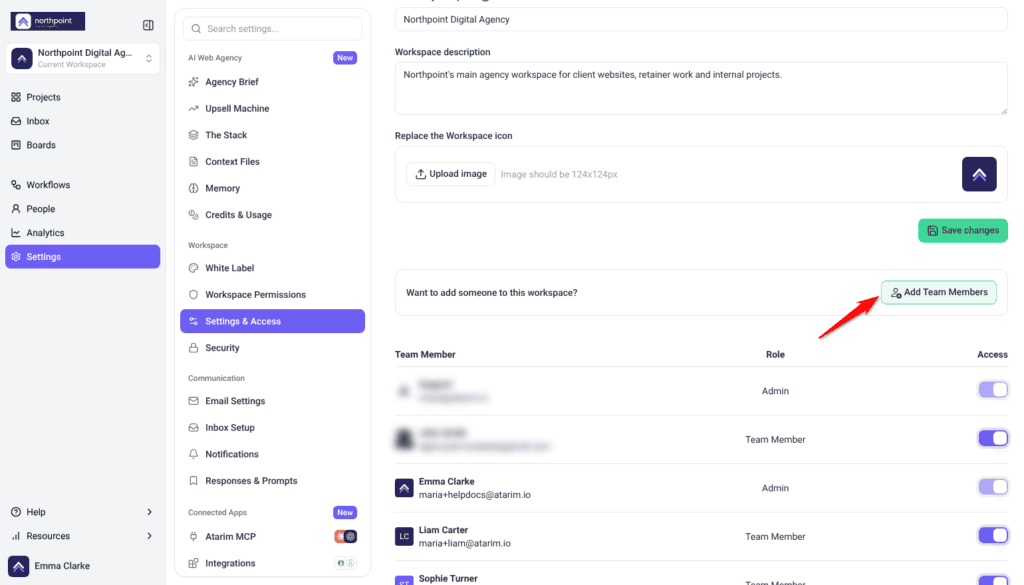
Holds two things: your theme preference — Light Mode, Dark Mode, or System Preferences, applied instantly — and the identity and membership of the workspace you’re in. Rename your space, write a description, replace the 124×124px icon, then select Save changes. Add Team Members invites someone new, and the table below lists each member with their role and an access toggle.
Instructions:
- From the main dashboard, select Settings.
- Under Workspace, select Settings & Access.
- Under Theme, pick Light Mode, Dark Mode, or System Preferences.
- Under Workspace, use Rename your space, Workspace description and Replace the Workspace icon (124×124px), then select Save changes.
- Review the team table below — each member’s role and an Access on/off toggle — and select Add Team Members to invite someone new.
Security
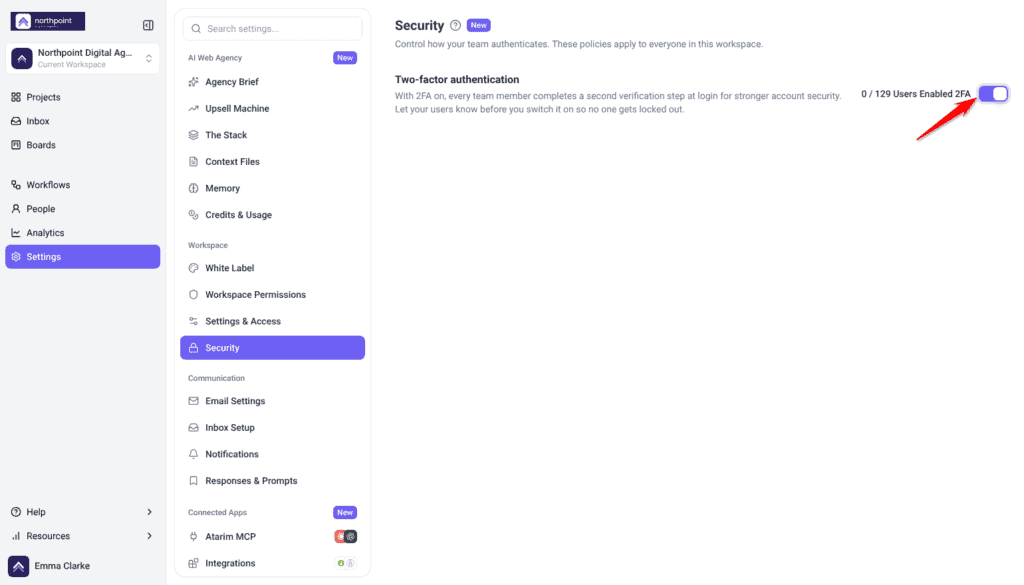
Require two-factor authentication for everyone in the workspace. The setting applies to every member. See How to Enable Two-Factor Authentication
Instructions:
- From the main dashboard, select Settings.
- Under Workspace, select Security.
- Turn on Two-factor authentication to require it for your whole team. The screen shows how many users have it turned on, for example “0 / 67 Users Enabled 2FA”.
Step 4: Setting Up Communication
Until Inbox Setup is complete, selecting Email Settings, Inbox Setup or Notifications opens the setup wizard in place of the normal pages, and the settings menu is hidden. Select Back to Email Settings beneath the wizard to leave it. This is expected, not an error.
Email Settings
Email Settings, under Communication, sets the sender name and email address associated with your workspace, and the signature appended to every email you send. If your plan does not include the signature, a lock names the plan you need. Explore Best Practices for Client Communication, and for the signature, Learn More About Email Signature
Inbox Setup
Inbox Setup, under Communication, is a four-step wizard that brings client email into your Inbox and lets you reply from your own address: Address, Receive email (forward your mail to Atarim), Send from your domain (add DNS records) and Signature, which is optional. With a free email address such as Gmail, the domain step is skipped. Explore Completing Inbox Setup, and for the DNS records, Learn More About Adding DNS Records to Verify Your Domain
Notifications
Notifications, under Communication, sets which email notifications your workspace sends. These are the workspace defaults. Each person can also choose which emails they get about tasks assigned to them, under Assigned Tasks Notifications in their profile. Explore Email Notifications: Controlling What Your Workspace Sends
Responses & Prompts
Responses & Prompts, under Communication, is one saved-text library for two jobs: responses go to your clients and team, and prompts go to your AI experts. Its Templates tab holds ready-made starting points. Explore Canned Responses
Step 5: Connecting Your Apps
Atarim MCP
Atarim MCP, under Connected Apps, connects Atarim to AI coding agents such as Claude and Codex, so client requests become executed work. One connection exposes every site your account can access, and an agent can only reach what you can. Learn More About Atarim MCP: Connecting Claude, Codex, and Other Coding Agents
Integrations
Integrations, under Connected Apps, connects Atarim to the outside tools your team already uses.
Every account can use the Chrome Extension, WordPress Plugin, Figma, Duda and InstaWP. The basic connectors (Zapier, Pabbly, Make, Dollie and Webhooks) and the native integrations (Slack, ClickUp, Asana, Jira, Teamwork.com, Basecamp, Trello, Monday, MainWP and Rocket) need a paid plan. A locked card shows the plan you need. Explore the WordPress Plugin, Zapier and Slack guides.
Step 6: Managing Your Account
Workspaces
Workspaces, under Account, lists every workspace you belong to, with its team member count and Quick Actions to edit it, or delete it if it isn’t your default. Use Add Workspace to create a new one. Explore Managing Your Workspaces
Personal Settings
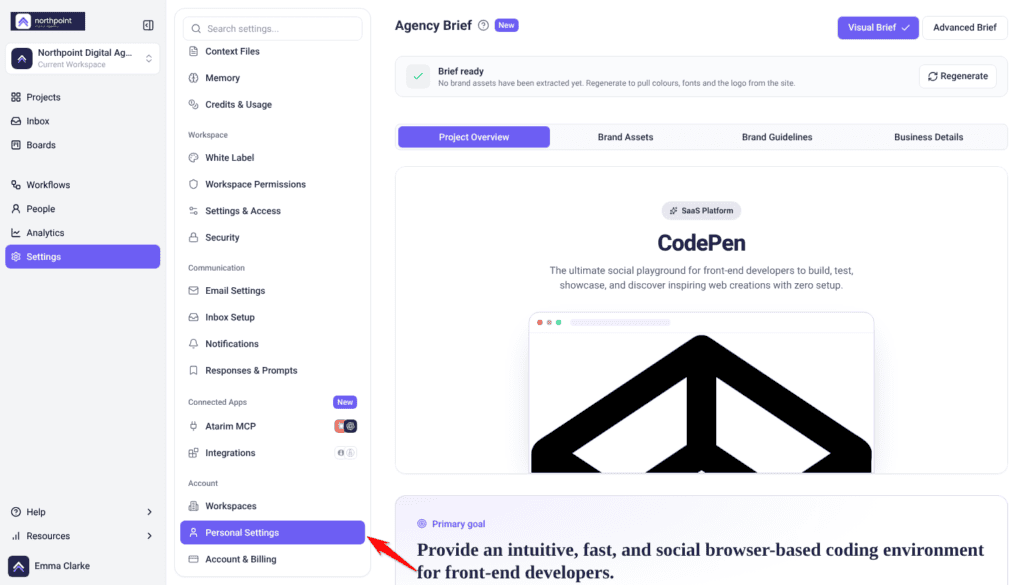
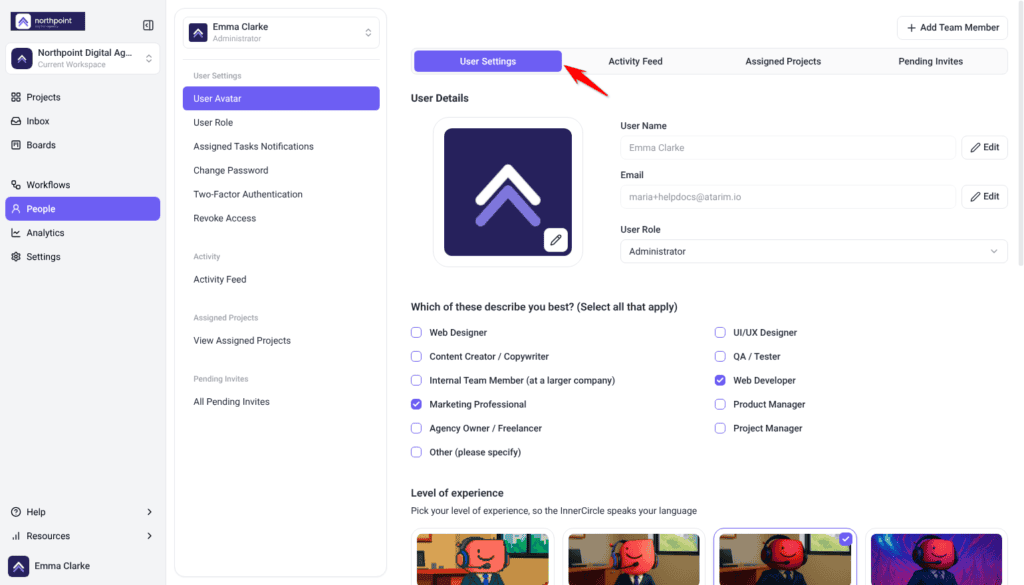
Selecting this takes you out of Settings and into your own user record under People. Owners and Administrators see the User Settings, Activity Feed, Assigned Projects and Pending Invites tabs; other roles see their own settings only. User Settings holds your avatar, name, email, skills or role, assigned-task notifications, password, two-factor authentication, and your level of experience, which scales how the AI explains things to you. Owners and Administrators also see Add to new projects by default and Add to tasks by default.
Account & Billing
Account & Billing, under Account, shows your plan and price, licence count, and usage bars for Projects, Team Members, Workspaces and AI Credits, then Payment Information and Invoice Information below. Explore Manage Your Account and Billing
FAQs
Where can I find my account settings in Atarim?
Select Settings in the sidebar.
Do I need admin permissions to change account settings?
Yes. Settings is available only to the Owner and Administrators, and some pages also depend on your permissions or your plan.
Where’s the setting that drives client request routing?
Settings, under AI Web Agency > Upsell Machine — fill in your Agency Profile and Rates & Pricing Context there.
How many categories does The Stack have?
Fourteen. Page Builder is detection-only — Gutenberg is assumed when no third-party builder is found.
Does configuring The Stack install plugins on my clients’ sites?
No. It’s reference data only, telling Atarim’s workflows and AI which tool fulfils each category.
Can I set a different stack for one project?
Yes. Open the project’s Project Brief, select the Stack tab, turn off Inherit from workspace defaults and override the categories you need. Only Owners and Administrators see the Stack tab.
What file types can I upload as Context Files?
PDF and TXT. Several focused files work better than one large document.
Do I have to write in the memory file myself?
No. Your experts write to it themselves as they work. Edit is there for when they have recorded something wrong, and Notes for your experts lets you ask for a change in plain language instead.
Why has my note not appeared in the memory yet?
Notes are folded in on a sweep rather than the moment you write them, so you can keep refining. The sweep waits until your notes have been quiet for about fifteen minutes. Apply now runs it straight away.
Are AI Chat and Trigger Clarity Test off for Team Members by default?
No. Both are on for Team Members by default. AI Chat is off for Collaborators. If someone can’t use them, check whether an Administrator has switched them off in Workspace Permissions, or in that project’s Project Permissions tab.
Do I need to press Save on the Workspace Permissions grid?
No. Each checkbox saves as you change it — look for the Saved! badge beside the heading.
Can each user choose their own notifications?
Partly. Each user can choose which emails they get about tasks assigned to them, under Assigned Tasks Notifications in their profile.
What’s the difference between a canned response and a canned prompt?
A response is text your team sends to clients. A prompt is an instruction your AI experts can run wherever you talk to them. The same library holds both.
Is the MCP Server URL different for Claude and Codex?
No. Every agent uses the same server URL. Under Connect an agent, pick Claude, Codex or Other to see the setup steps for it.
Why can’t I delete my workspace?
Your default workspace can’t be deleted, and deletion requires the right permission. The Delete this Workspace section only appears on Settings & Access when both conditions are met.
Do White Label and Email Settings change things I’ve already sent?
No. Both apply only going forward — anything sent before still carries the generic default.
Conclusion
Configuring your account settings is a one-time investment that pays off across every client relationship that follows. Agency Brief and the Upsell Machine sharpen the AI's judgment so it knows your work well enough to spot an opportunity and knows when to escalate rather than act alone. White Label and Security shape what clients see and how your team logs in. Communication settings keep everyone informed without manual effort, and Connected Apps extends Atarim into the tools your team already uses.
The one thing worth remembering: saving isn't consistent across Settings. Roughly half the pages need an explicit Save and half save as you go. If a change doesn't seem to have stuck, check whether that page has a Save Changes button before assuming something is broken — it's the single most common cause of lost work here.
Tips & best practices
- Finish Inbox Setup Before You Invite Clients: Forward your client email address to Atarim so requests arrive in your Inbox, and send from your own domain so replies come from you.
- Customize Notifications: Adjust notification settings to ensure relevant team members receive updates without cluttering their inbox.
- Manage Workspace Settings for Security: Regularly update user permissions to control access to sensitive project information.