Creating Your First Project in Atarim
Ways to connect a site — but only one unlocks the full AI web agency.
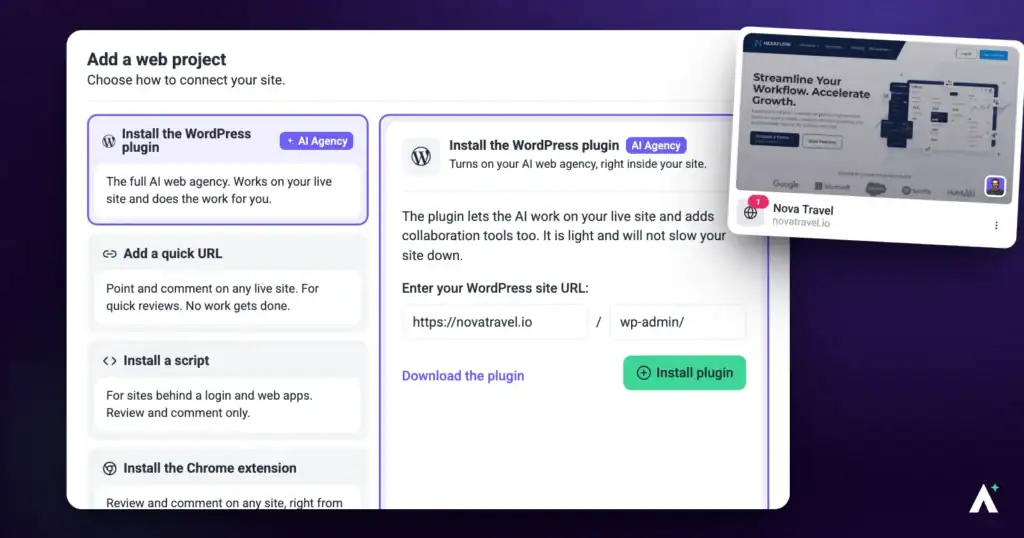
Every project starts from Add new on the Projects screen. It offers several ways to connect a site, but they're not interchangeable: only the WordPress plugin lets the AI make changes on the site directly. This walkthrough covers each way in and what happens right after.
Step-by-Step Guide
Every project starts in the same place. The options are grouped under Work, Organise and Collaborate, and which ones you see depends on your role.
Instructions:
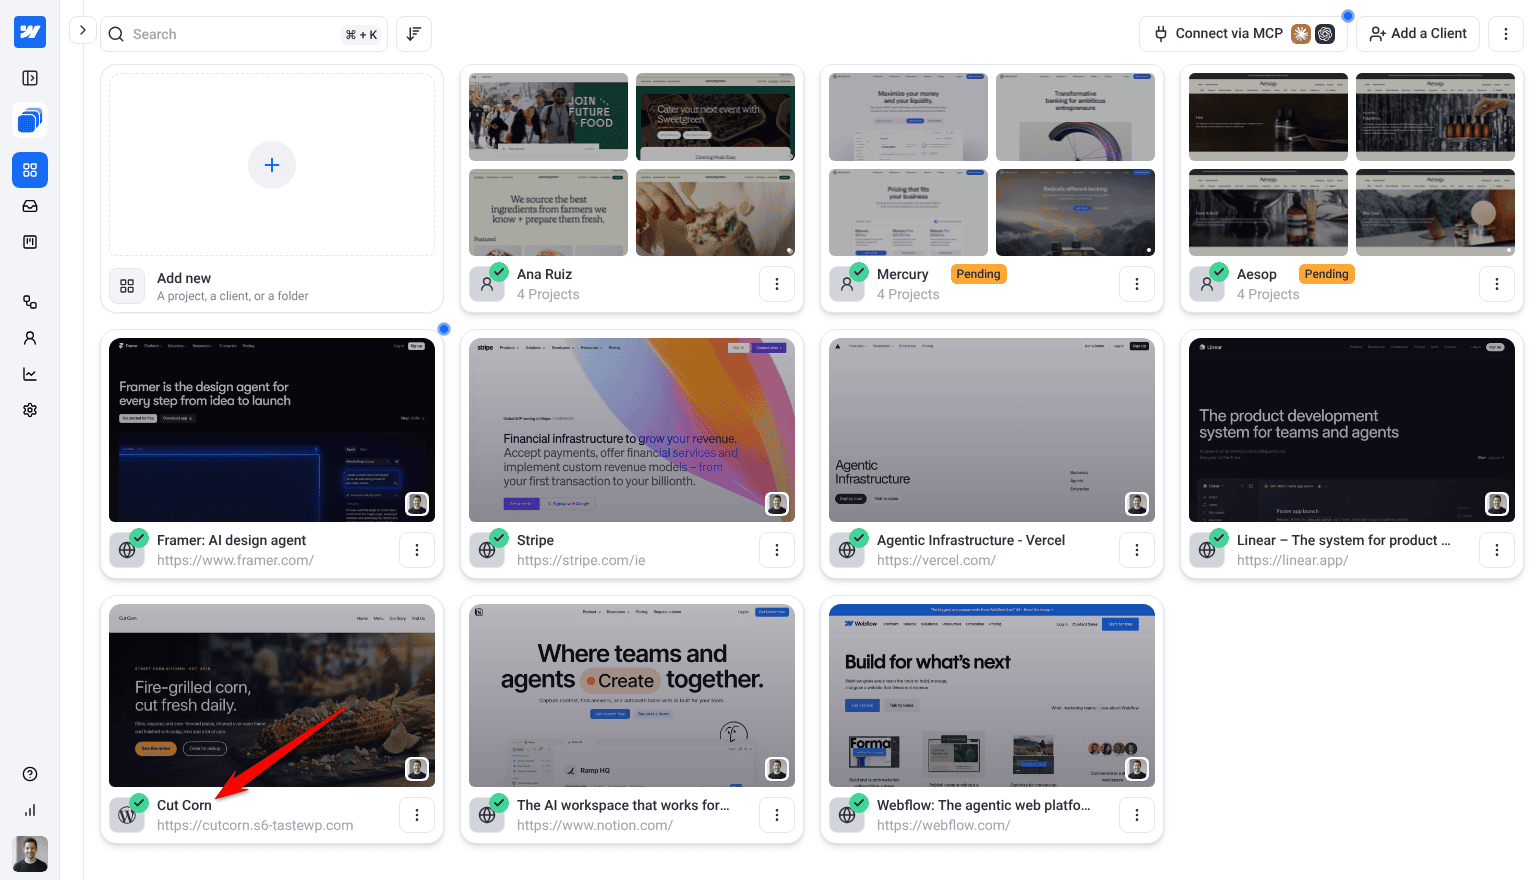
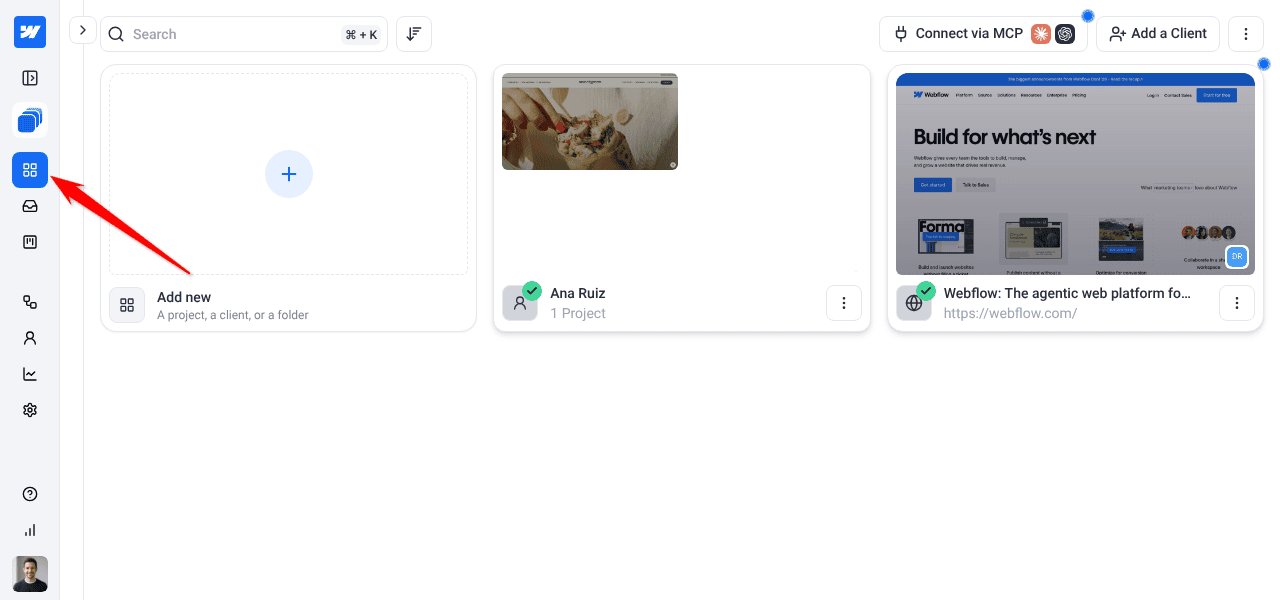
- On the Projects screen, select Add new, the first card in the grid. It is also in the ⋮ menu at the top right.
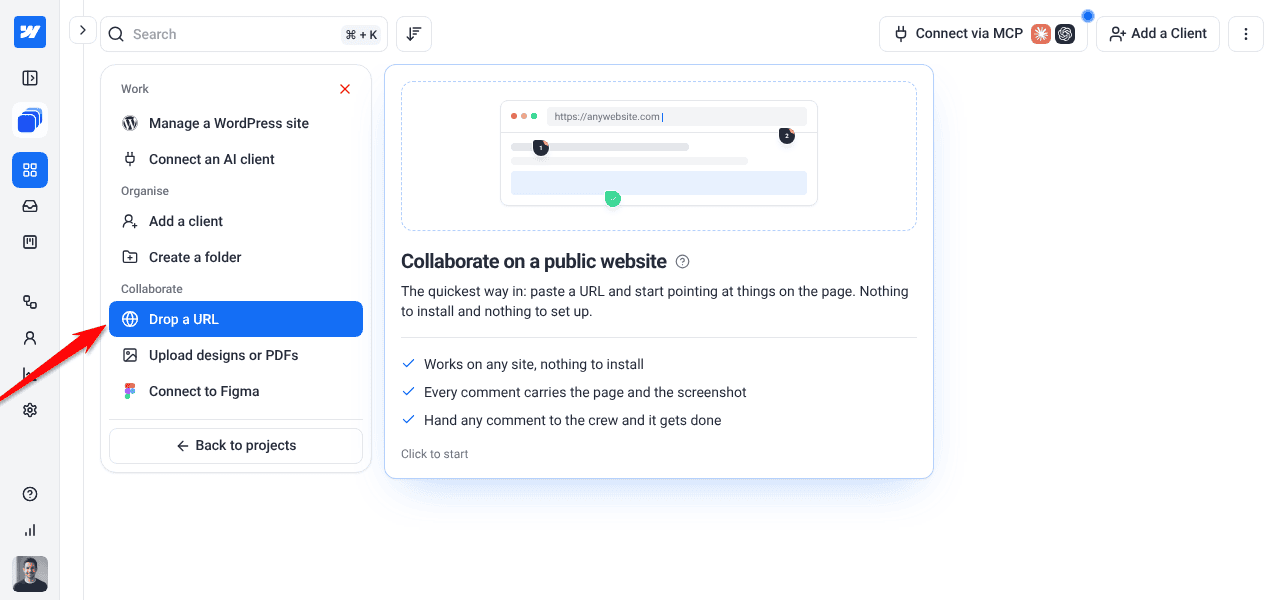
- Atarim asks What do you want to add? Hover an option to see what it is for. Under Work you’ll also find Connect an AI client (connects Claude Code or Codex), and admins see Add a client and Create a folder under Organise.
- For a website, choose Manage a WordPress site (Option 1) or Drop a URL (Option 2). Designs have their own options, Upload designs or PDFs and Connect to Figma.
Option 1: Install the WordPress Plugin — The Full AI Web Agency
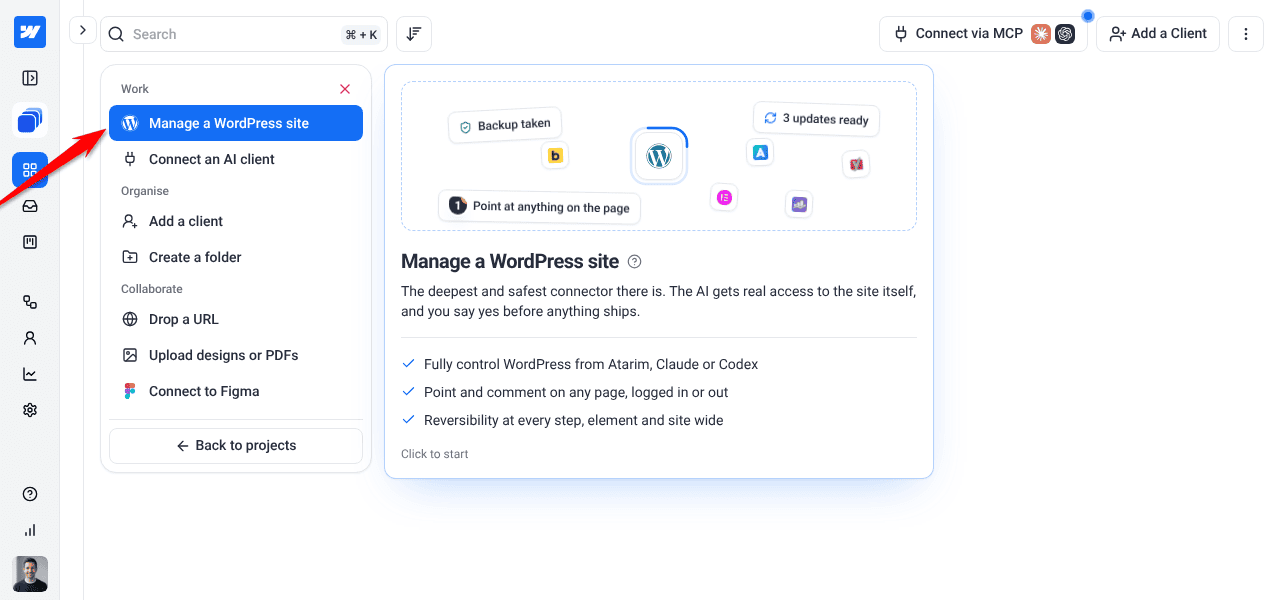
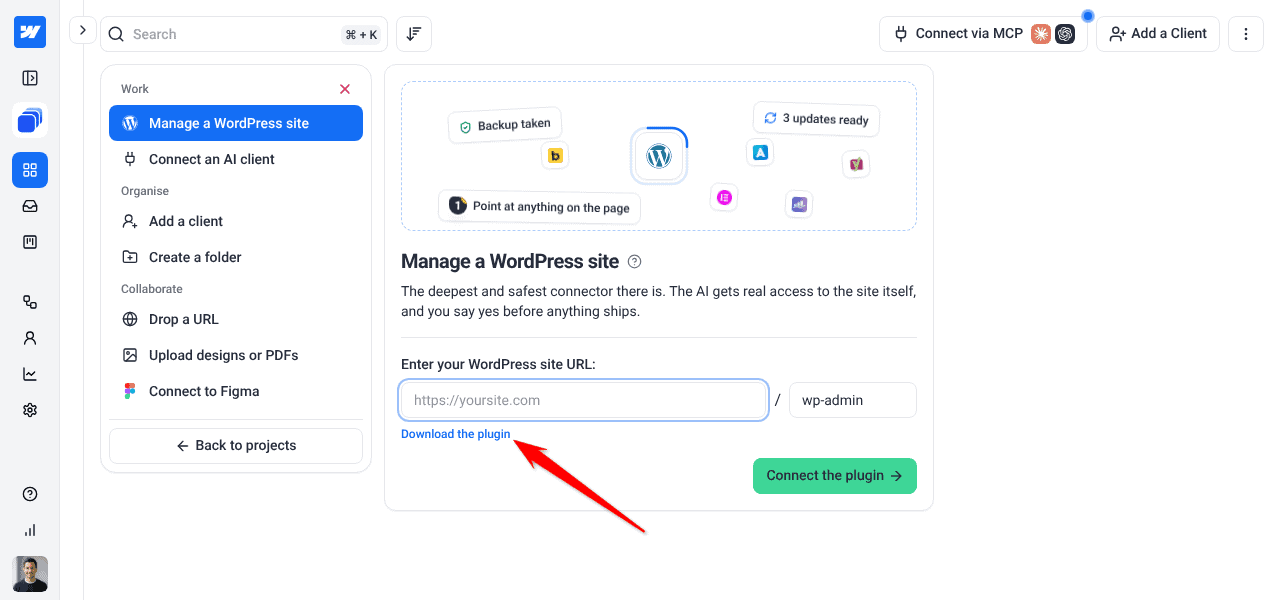
In Add new this is Manage a WordPress site, under Work. It is the only way in that lets the AI work on the site itself.
Instructions:
- In Add new, choose Manage a WordPress site.
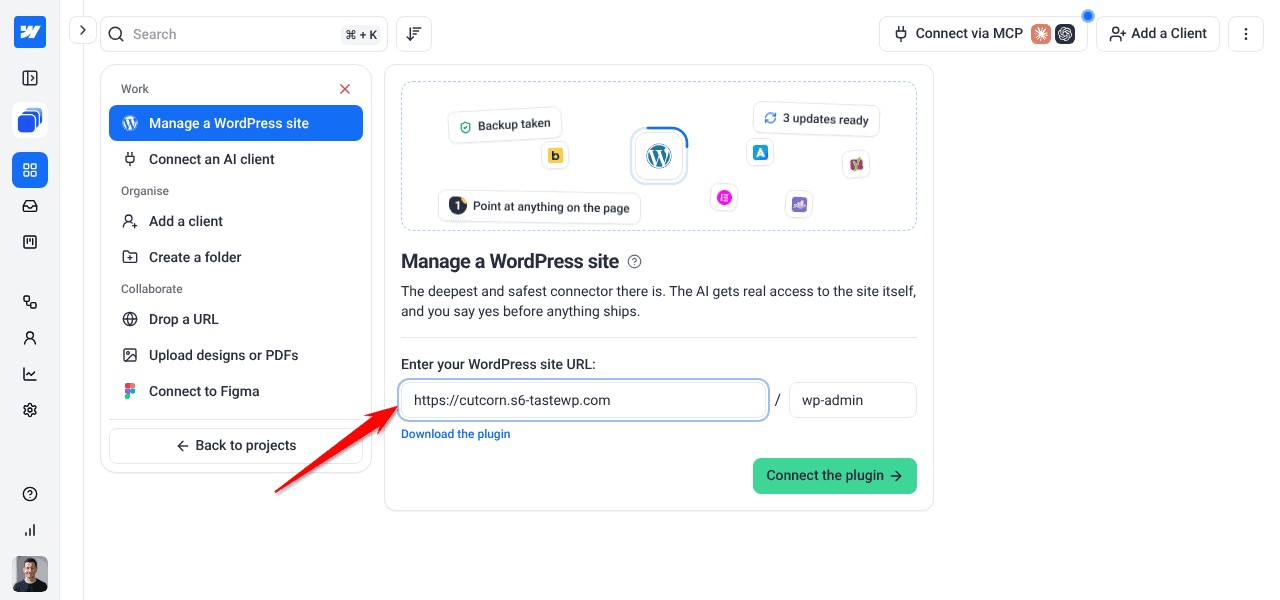
- Enter your WordPress site URL. If your WordPress admin is not at
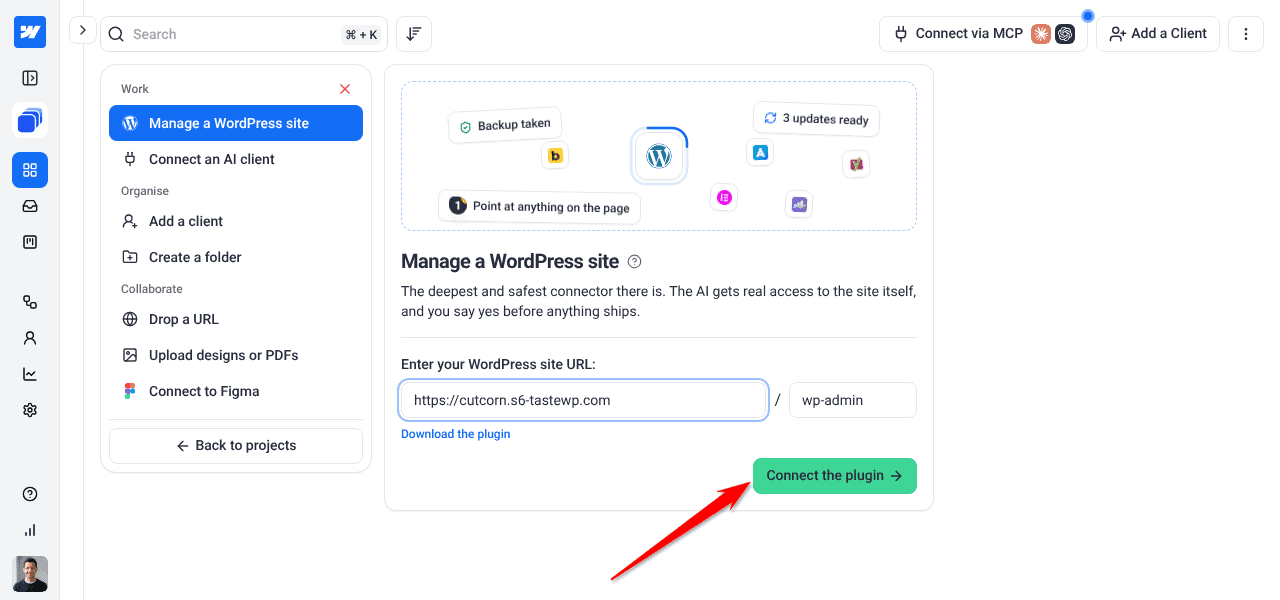
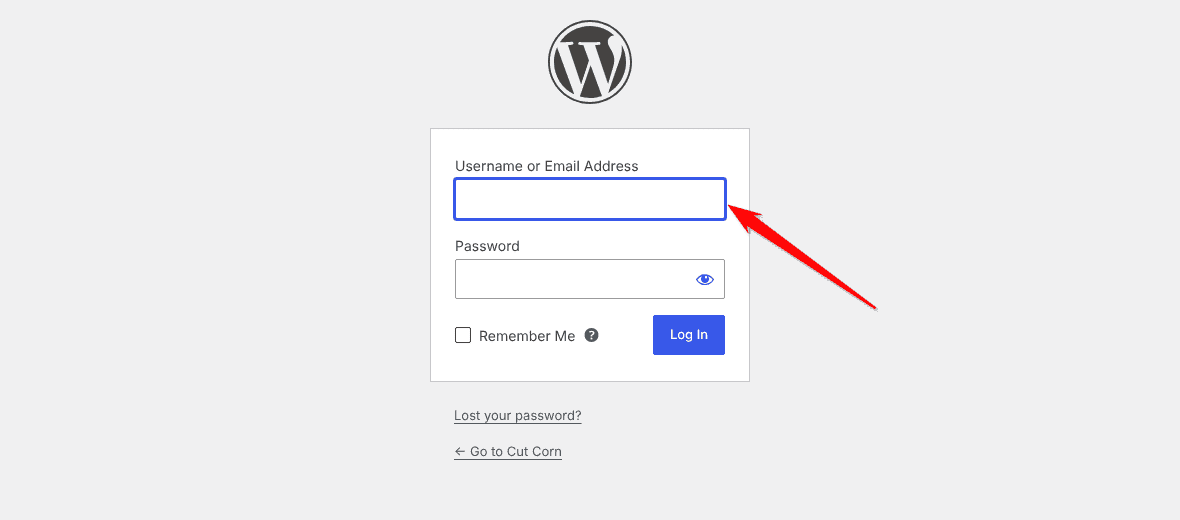
/wp-admin, change the path in the box beside it. - Select Connect the plugin. Your WordPress admin opens in a pop-up window on the Atarim plugin’s page (allow pop-ups if your browser asks, and log in to WordPress if prompted). If the plugin is already installed, it opens the plugin’s settings instead.
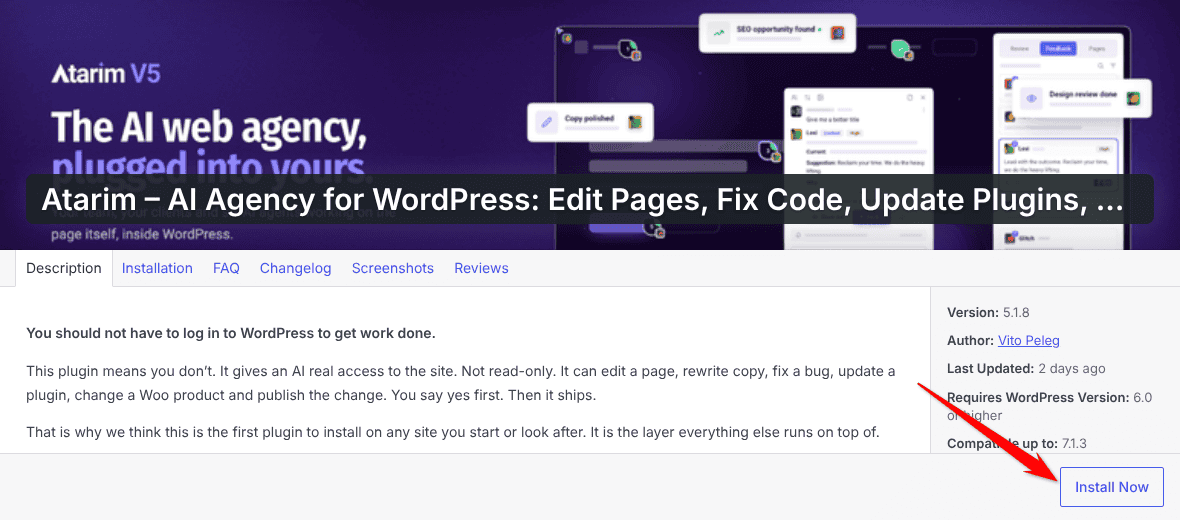
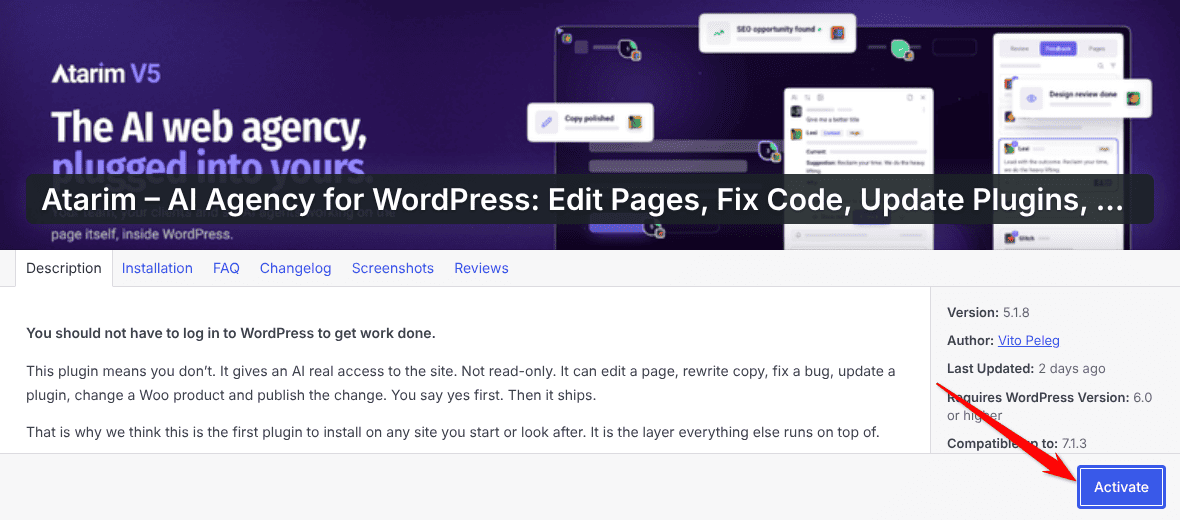
- Click Install Now, then Activate.
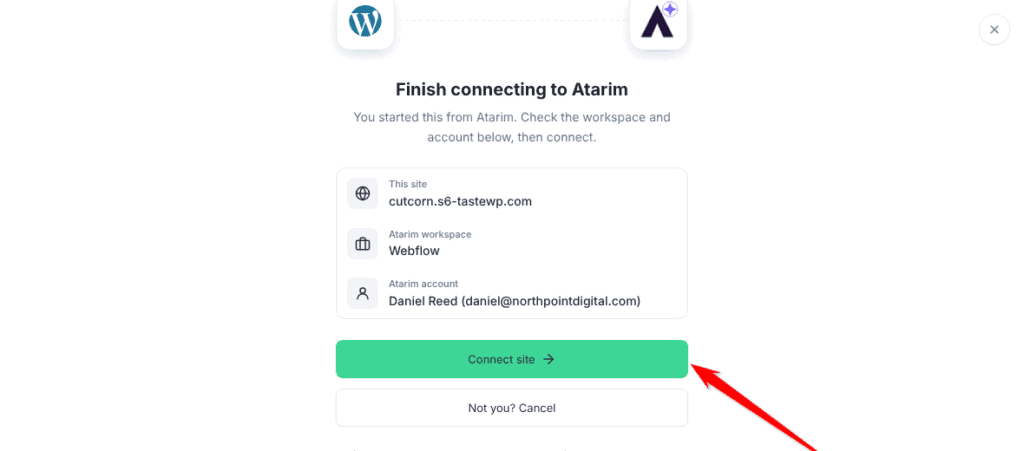
- On Finish connecting to Atarim, check the site, workspace and account, then select Connect site.
- The window closes and Atarim adds the site to your projects.
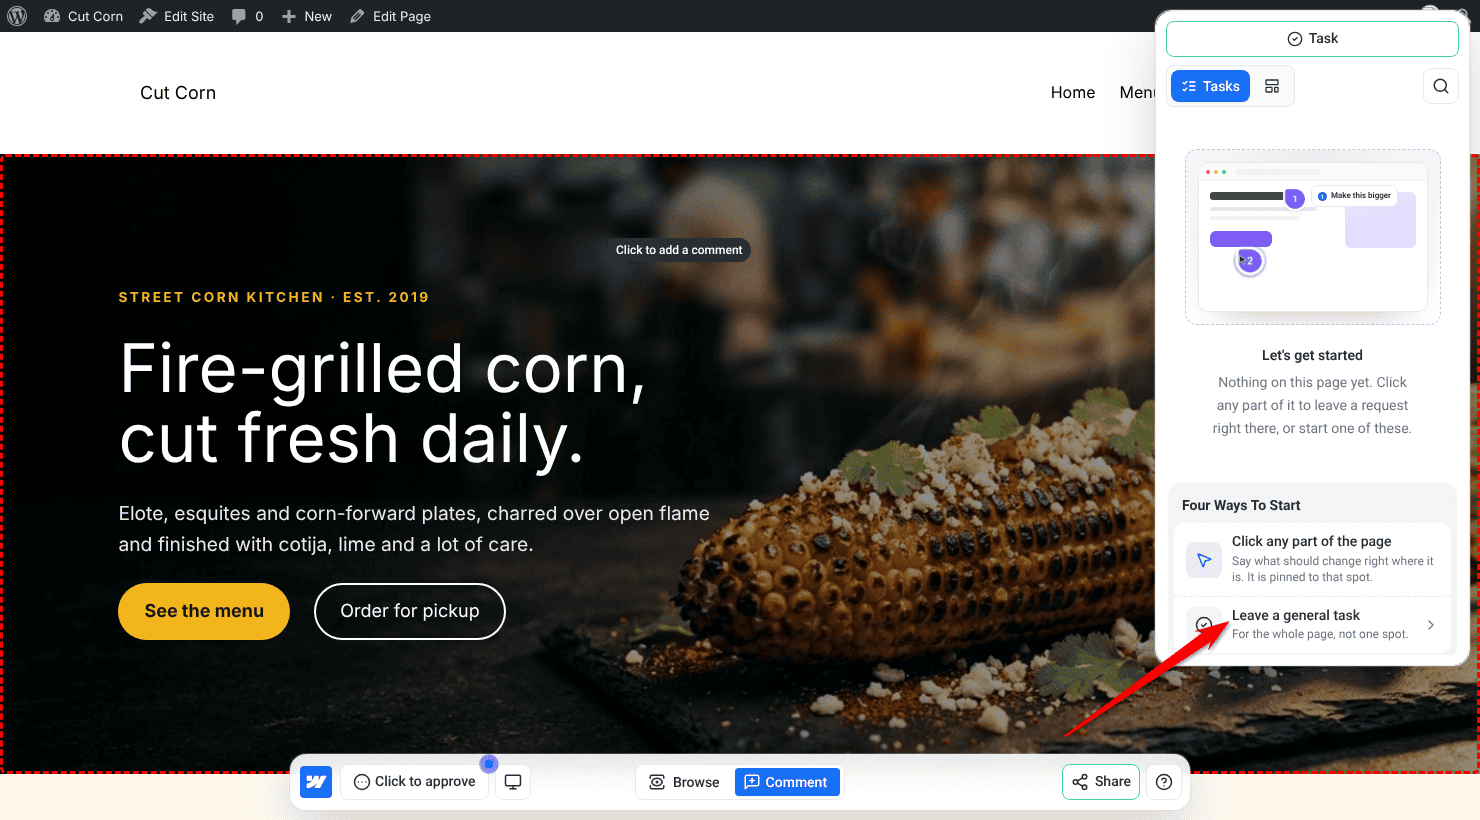
Once connected, this unlocks the full Do It execution layer plus one-click Autologin into any site in your fleet, so team members don’t need to share WordPress credentials. Execution abilities span content, core, metadata, media, navigation, taxonomies, users, settings, and plugin management (install free WordPress.org plugins, activate, update, deactivate, delete), plus block-level and template-level control: block navigation, patterns, templates, theme files, themes, global styles, and Gutenberg blocks.
Install via Plugin Download (Manual Upload)
Install the Atarim plugin by downloading the latest plugin file and manually uploading it to your WordPress site. Learn More About The Plugin Settings.
Instructions:
- In Add new, choose Manage a WordPress site.
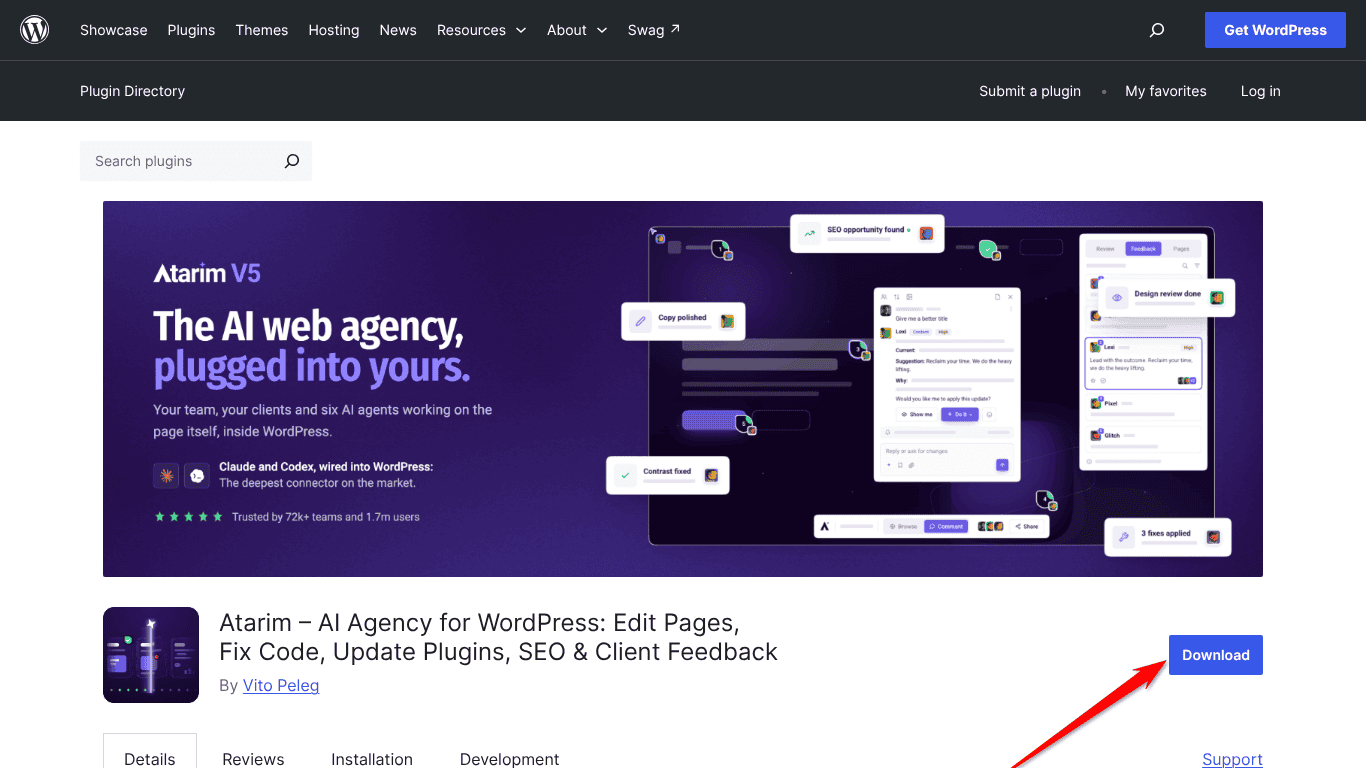
- Select Download the plugin. It opens the plugin’s WordPress.org page, where you can download the latest version.
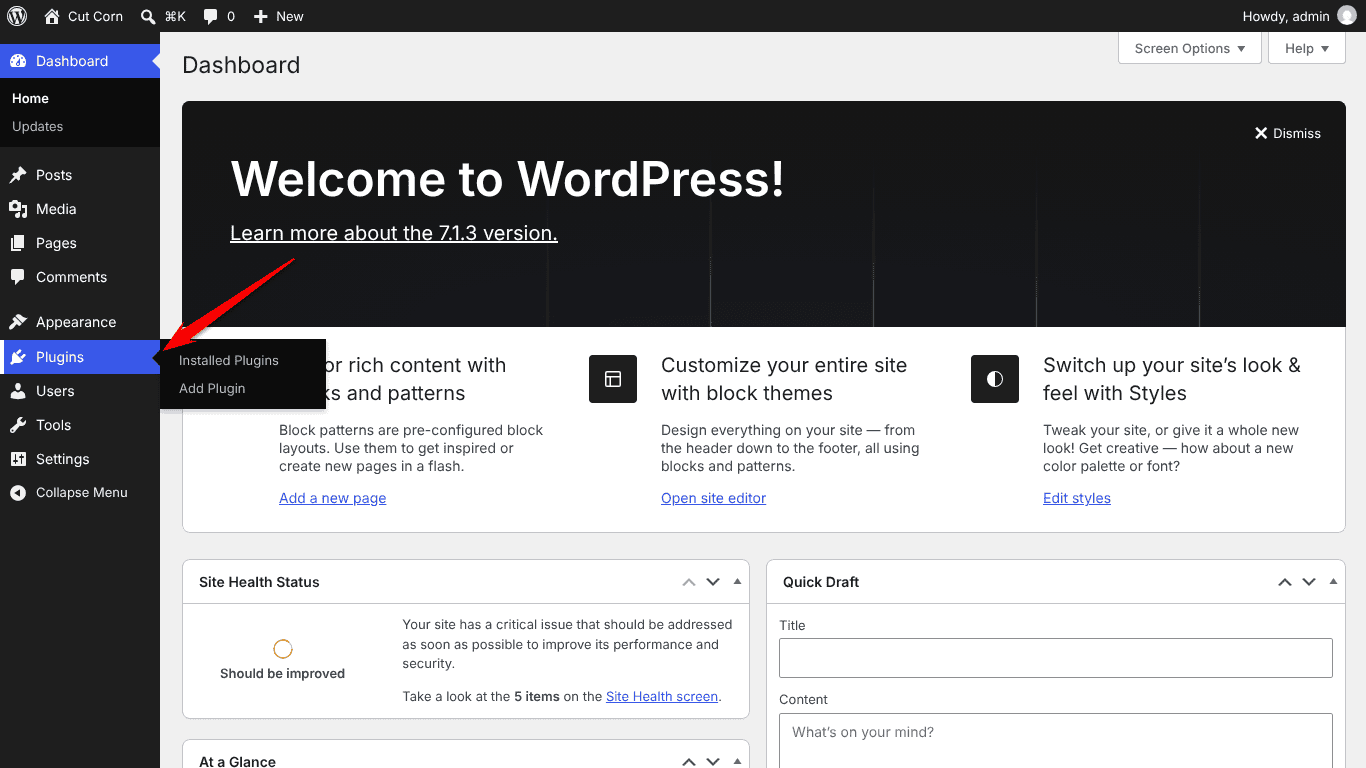
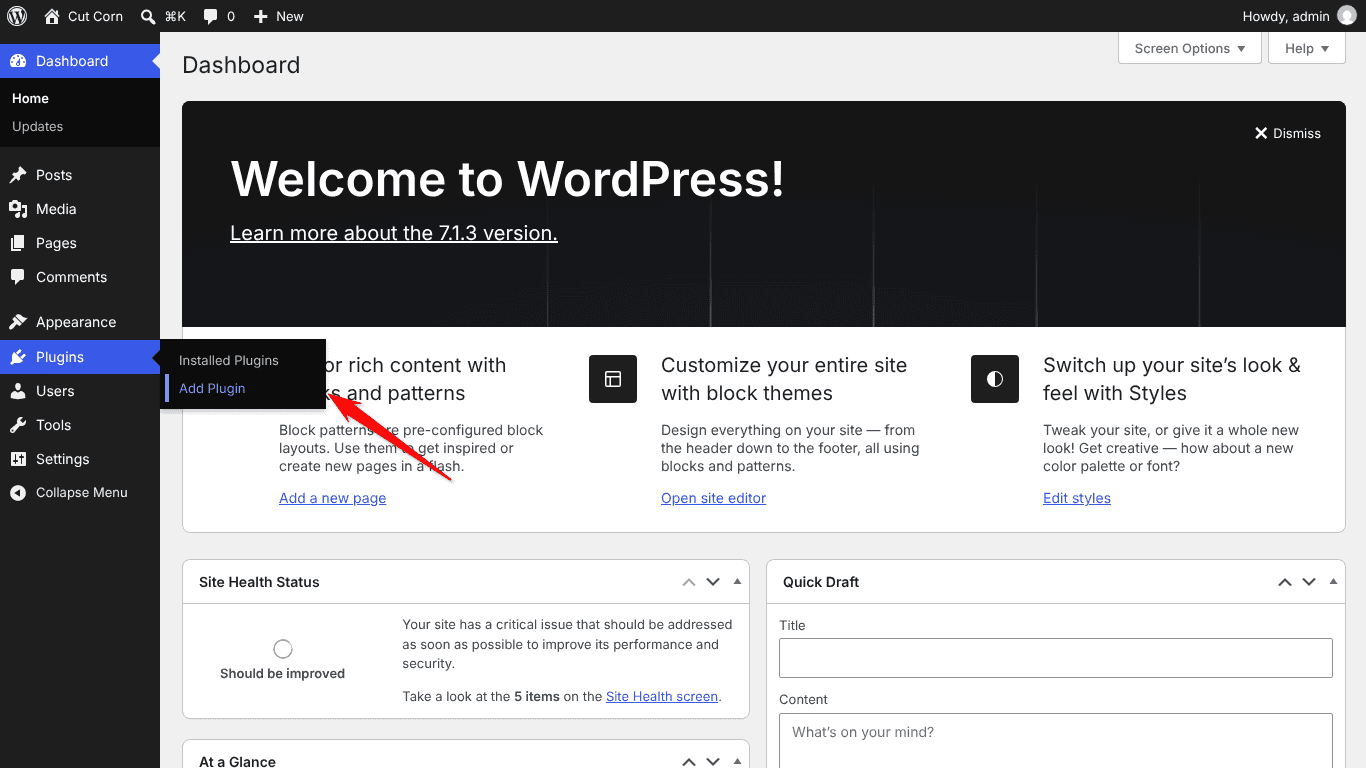
- Log in to your WordPress Dashboard and go to Plugins → Add Plugin.
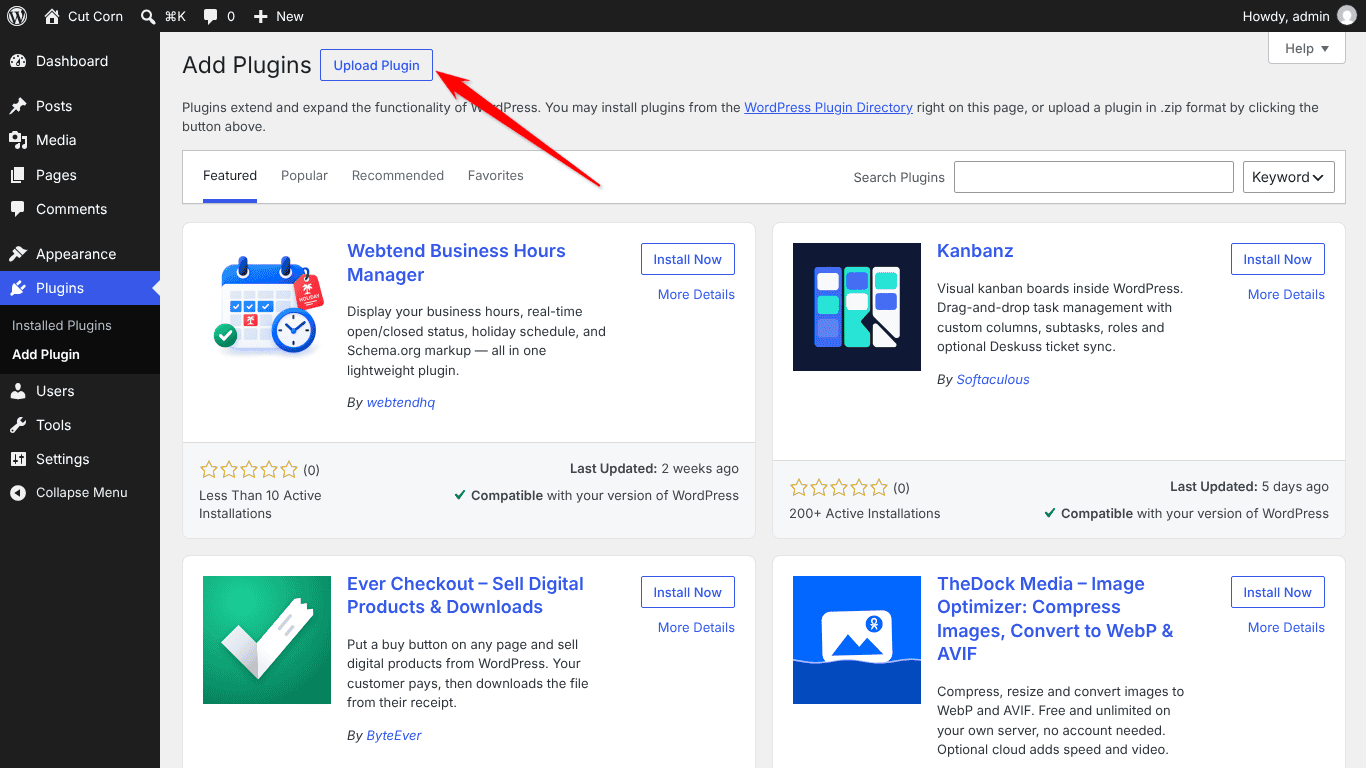
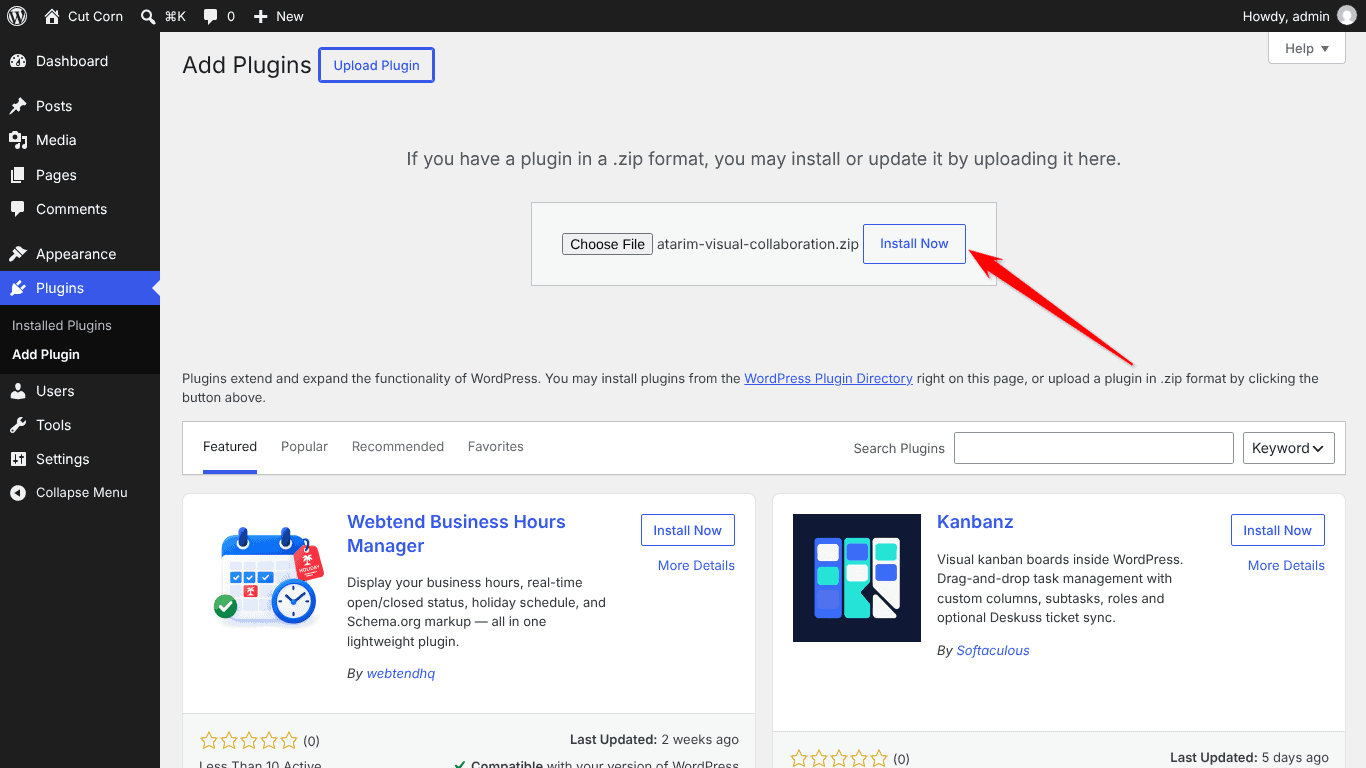
- Click Upload Plugin.
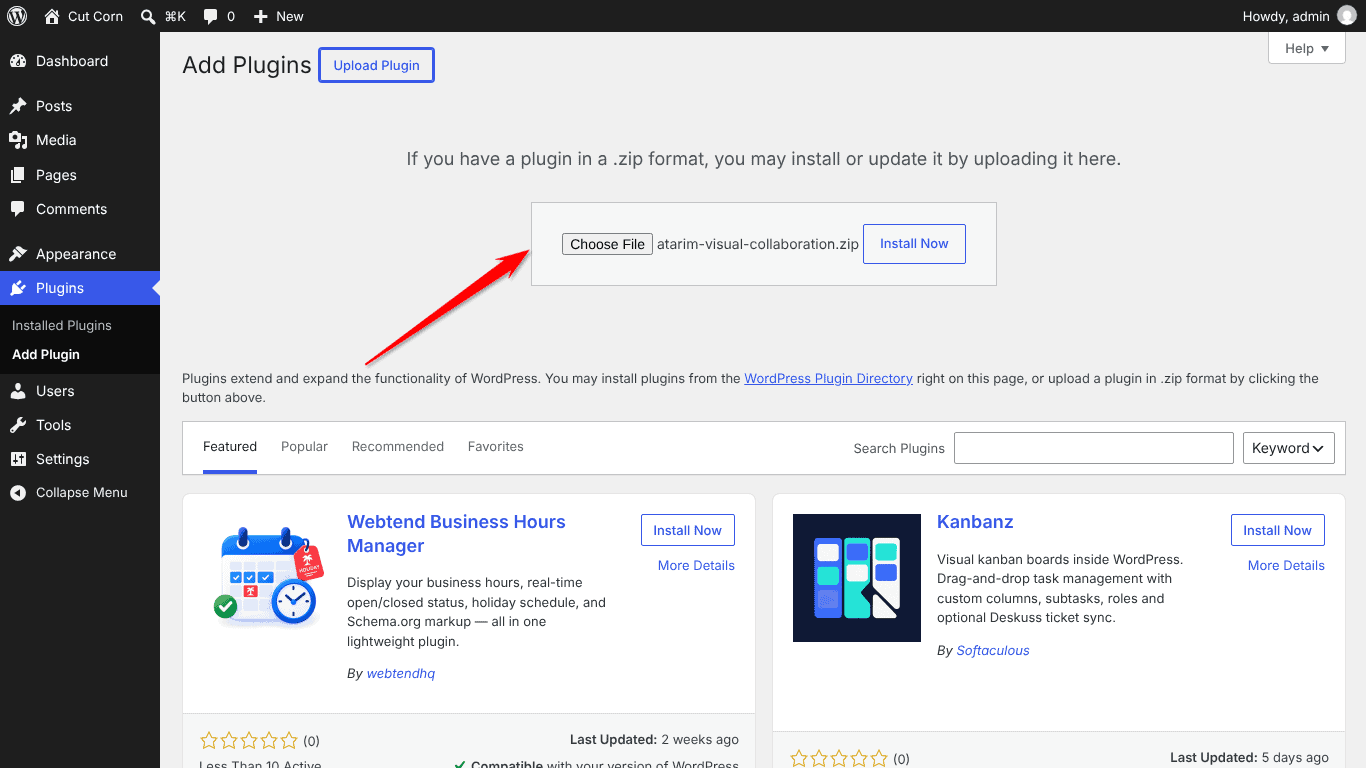
- Click Choose File and select the downloaded Atarim ZIP file.
- Click Install Now.
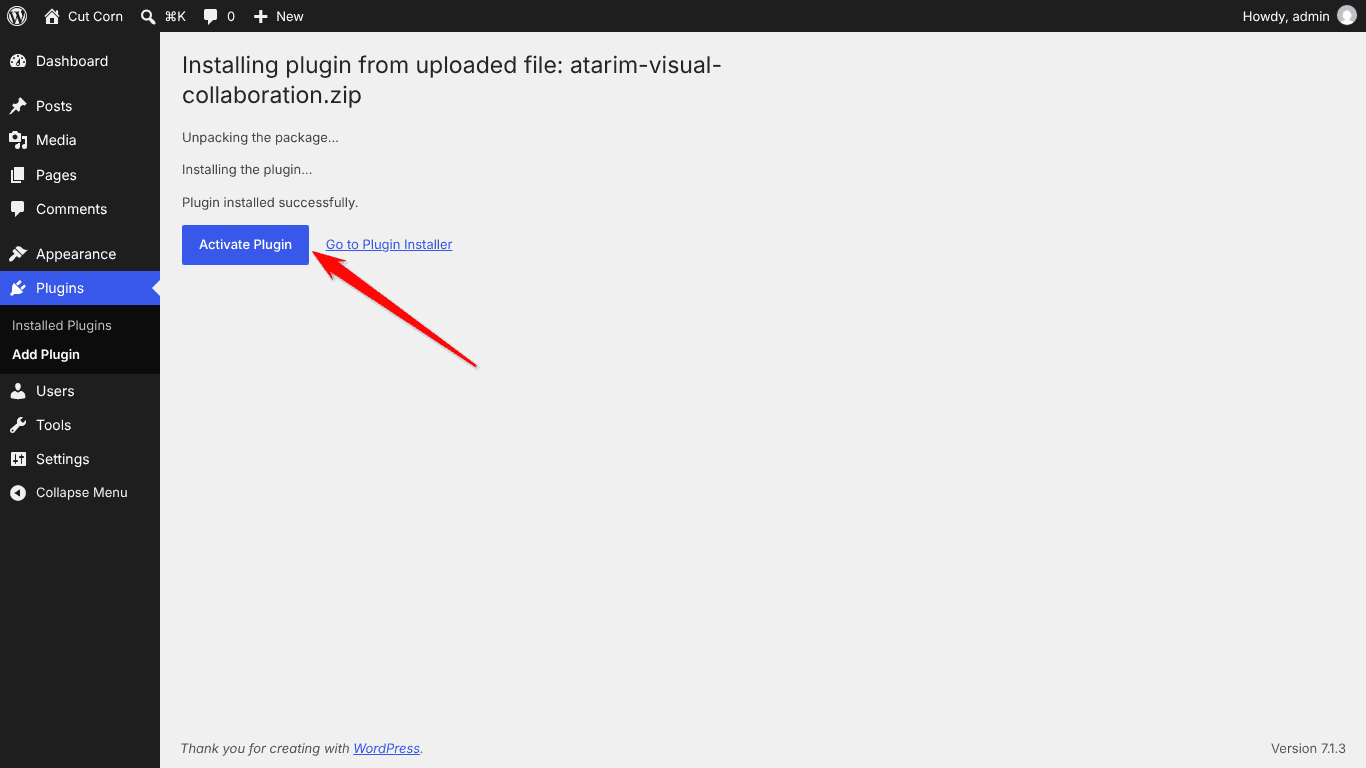
- Once installation is complete, click Activate Plugin.
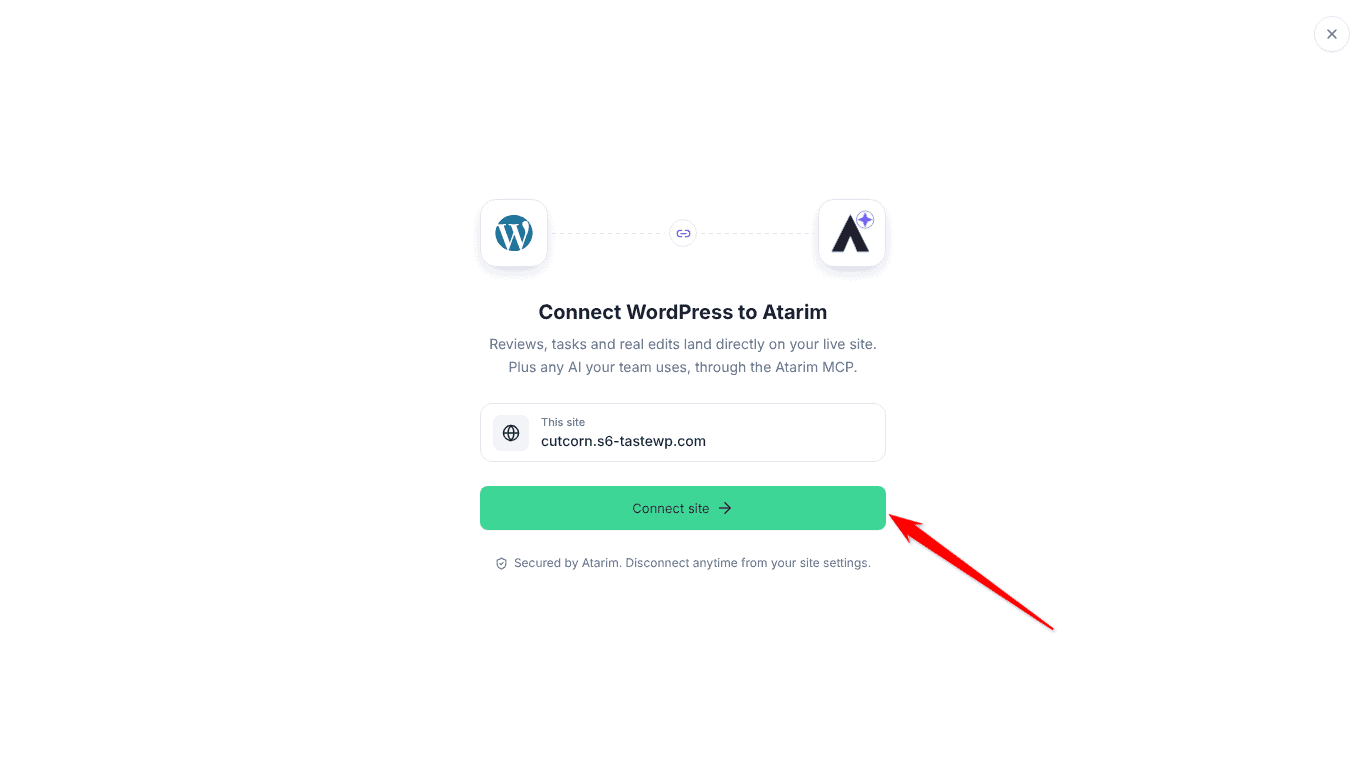
- On Connect WordPress to Atarim, click Connect site. Atarim opens in a new tab.
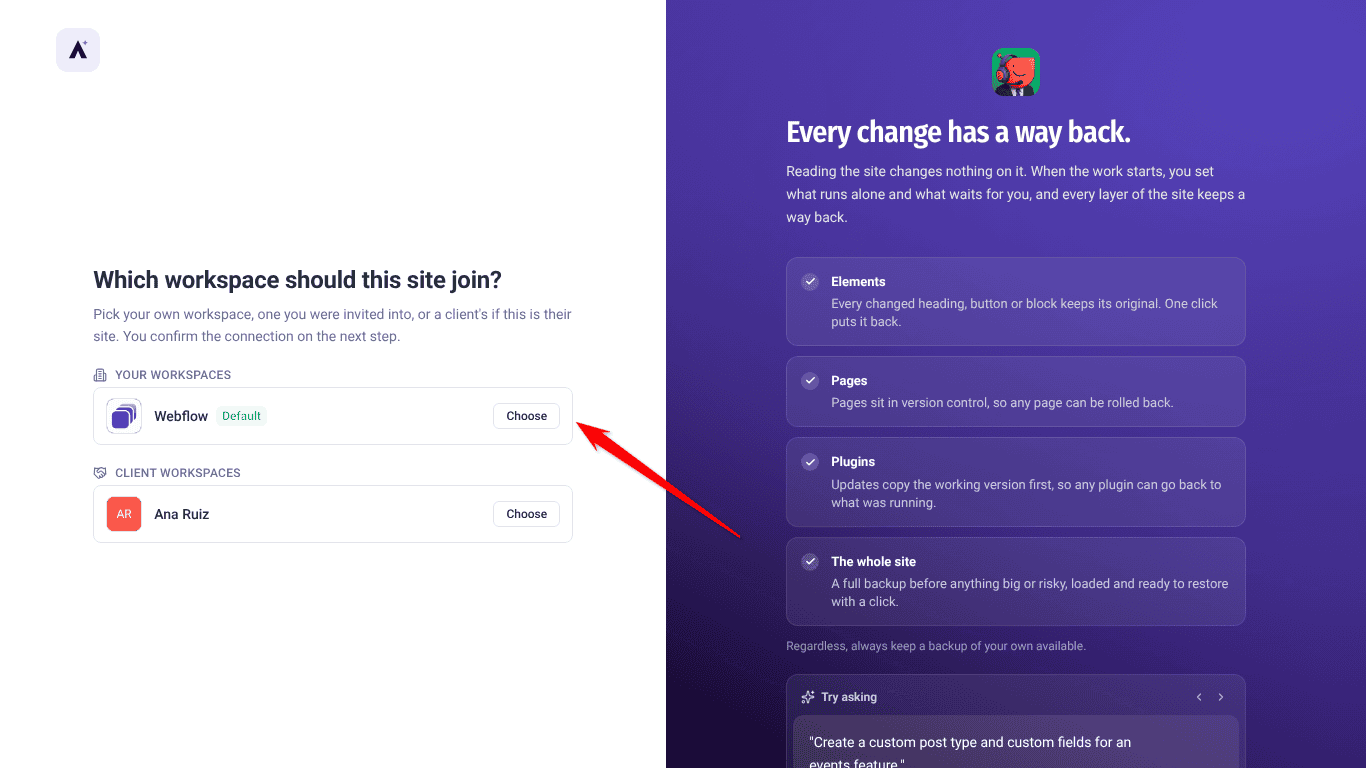
- Under Which workspace should this site join?, select Choose next to the workspace.
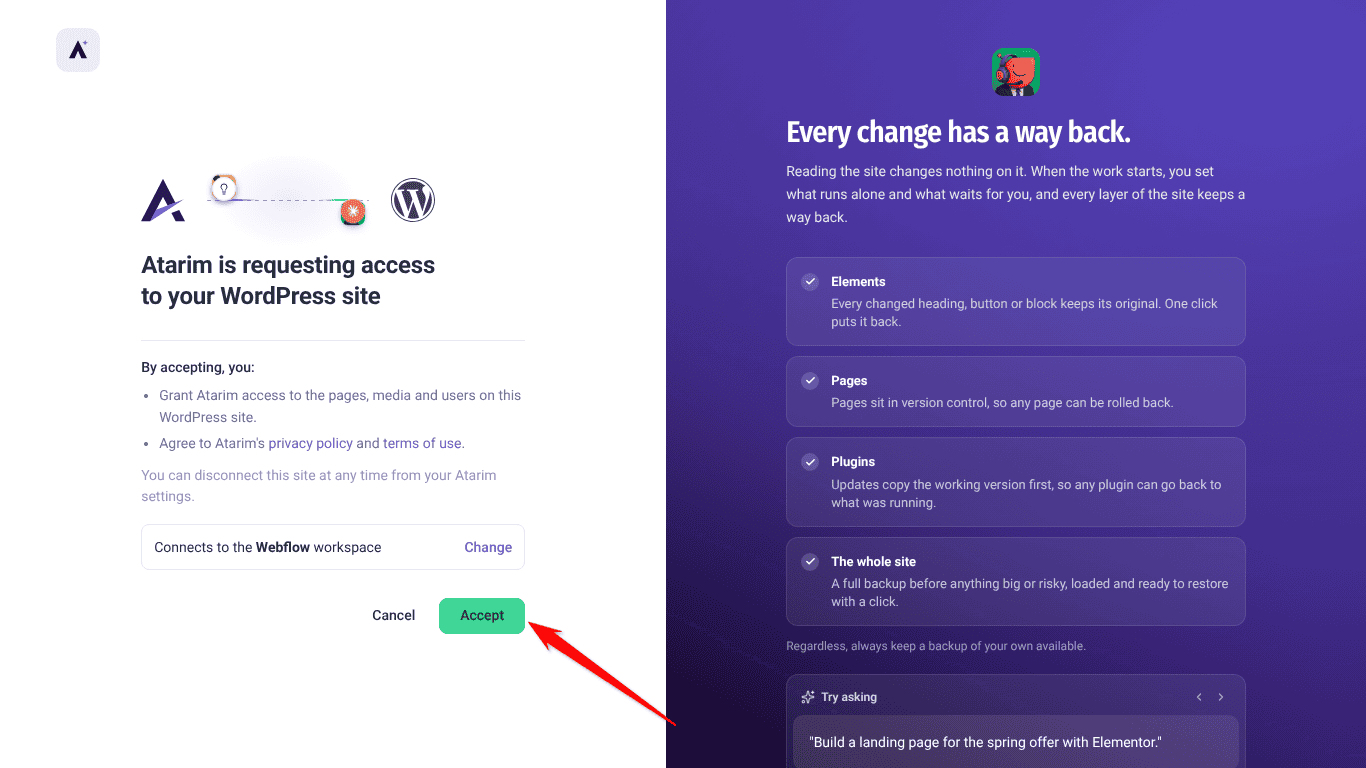
- On Atarim is requesting access to your WordPress site, check Connects to the … workspace (select Change to pick another), then select Accept.
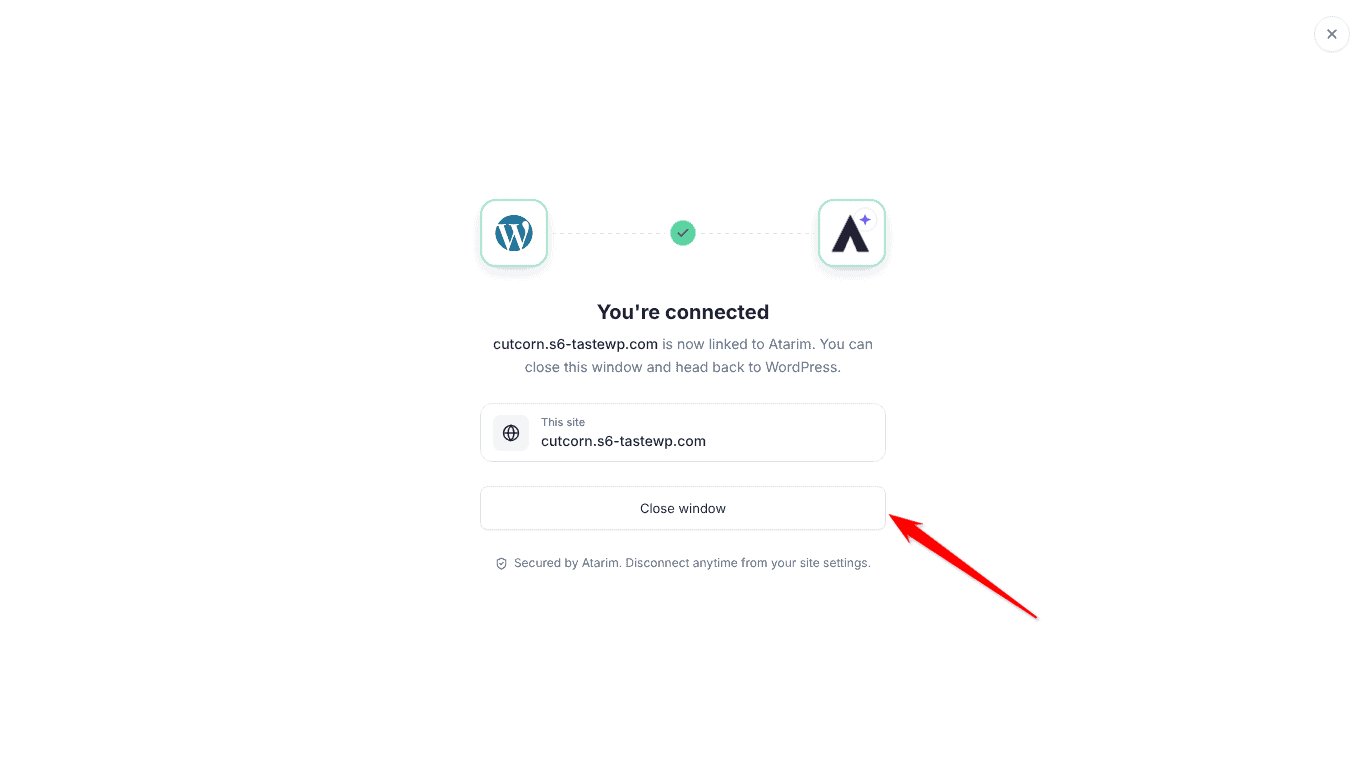
- You’re connected appears in WordPress. Your site then opens with Atarim ready, or select Close window.

What you get with the plugin
- Works on secure and login-protected pages, since it runs inside WordPress rather than fetching the page externally
- Collaboration works in the WordPress admin too, not just the front end
- Auto-login from the Atarim dashboard into wp-admin
- Guest Mode — clients can comment without a WordPress account
Option 2: Drop a URL
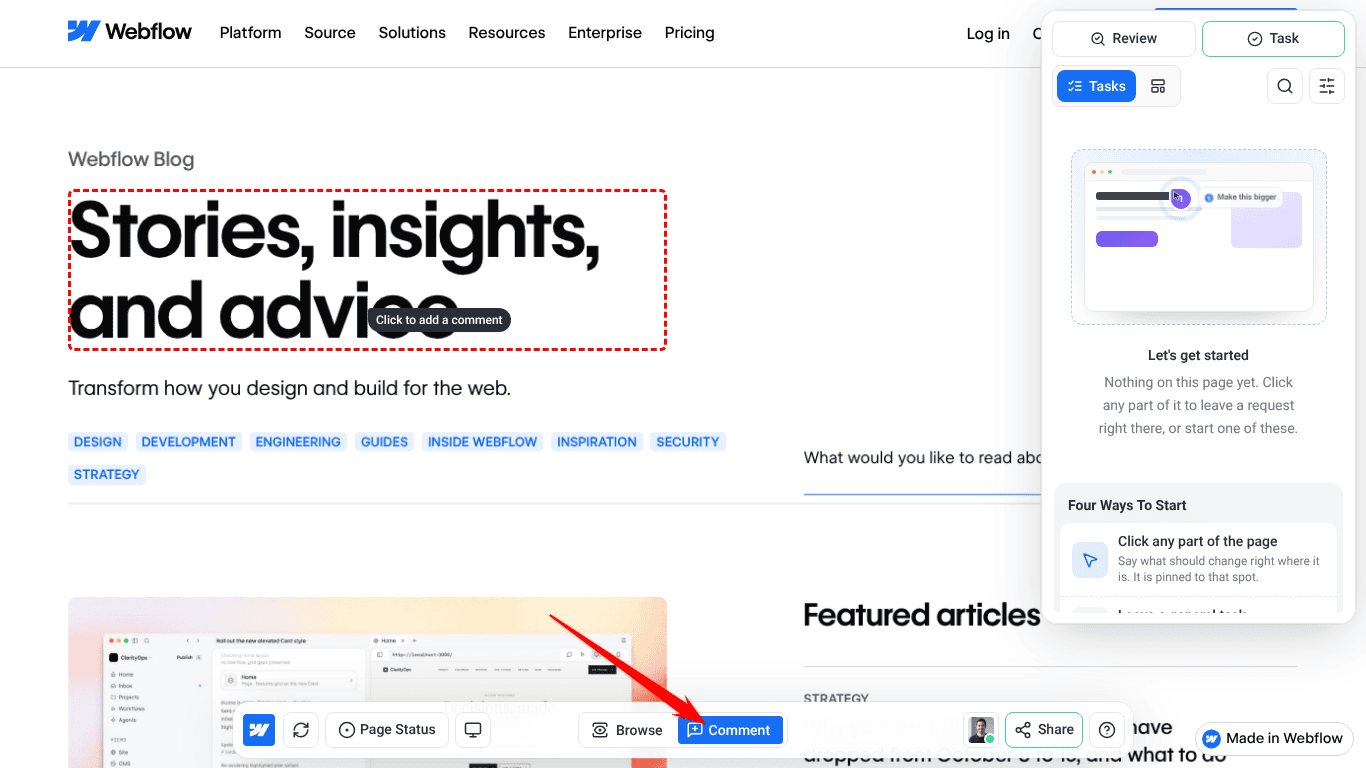
In Add new this is Drop a URL, under Collaborate: paste a URL and start pointing at things on the page, with nothing to install. You can point and comment on the live site, but the AI cannot make changes on it.
Instructions:
- On the Projects screen, select Add new.
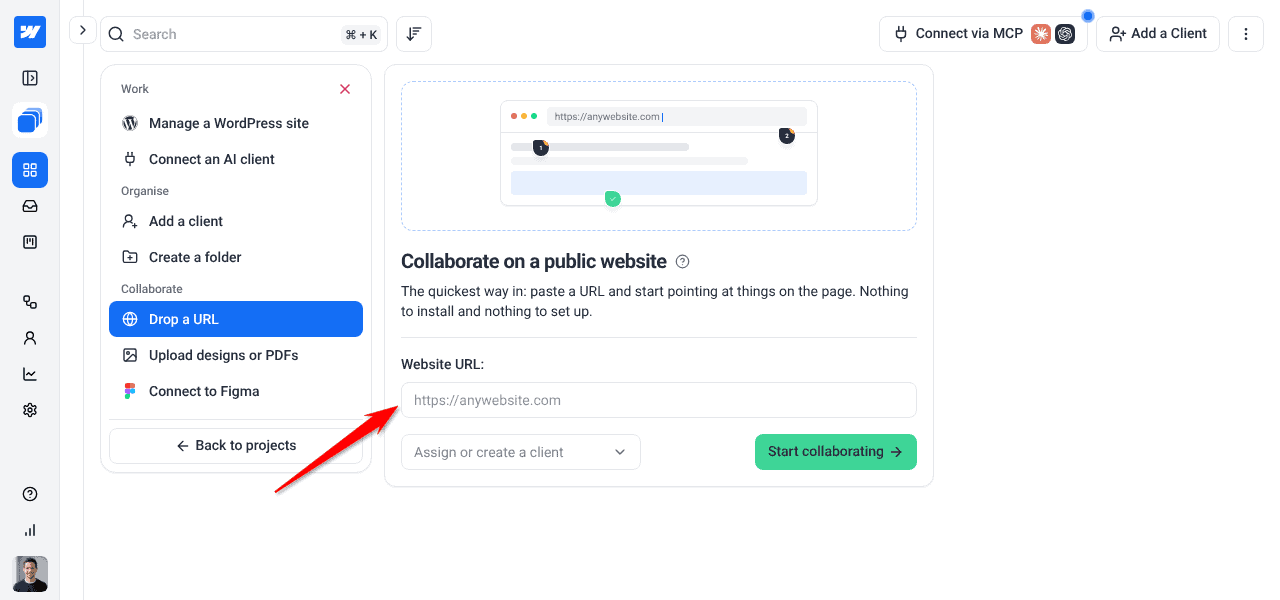
- Choose Drop a URL.
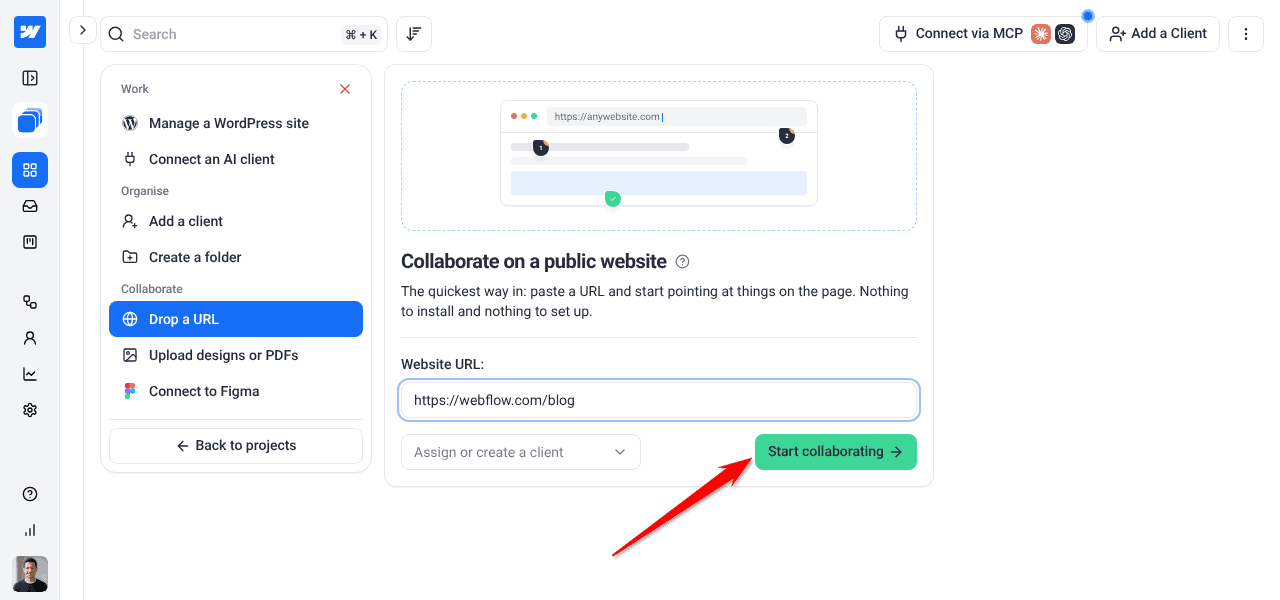
- Enter the address in Website URL. You can also assign the project to a client before you continue.
- Select Start collaborating. The new project opens in the collaborate view.
This is the right starting point for non-WordPress sites, or a WordPress site where installing the plugin isn’t yet possible.
Option 3: Install a Script
For sites behind a login and web apps. Review and comment only. The script is no longer one of the Add new options: add the site with Drop a URL first, then get the script from the project’s menu.
Instructions:
- Add the site with Drop a URL (Option 2), then go back to the Projects screen.
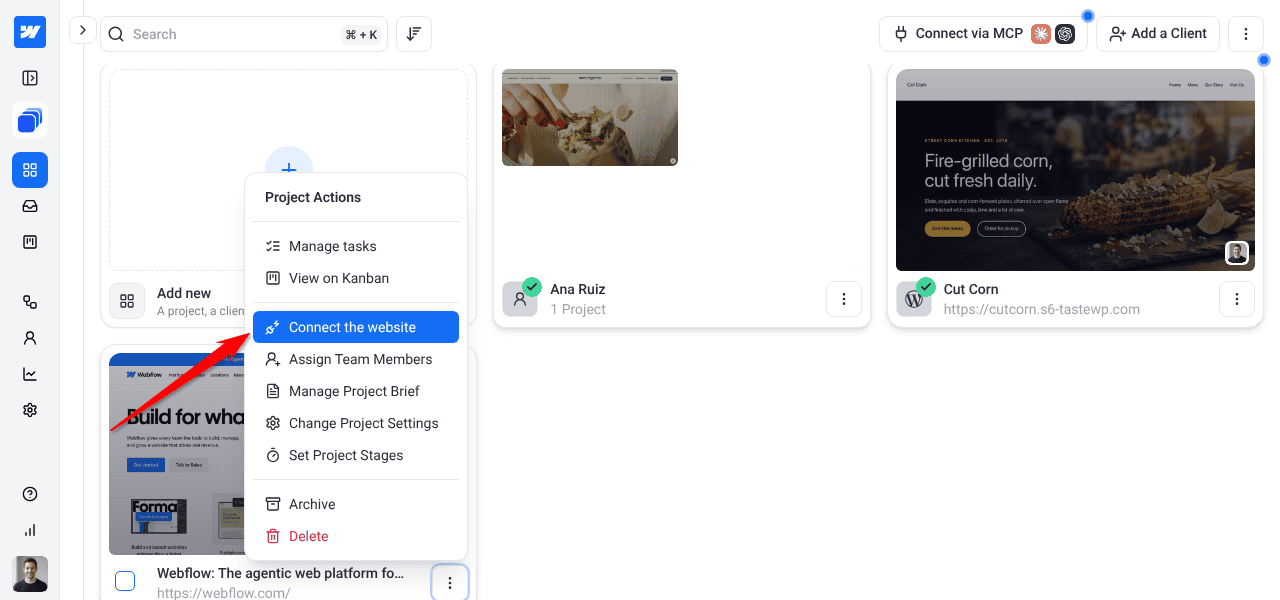
- In grid view, open the project card’s ⋮ menu (or right-click the card) and select Connect the website.
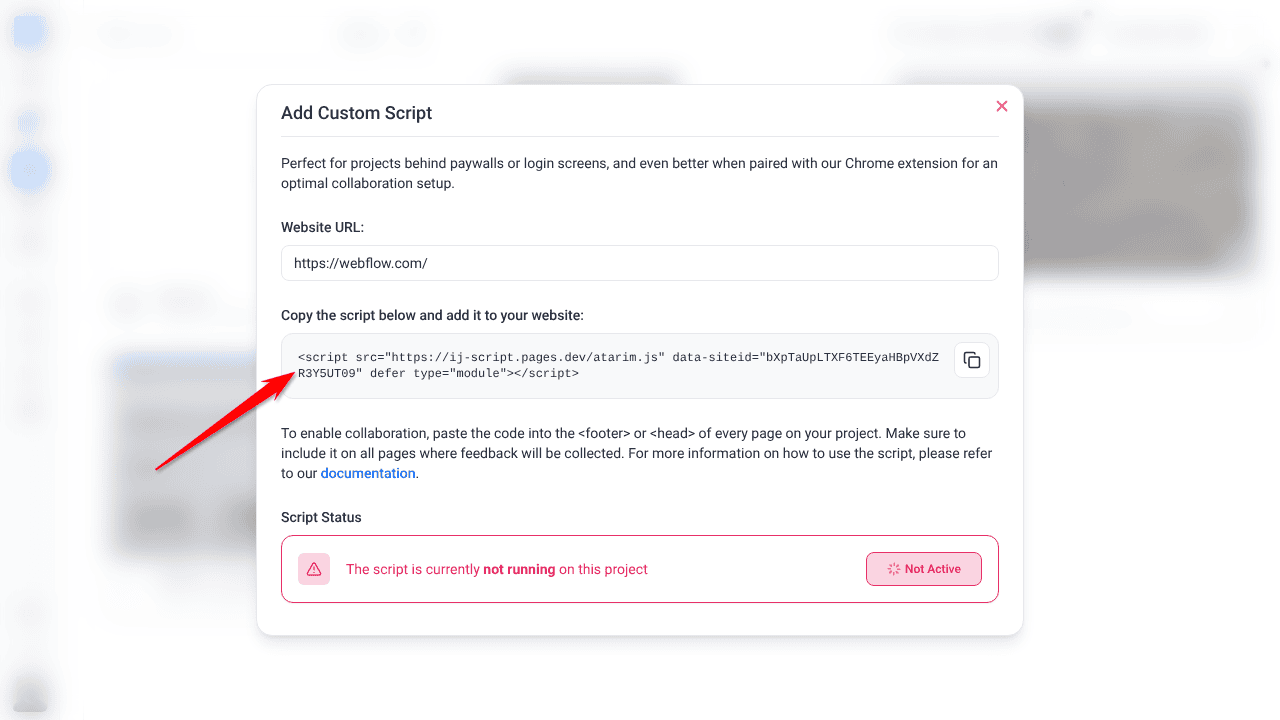
- Add Custom Script opens with the site’s address filled in, and the script is generated for you.
- If no script appears, check the Website URL and select Generate Script.
- Copy the generated script tag.
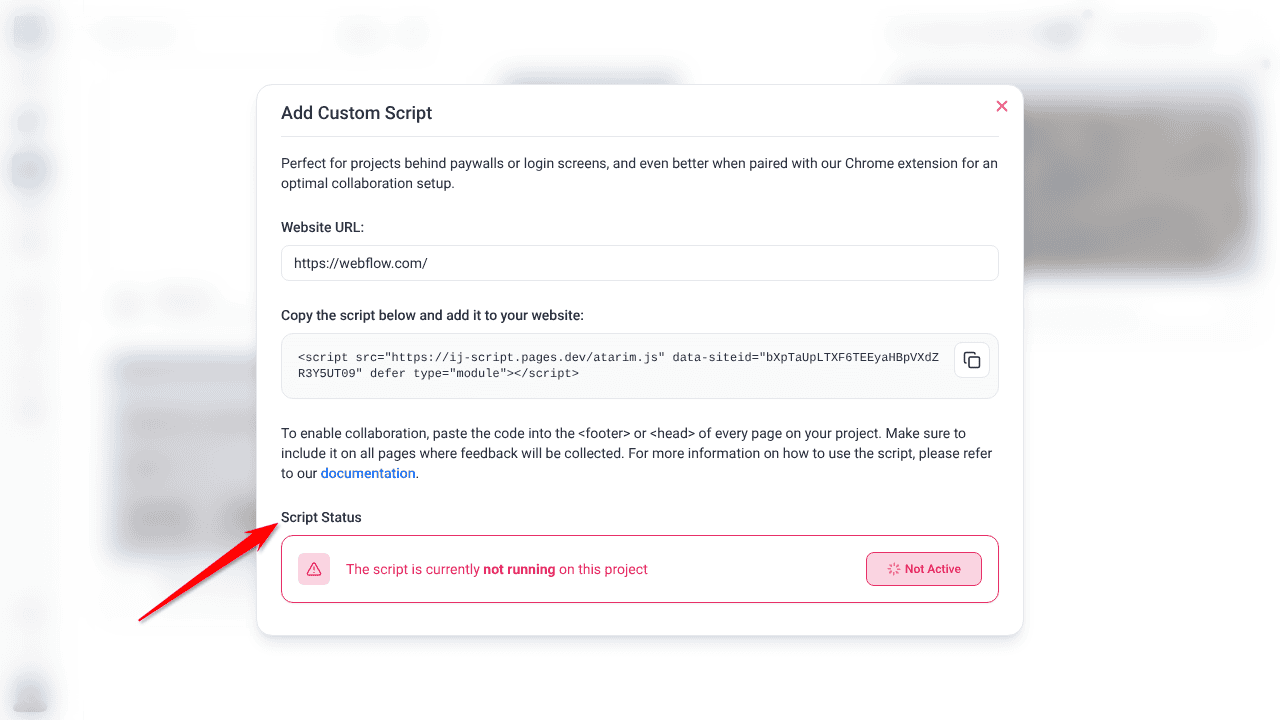
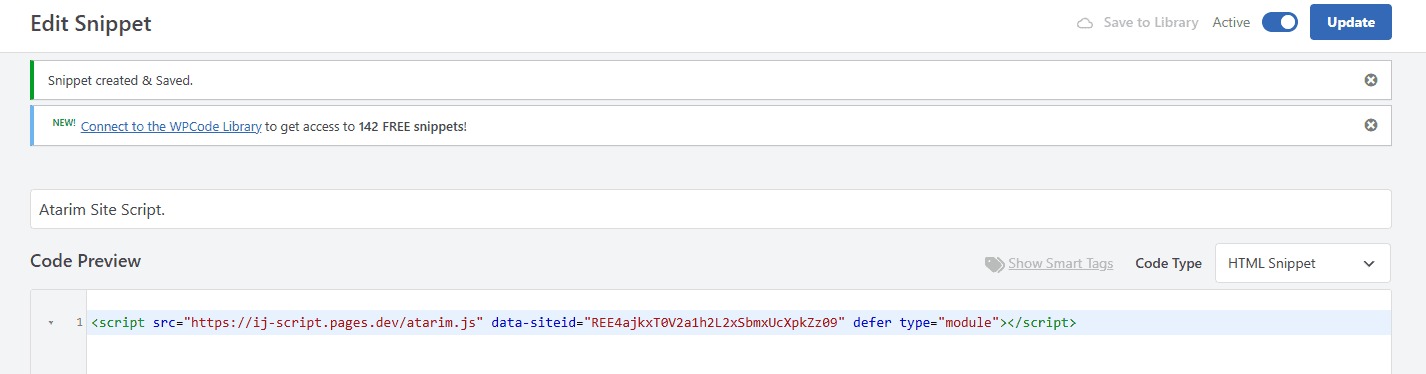
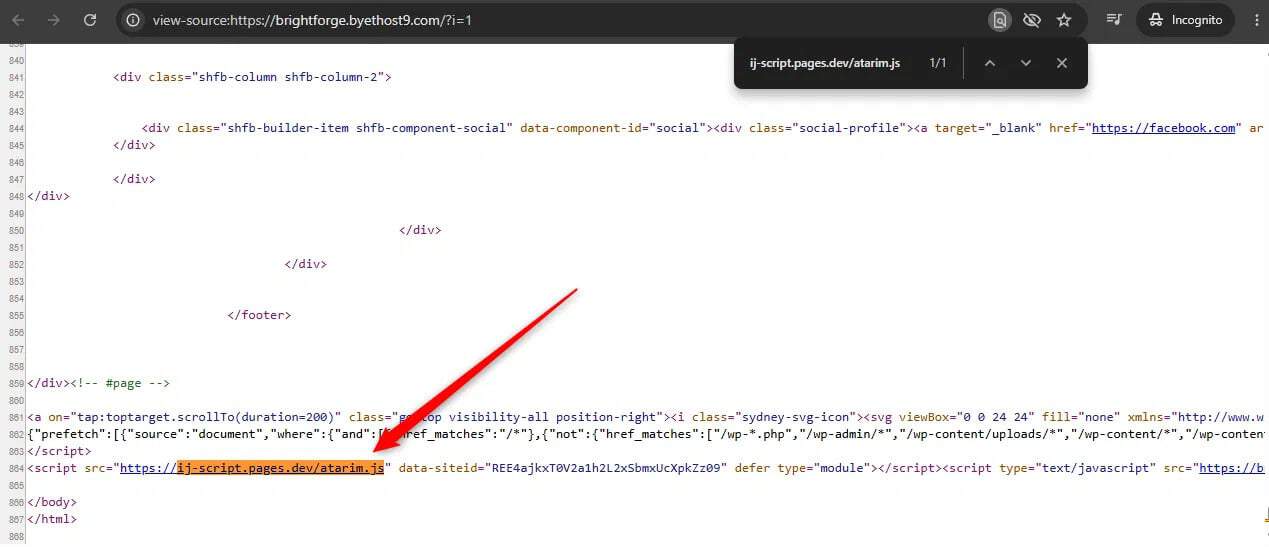
- Paste the script into the <head> or footer of every page where you want to collect feedback. Add it to each relevant page, not only the homepage. Script Status in the same window shows whether the script is running on the project: Script Active once Atarim sees it on the page, Not Active until then.
Best suited for internal tools, staging environments behind auth, or single-page apps a plain URL can’t reach. Like Drop a URL, this is review-and-comment only.
What you get with the script
- Works on any platform where you can add a script to the page — not just WordPress
- Loads Atarim on the actual live page, not inside a proxy or iframe
- Works on login-protected pages, using the viewer’s own session — so they’ll need to be logged in to collaborate there
Option 4: Chrome Extension — For a Quick, No-Install Review
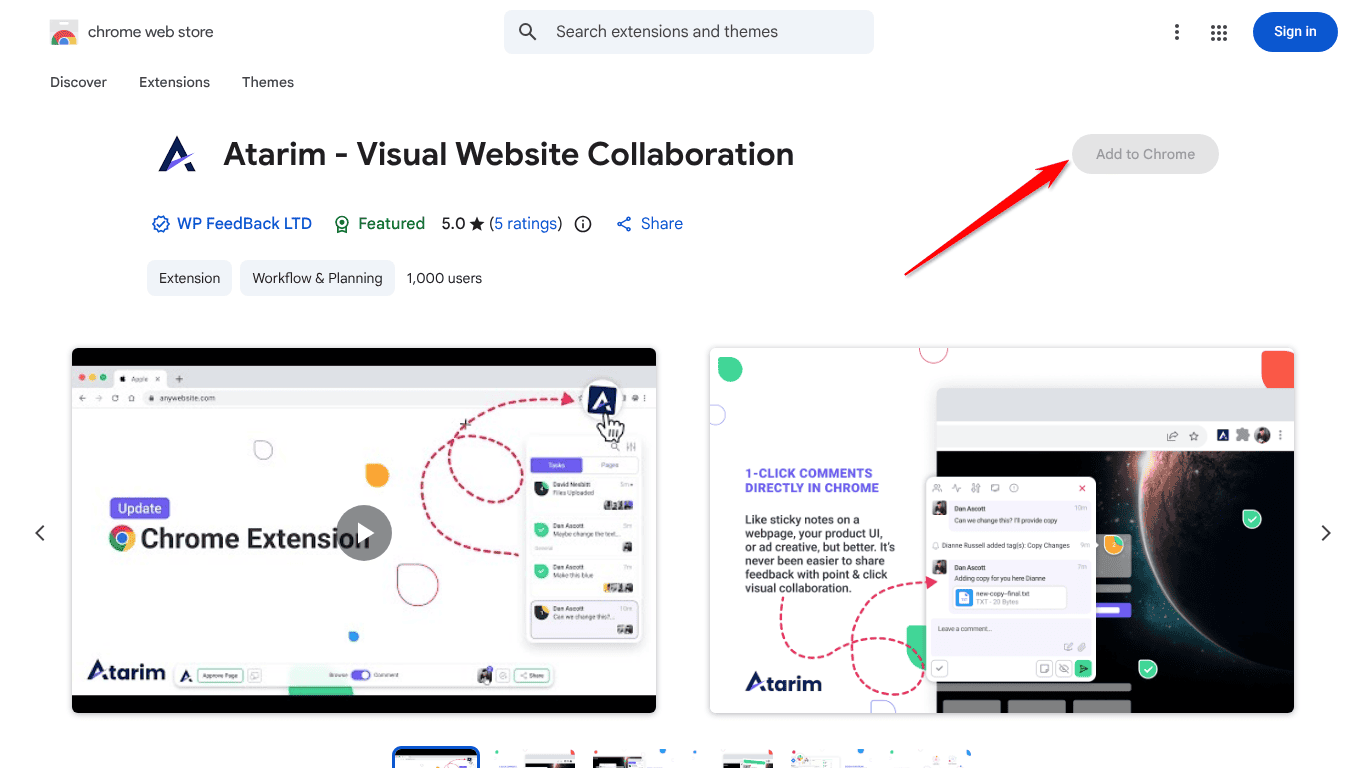
The Chrome extension is no longer one of the Add new options, but it still lets you review and comment on any site straight from your browser, with no plugin or script needed.
Instructions:
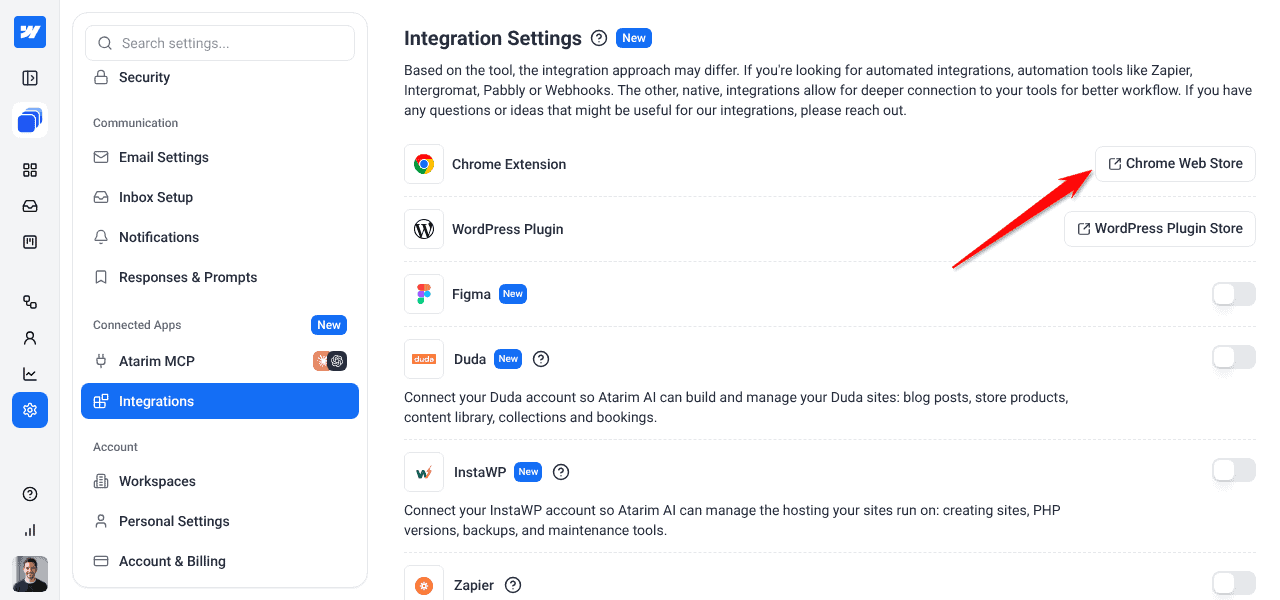
- Install the extension from the Chrome Web Store. There is also a link to it under Settings › Integrations.
- Browse to the live site you want to review — no installation needed on the site owner’s side.
- Use it for ad hoc reviews of sites you don’t manage directly, or a fast first look before a formal project exists.
FAQs
Can I create multiple projects at once?
Yes — you can add as many projects as your plan allows, each as its own URL or design upload. They’re added one at a time rather than in bulk.
What if my client has never used Atarim?
You can share a link that lets clients view and comment on the project without needing an account or anything installed on their side.
Which method should I use for a new client site?
For WordPress sites, install the plugin as soon as possible for full “Do It” capability. For anything else, URL is the right starting point. The Chrome Extension is best reserved for one-off reviews of sites you don’t manage directly.
Does using the Chrome Extension require the client to install anything?
No — the extension is installed on your side only, which is exactly why it’s useful for a quick, no-install look — but it doesn’t unlock direct AI execution.
What happens if I don’t assign a project to a client?
It stays in your own workspace as one of your projects. You can still move it into a client’s folder later.
Can a Website Owner add their own projects?
Not in a client workspace. Your agency adds projects there, either when it creates the client or later from Client Settings.
Where do I approve workflows and set a budget for a new client project?
Open the project’s dashboard. In Scheduled Work, select “Build the proactive plan” if there’s no plan yet, then “Review the plan” to approve workflows, and “Set monthly budget” if prompted. The top-bar “+ Get More Done” button is for credit allocation, not workflow review.
Conclusion
Creating a project is instant regardless of method, but the connection method you choose determines how much the AI can do directly — the WordPress plugin unlocks the most, URL collaboration is the flexible default for everything else, and the Chrome Extension is a fast, no-install option best reserved for one-off reviews. Whether it lives inside a Client folder or not determines whether the full client experience is active on it from day one.
Tips & best practices
- Install the WordPress plugin whenever the site supports it — it's the difference between feedback and direct execution.
- Always attach new client work to a Client folder rather than leaving it unassigned, so the Client Dashboard and related features activate correctly.
- Review the AI's discovery findings before saving the Project Brief — they're editable, not final.