Canned Responses
Write it once, reuse it forever — saved replies for your clients, and saved instructions for your AI experts, in the same place.
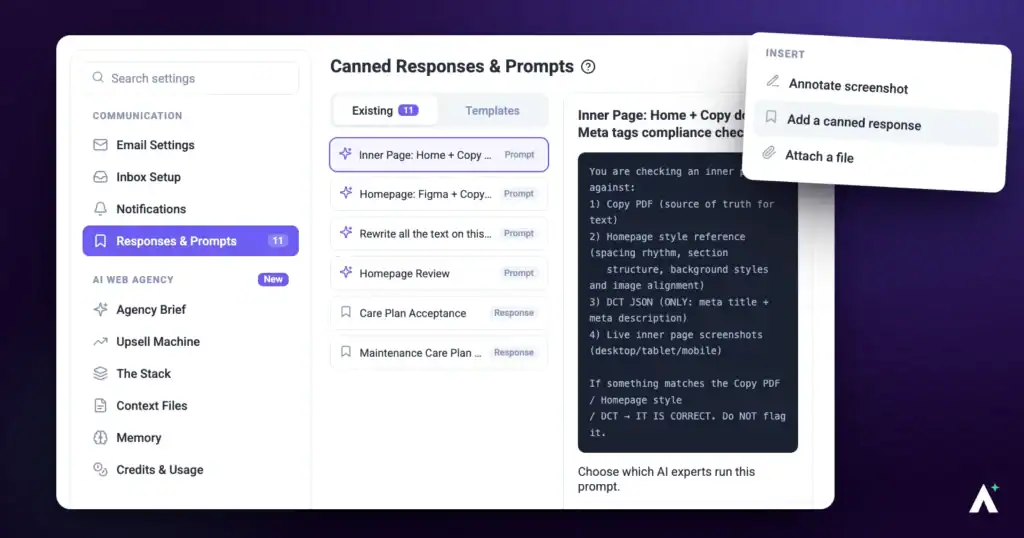
Canned responses are saved blocks of text you can drop into any reply instead of retyping them. The same screen also holds canned prompts — saved instructions your AI experts can run on demand. They look almost identical when you create them, and one switch decides which you're making. This article covers writing both, the variables that fill themselves in, and where each one shows up once saved.
Step-by-Step Guide
Responses and Prompts Are the Same Feature
Both live under Responses & Prompts, both are created the same way, and one switch separates them:
- A canned response is text your team sends to clients. You insert it into a reply, edit if needed, and send.
- A canned prompt is an instruction your AI experts run. It doesn’t go to a client — it tells an AI expert what to do.
The page describes it plainly: write it once, reuse it forever. Responses go to your clients and team, prompts go to your AI experts.
Every item in the list carries a badge showing which it is — Response or Prompt — so you can tell them apart at a glance.
Where to Find Them
Responses and prompts share one screen and one creation flow, separated only by a switch.
Instructions:
- From the main dashboard, select Settings.
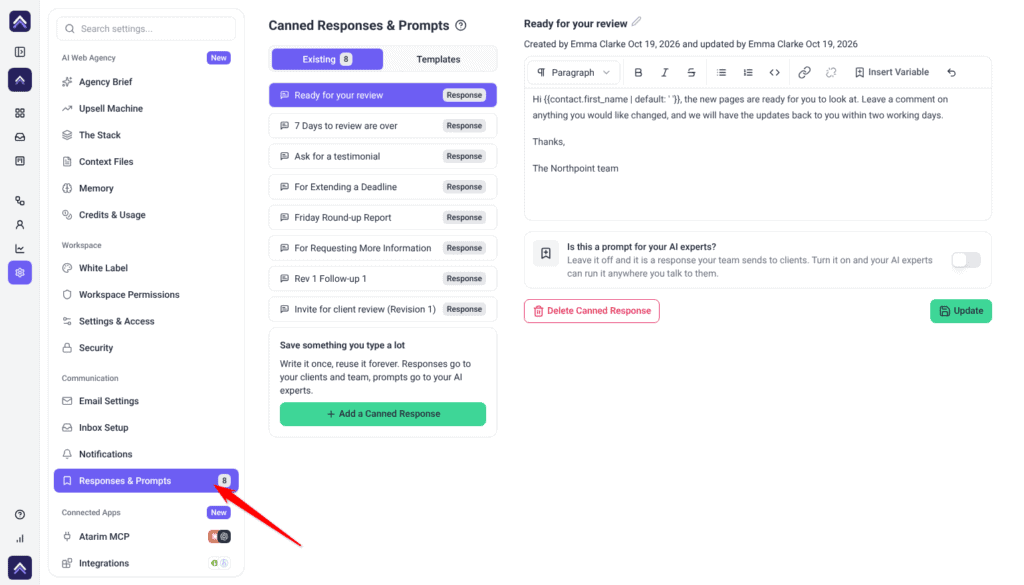
- Under Communication, select Responses & Prompts. The menu item shows a count of how many you have.
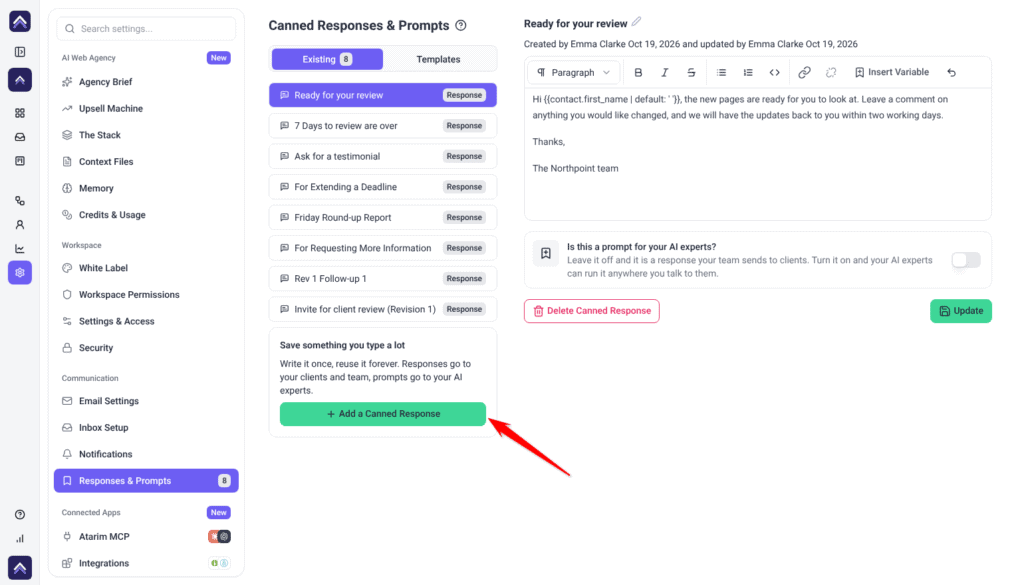
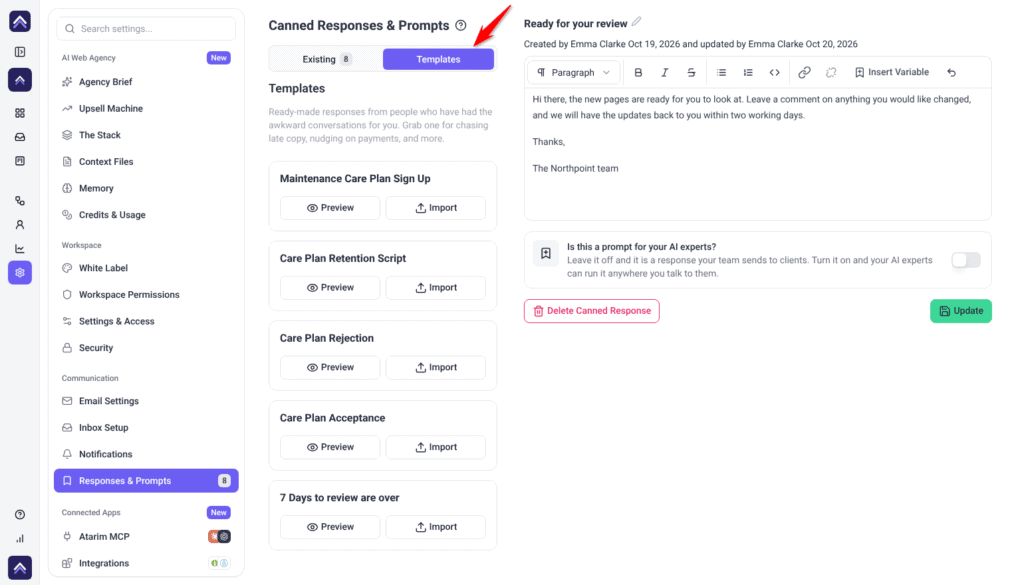
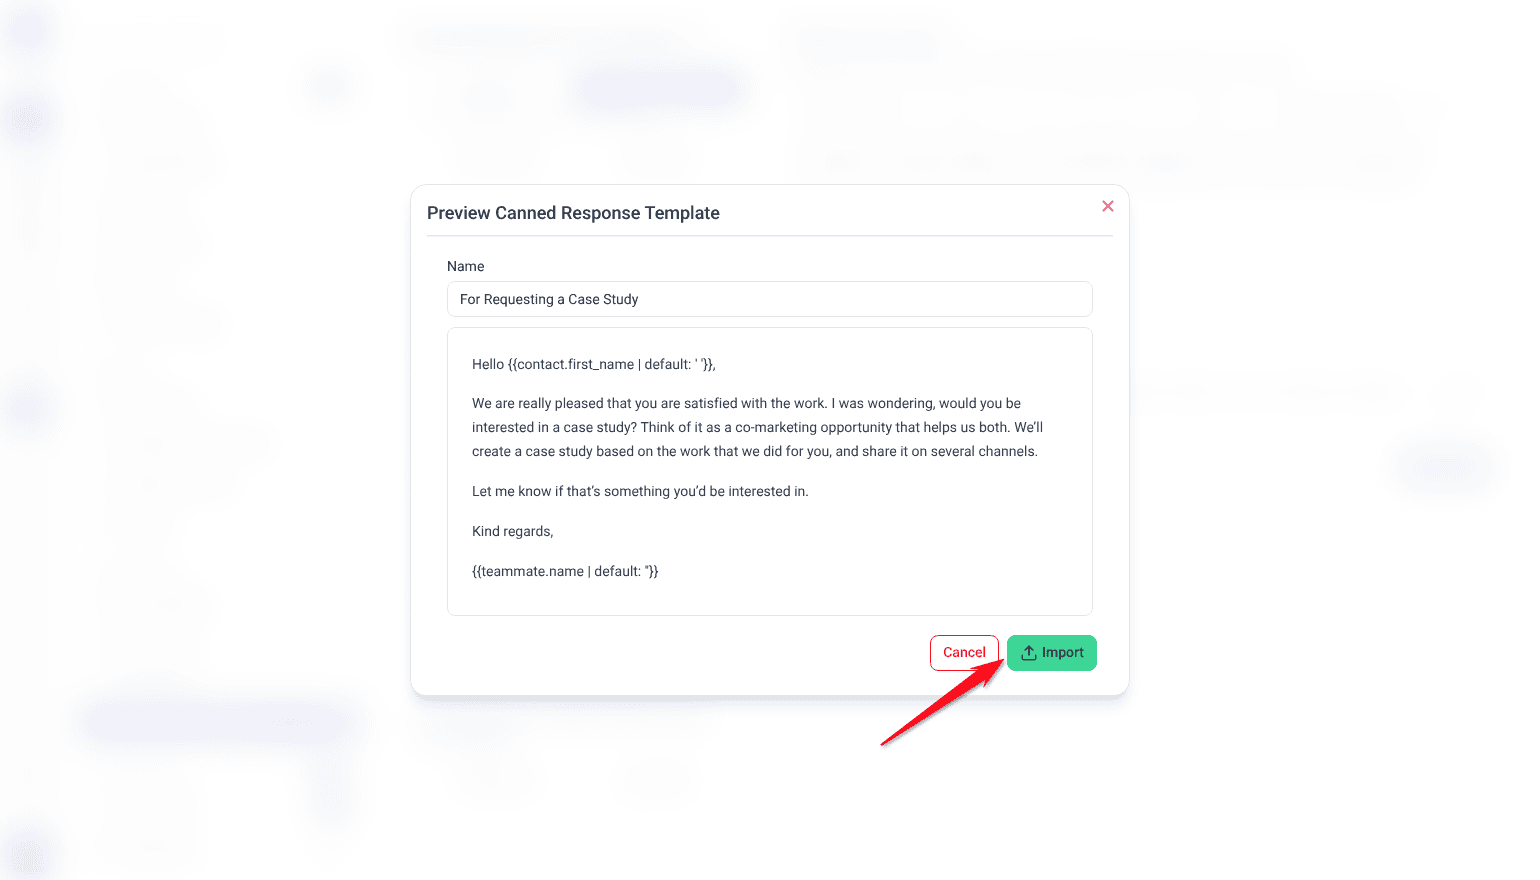
The screen is headed Canned Responses & Prompts. On the left are two tabs. Existing lists everything your workspace has saved, each with a Response or Prompt badge, and ends with an Add a Canned Response button. Templates holds ready-made responses: select Preview to read one in full, or Import to copy it into your Existing list. On the right is the editor for the item you select.
Before you select anything, the right-hand side reads No Canned Response Selected. That’s the normal starting state, not an error.
Two things can hide this screen from you. Canned responses are plan-gated — on a plan without them you’ll see an upgrade card instead of the editor. And the menu item only appears for people whose role permits viewing canned responses, so a teammate may not see it at all.
Creating a Canned Response
The name is what your team will search by, so it matters more for finding the response later than the content does.
Instructions:
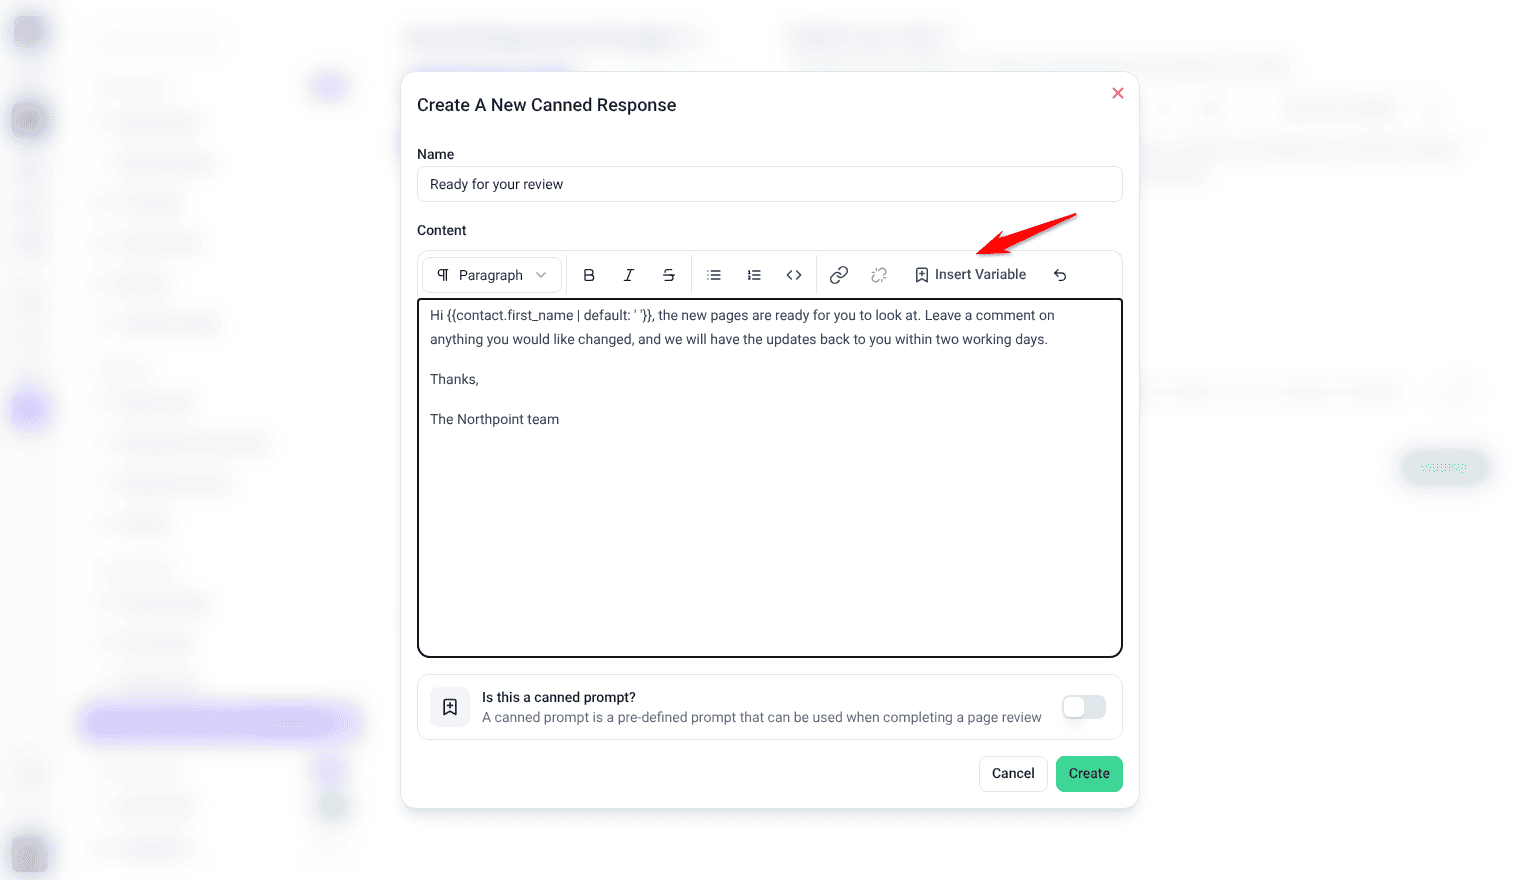
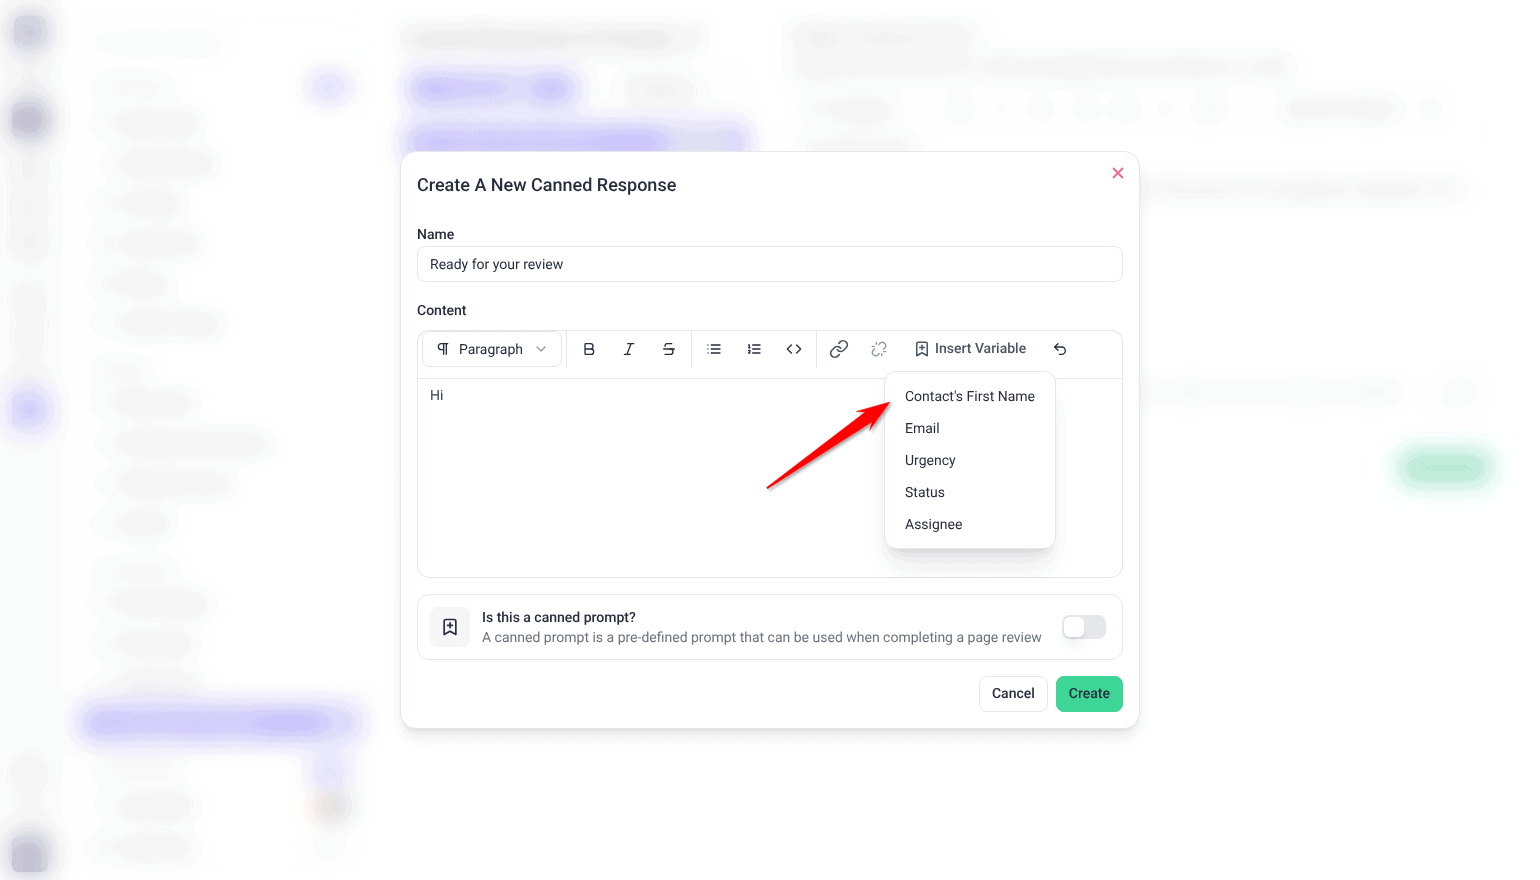
- Select Add a Canned Response. The Create A New Canned Response window opens.
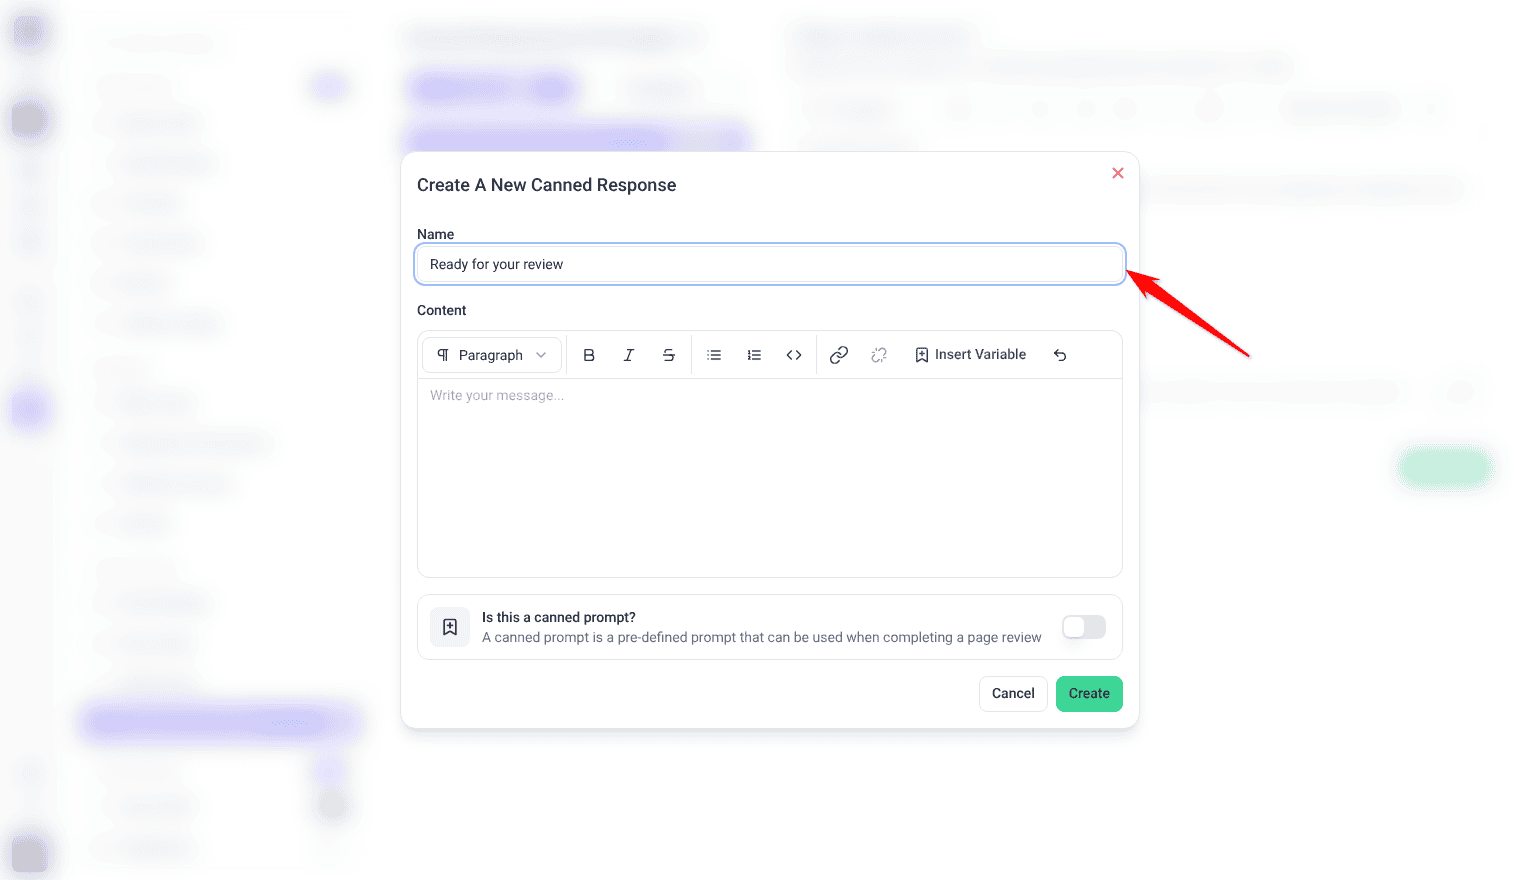
- Enter a Name. This is what you and your team will see in the list, so make it findable — you’ll be searching it later.
- Write your text in the Content editor. It’s a full rich-text editor, so formatting, links and lists all work.
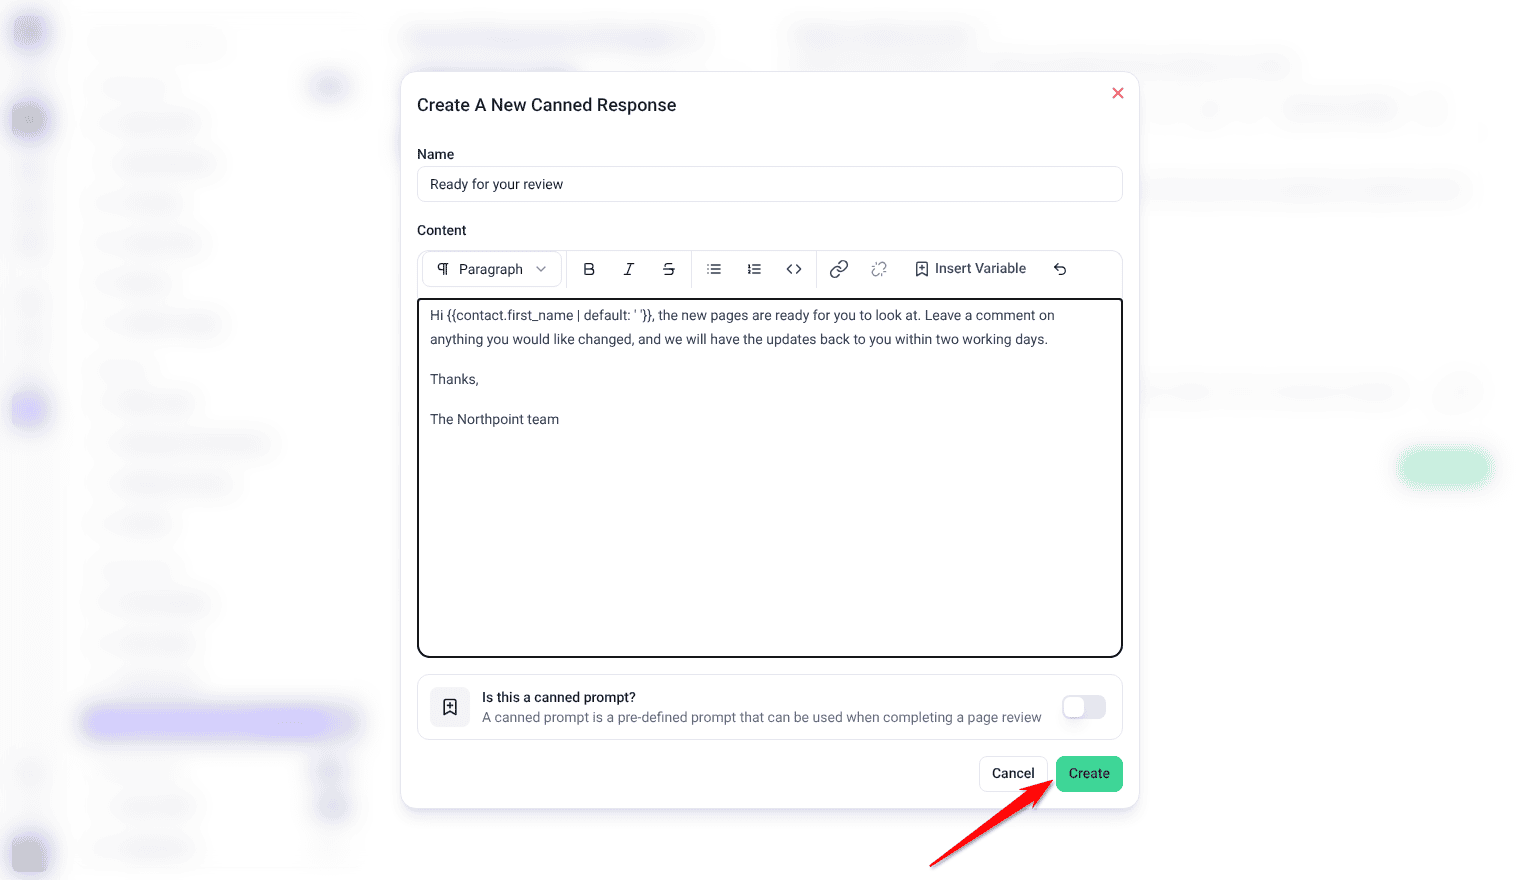
- Leave Is this a canned prompt? switched off.
- Select Create.
The Create button becomes available once you’ve entered a name. Add your content too, because a canned response needs both a name and content before it saves.
Cancel closes without saving.
Inserting Variables
Variables are placeholders that fill themselves in when the response is used, so one saved reply works across every client and task.
Instructions:
- Place your cursor where you want the value to appear.
- Select Insert Variable in the editor toolbar.
- Choose from the list.
Five variables are available:
| Variable | Fills in with |
|---|---|
| Contact’s First Name | The first name from the sender’s email address |
| The contact’s email address, from the email thread the task came from | |
| Urgency | The urgency of the current task |
| Status | The status of the current task |
| Assignee | The Atarim user assigned to the task |
If a variable has nothing to fill in with, it resolves to an empty space rather than printing raw text at your client.
Using a Canned Response
Canned responses are inserted from the composer wherever you’re writing a reply.
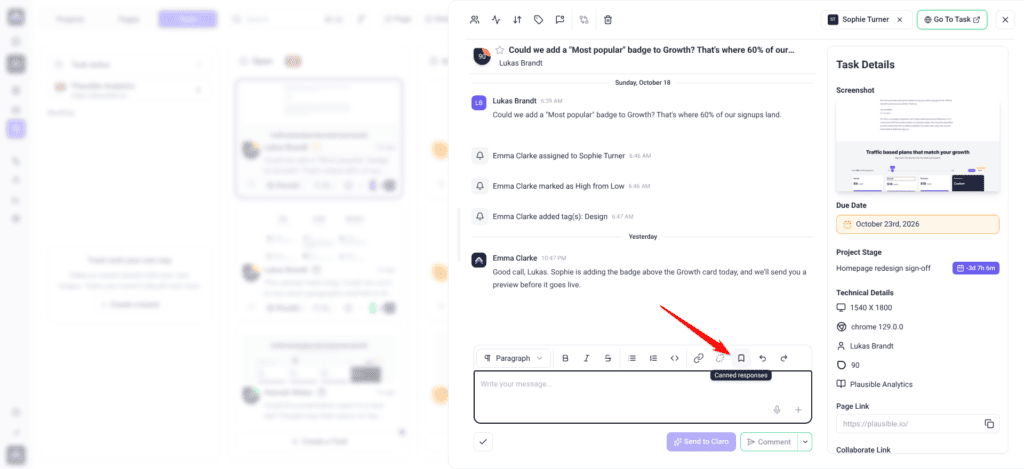
- Open the canned responses picker: the bookmark icon in the editor toolbar, or + › Add a canned response in a website’s comment box. The Canned Responses window opens.
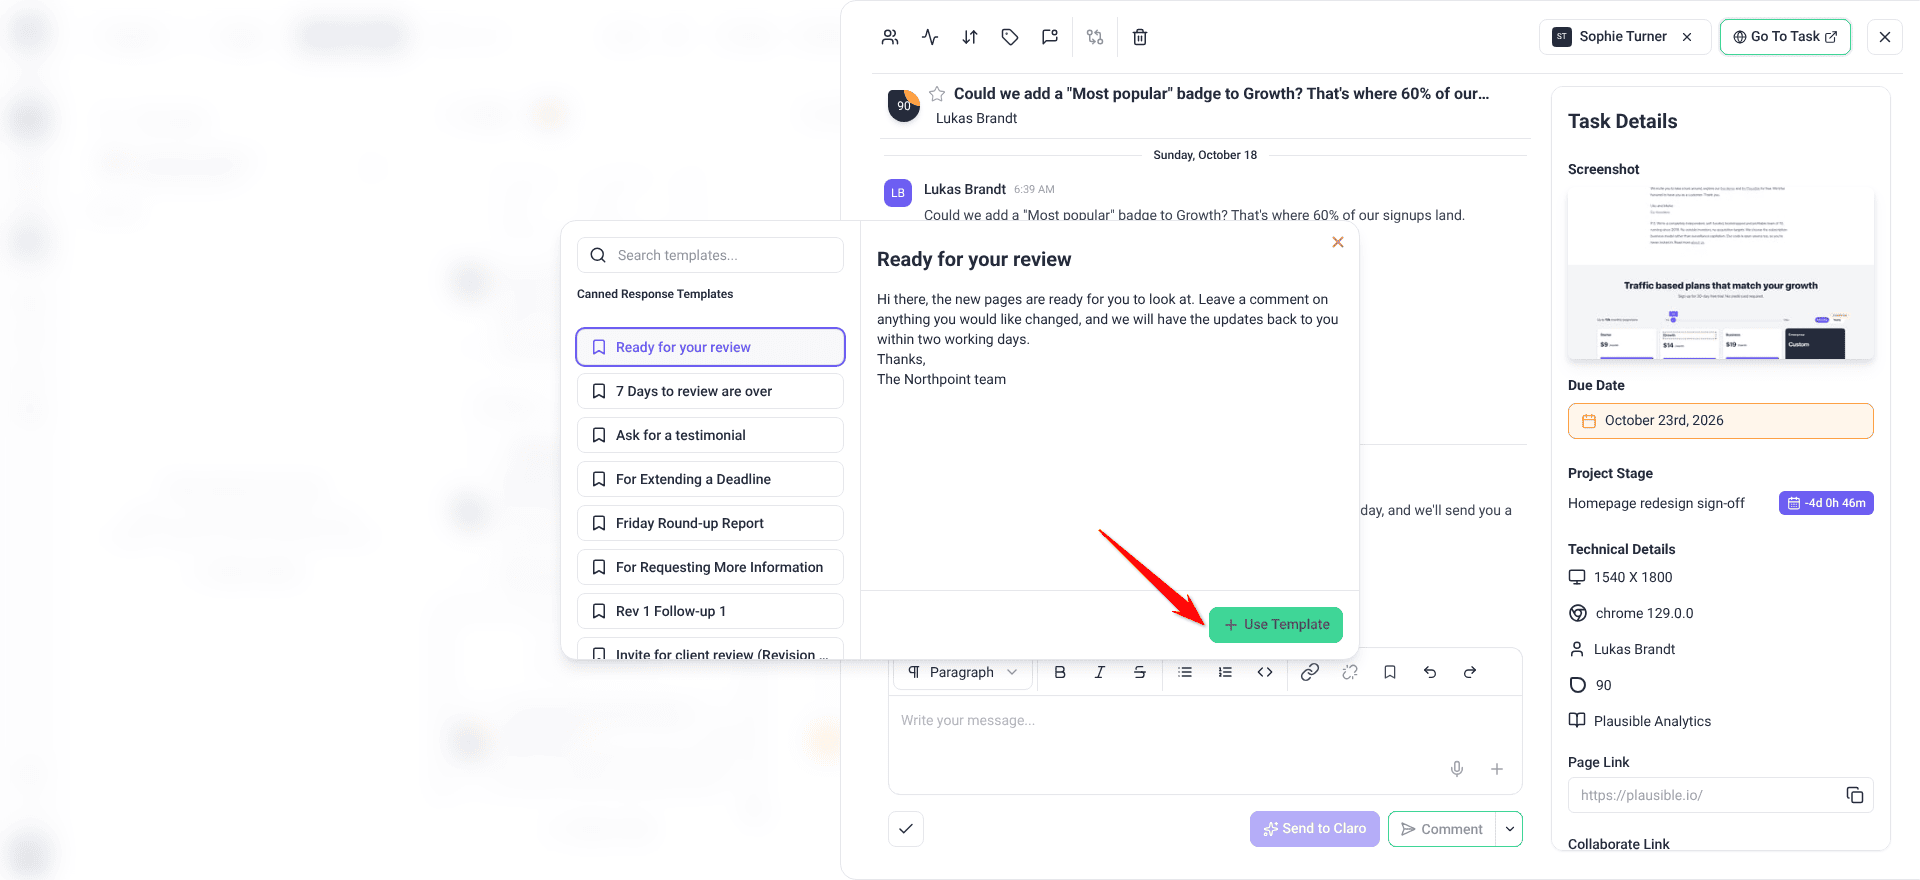
- Pick one from the Canned Response Templates list on the left, or search for it.
- Select one. Its full content previews on the right so you can check it before committing.
- Select Use Template. The text drops into your reply at the cursor.
Inserted text is fully editable. Nothing is locked — treat it as a starting point rather than a finished message, and adjust before sending.
Creating a Canned Prompt
A canned prompt is a saved instruction for your AI experts rather than text for a client.
Instructions:
- Select Add a Canned Response and give it a Name.
- Write the instruction in Content — what you want the AI expert to actually do.
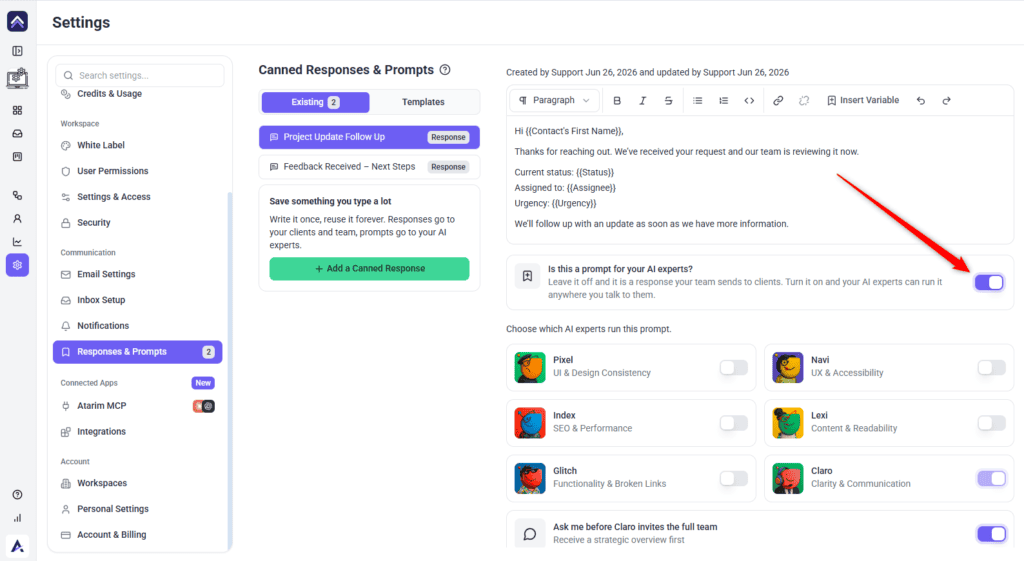
- Switch on Is this a canned prompt?
- A list of AI experts appears. Choose which ones should run this prompt.
- Select Create.
The editing view words the same switch differently — Is this a prompt for your AI experts? — and explains it as: leave it off and it’s a response your team sends to clients; turn it on and your AI experts can run it anywhere you talk to them.
Claro is always included and can’t be deselected. Other experts are yours to choose.
Editing and Deleting
Select any item in the left-hand list to open it.
Renaming
Select the pencil icon beside the title, type the new name, click away to close the field, then select Update to save it.
Changing the content
Edit in the editor, then select Update. Unlike the notification settings, this screen does not save on its own — navigating away without selecting Update loses your changes.
Converting between the two
Flip the prompt switch on an existing item and select Update. Its badge changes accordingly.
Deleting
Select Delete Canned Response at the bottom left. You’ll be asked to confirm, with a warning that the action can’t be reversed.
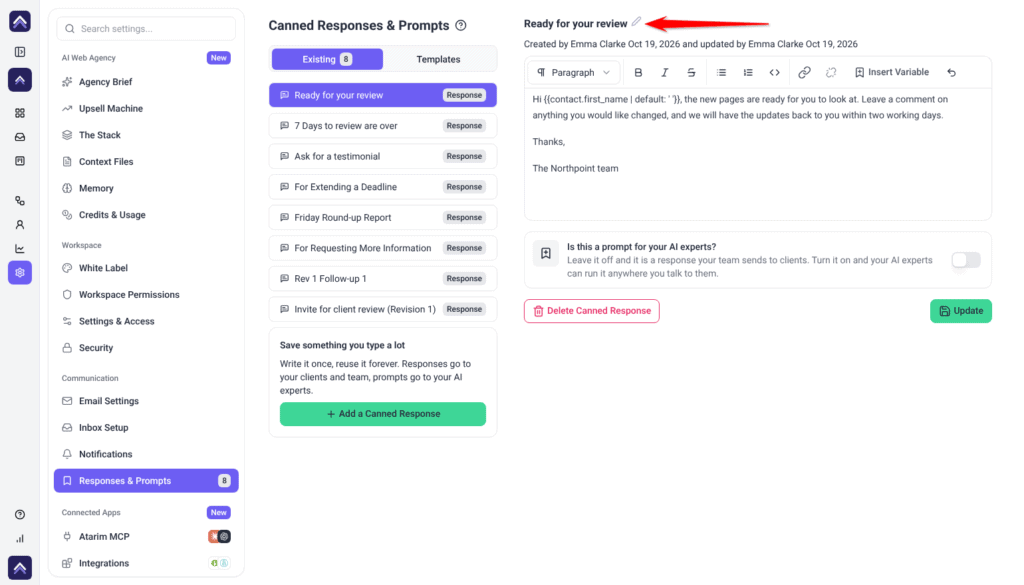
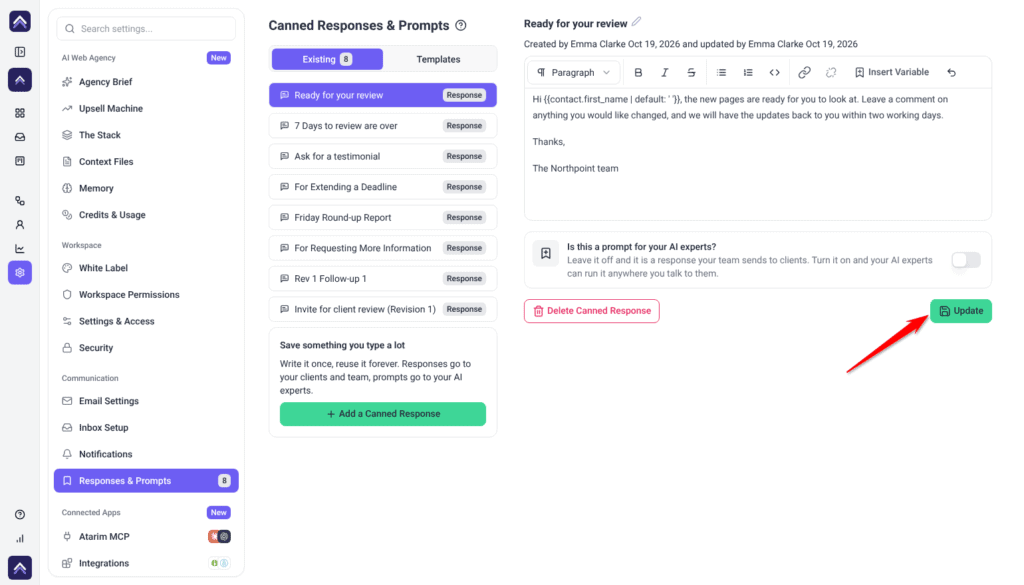
Beneath the title you’ll see who created the item and when, and who last updated it — useful on a shared workspace when you’re not sure whether something is still current.
FAQs
What’s the difference between a canned response and a canned prompt?
A response is text your team sends to clients. A prompt is an instruction your AI experts run. One switch decides which you’re creating, and every saved item is badged accordingly.
Can I edit a canned response after inserting it?
Yes. Inserted text is ordinary editable content — adjust it before sending.
Do variables work in canned prompts too?
The Insert Variable control is available in both editors. Whether a given value is meaningful depends on where the prompt runs.
Can I turn a response into a prompt later?
Yes. Open it, flip the switch, and select Update. The badge changes to match.
Does the content editor save automatically?
No. Nothing on this screen saves on its own — content changes and renames both need an explicit Update.
Can other people on my workspace see what I create?
Yes, canned responses are shared across the workspace. Each shows who created it and who last updated it.
Conclusion
By using canned responses in Atarim, you can significantly improve communication efficiency, maintain consistency across messages, and reduce response time for repetitive interactions. Whether handling client queries, internal task updates, or QA reports, canned responses streamline your workflow and free up time for more critical tasks.
Tips & best practices
- Standardize answers for frequently asked questions.
- Speed up the reporting process with structured templates.
- Automate follow-ups and progress updates.
- Quickly relay updates without rewriting responses.