Agency Brief: Building Your Brand Kit
The brand and business snapshot every AI specialist reads before it reviews a page, writes a line of copy, or proposes a change — and how it layers with project and personal context.
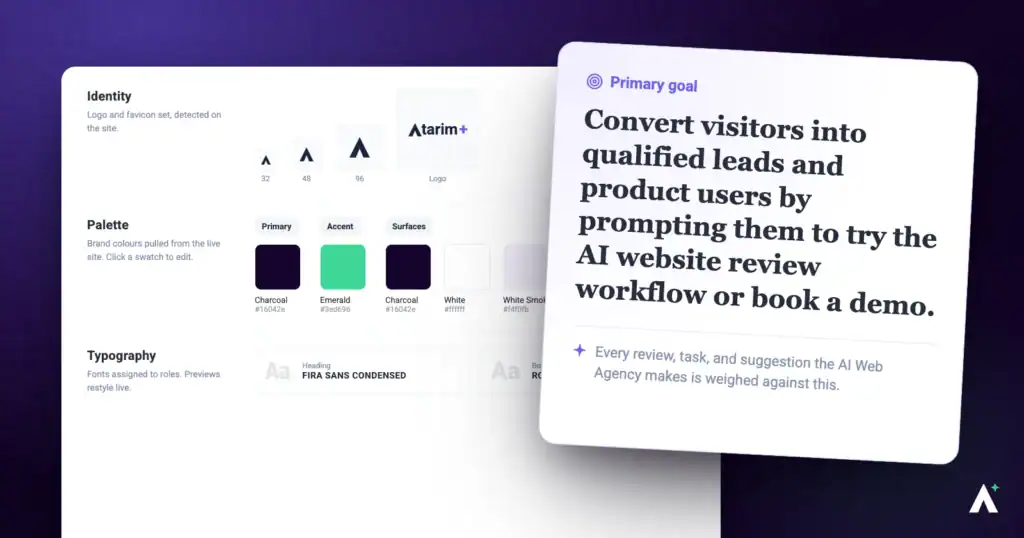
Agency Brief is your brand snapshot — what your business does, who it speaks to, how it sounds, and what it looks like. It's the first thing every AI specialist checks before doing anything.
It's also one of three context layers. Your brief sets the workspace default, individual projects can override it, and your own profile decides how the AI explains things to you.
This guide covers all three: how to build your brief section by section, what each part actually changes, and how to override it for one client.
The Three Context Layers
| Layer | Where it lives | What it does |
|---|---|---|
| Global | Settings > AI Web Agency | Your workspace’s brand, business, and voice. Used for workspace-level work, such as chatting with Claro outside a project. |
| Project | The project’s own brief | The brief for one project, client, or campaign. Every project has its own. |
| User | Your own profile (your avatar, then View Profile) | Adjusts how the AI explains things to you. Doesn’t affect anything a client sees. |
The brief is what you tell the AI. Your experts also keep a memory of what they learn as they work, which you can read and correct under Memory.
Why It’s Worth Filling In
Your brief isn’t reference material the AI glances at. It’s the reference it’s told to trust above everything else.
It settles disagreements
If a page on your site contradicts your brief, the brief wins. A page is treated as evidence about that page, never as a definition of your business — and the AI flags the mismatch rather than quietly following the page.
It stops the AI improvising
Specialists are instructed to pull exact values from your brief rather than inventing them. Give it your real colours and fonts and it commits to those; leave them blank and it falls back to generic defaults.
It prevents placeholder content reaching your site
The AI won’t invent a real-world value — an email address, phone number, price, or statistic — into content that publishes live. If your brief doesn’t supply it, the field is left out instead of faked.
It tells each specialist what to hold work to
Step-by-Step Guide
Step 1: Opening Agency Brief
Agency Brief sits in workspace settings rather than on a project, because what you set here applies everywhere unless a project overrides it.
Instructions:
- From the main dashboard, select Settings.
- In the menu on the left, under AI Web Agency, select Agency Brief.
- Confirm you’re on Visual Brief — the guided, tabbed view, selected by default.
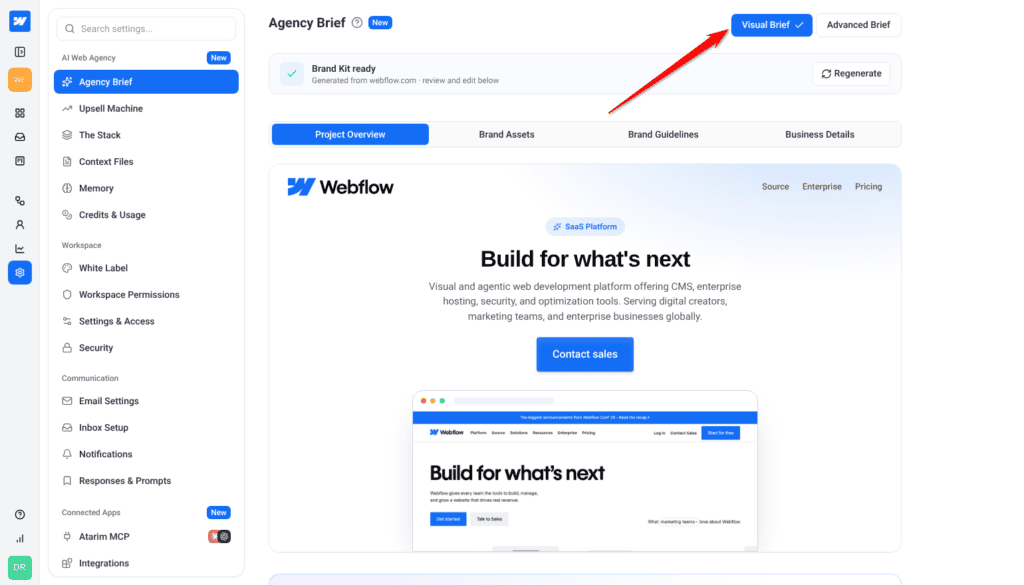
A toggle at the top of the page switches between two views of the same brief. A tick marks whichever is active.
| View | What it is, and when to use it |
|---|---|
| Visual Brief | A guided editor split into four tabs. The default, and the right choice for a first setup — it prompts you for everything the AI needs. |
| Advanced Brief | The raw fields behind the tabs, plus a free-text box for your own AI instructions. Use it when the guided sections can’t express something specific. |
Step 2: Generating Your Brief From Your Website
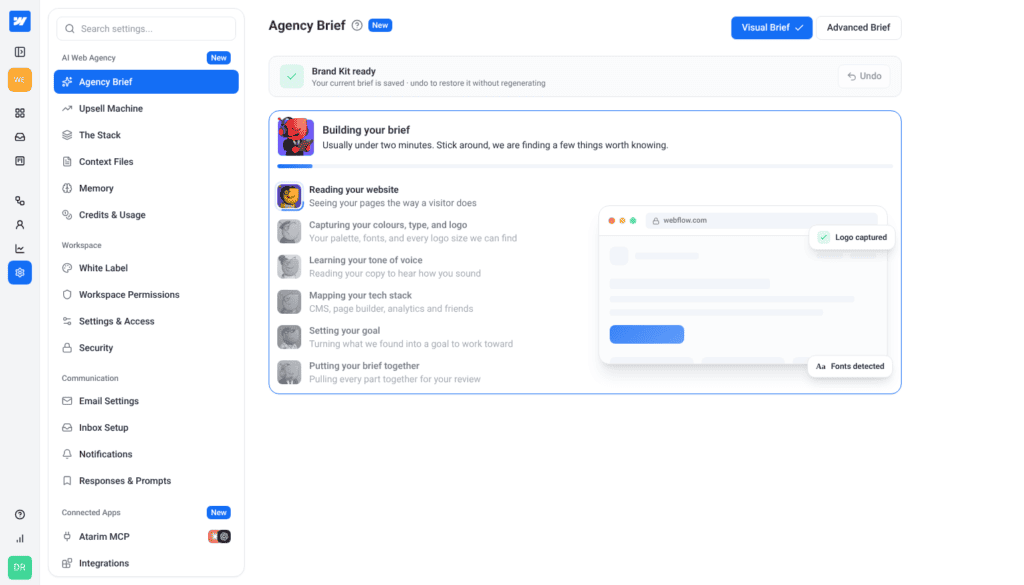
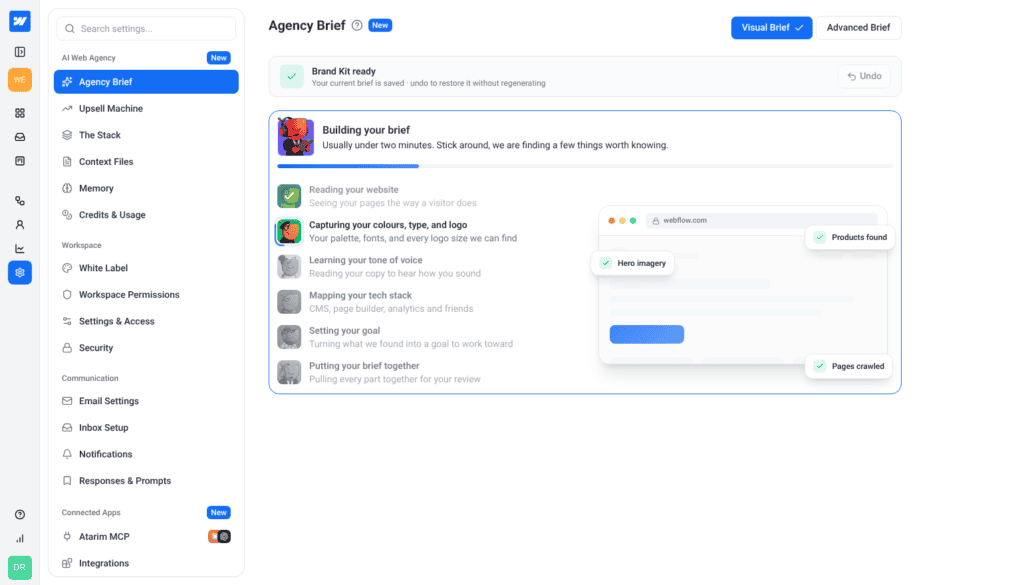
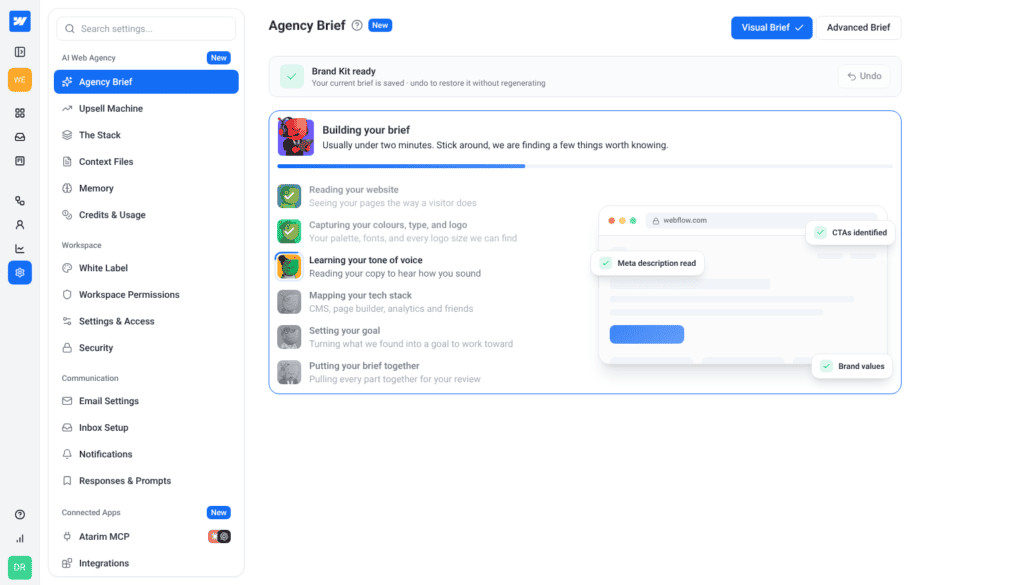
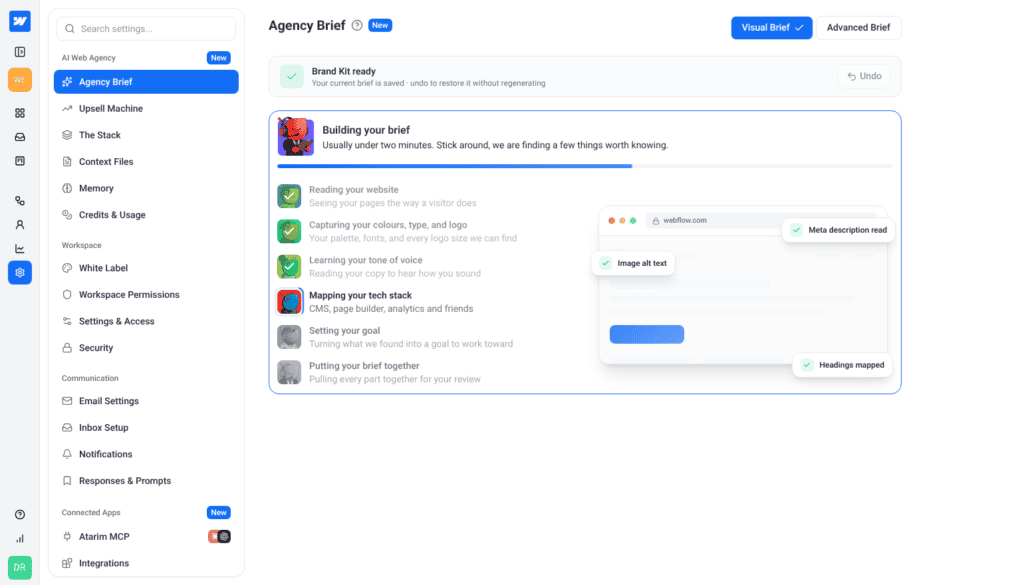
What this does: reads your site and pre-fills every tab — brand name, project type, audience, tone of voice, colours, and key context — so you’re editing a draft rather than starting from nothing.
Instructions:
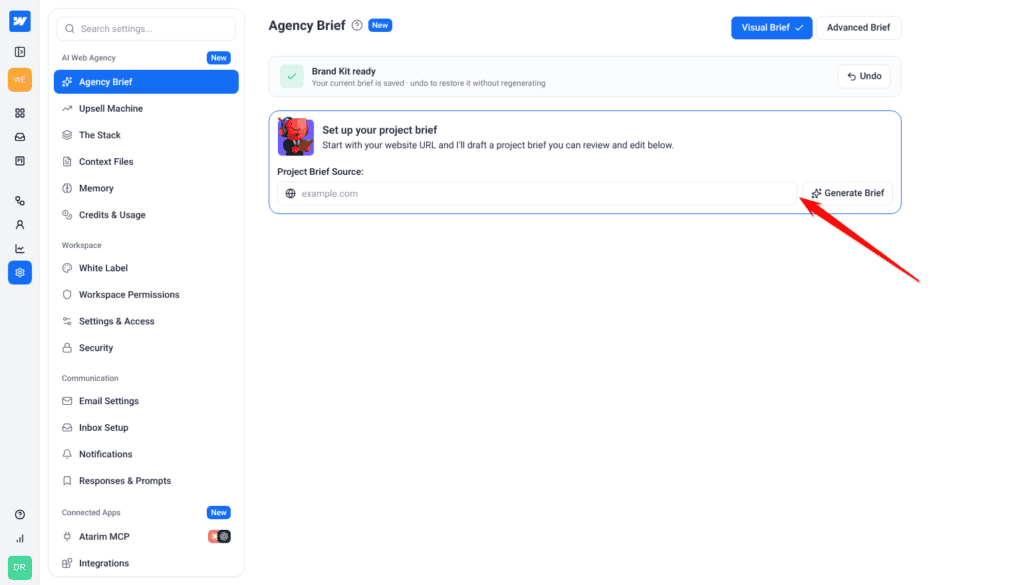
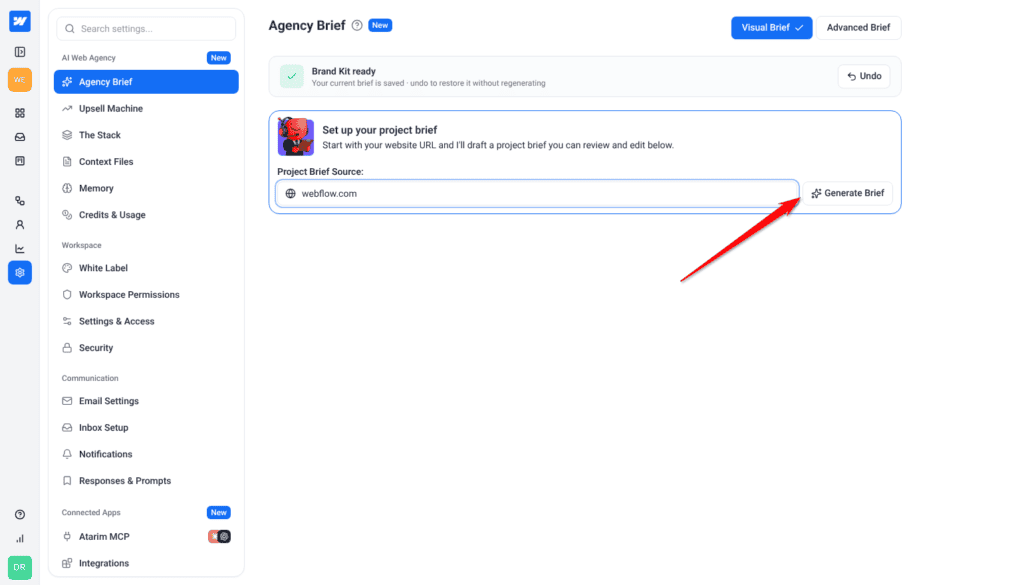
- Under Project Brief Source:, enter your agency’s website address. The field shows the expected format,
example.com. - Select Generate Brief. The field and button are disabled while it runs.
- Wait for the confirmation — a green tick reading Brand Kit ready, with Generated from yoursite.com · review and edit below underneath.
- Work through the four tabs and correct anything that doesn’t fit.
- Select Save Changes.
If any field came back empty, the bar names those instead of the score, for example nothing came back for the logo, fonts, a primary colour. A low score or a named gap still leaves you a usable brief; it tells you which parts to check first.
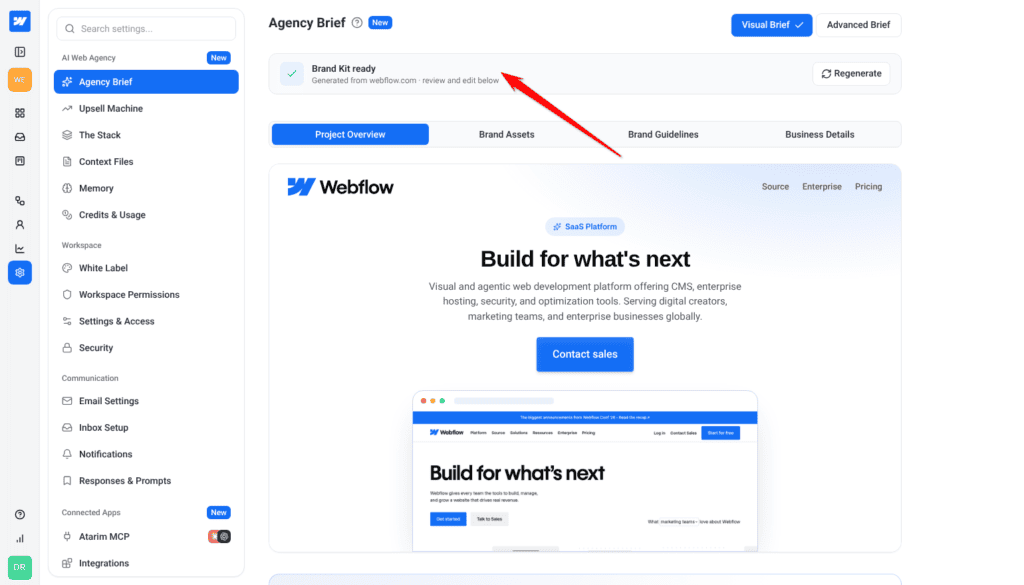
Step 3: Project Overview
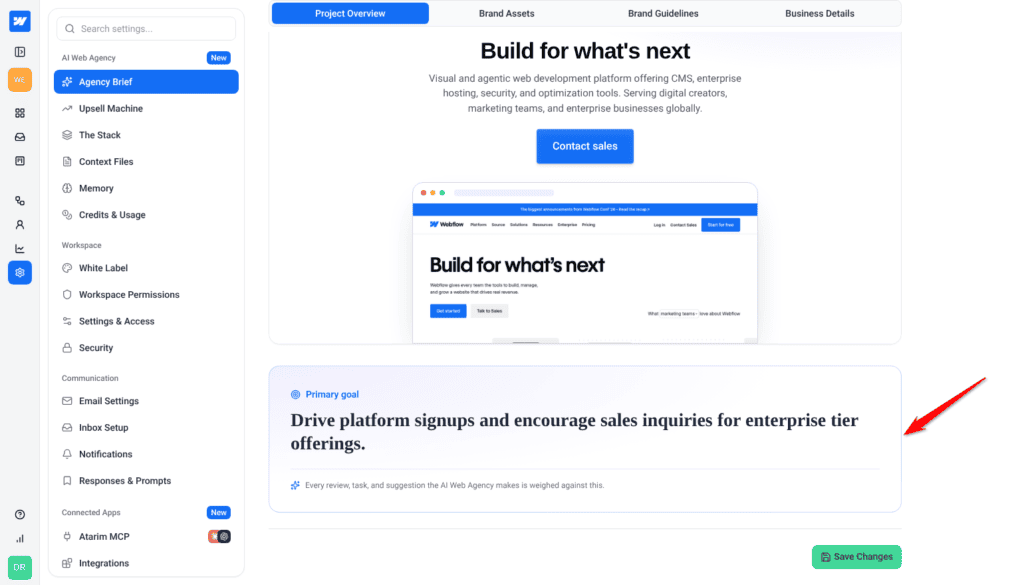
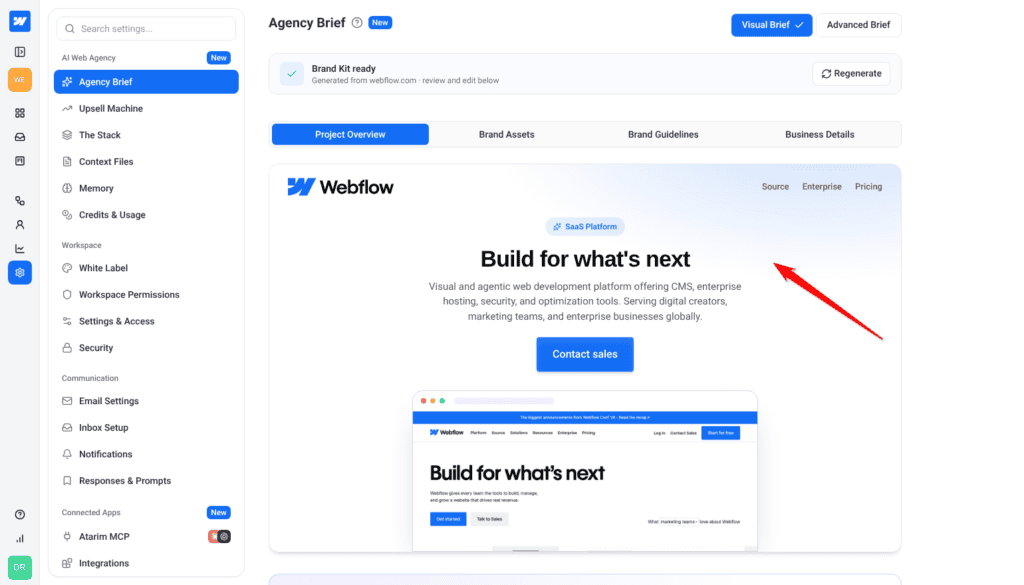
The summary tab, showing a preview of your site and your primary goal.
Why it matters: this is what the AI reads first, and it’s where your primary goal lives. Specialists are instructed to tie every piece of work back to that goal — making it the single field with the widest effect on what you get back.
Instructions:
- Open Agency Brief and stay on the Project Overview tab.
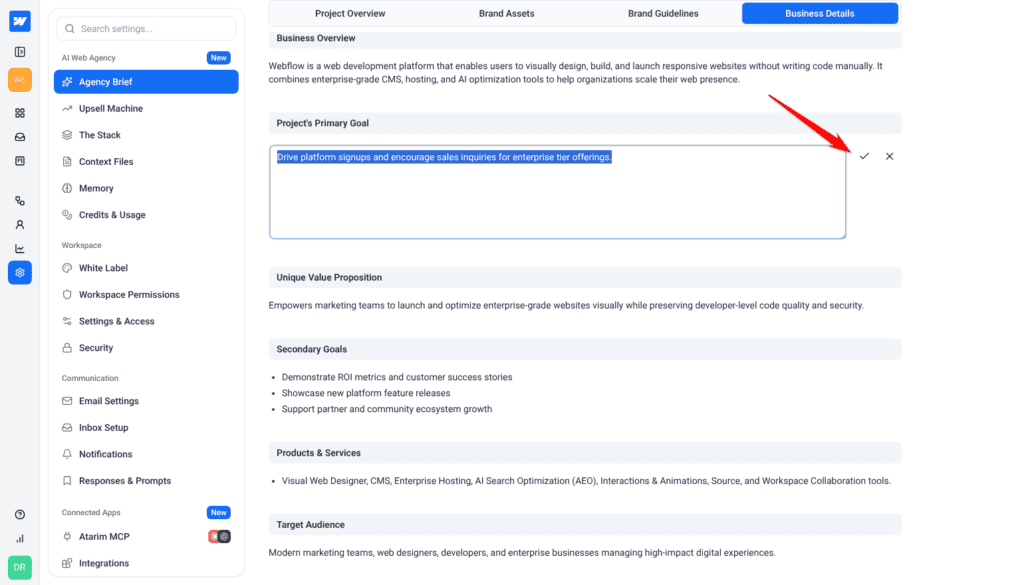
- Select the Primary goal card. This opens the Business Details tab with the goal ready to edit; select the tick to confirm.
- Select the Site preview at the top of Project Overview. A tooltip reads Open Brand Assets, and selecting it takes you to that tab to edit your colours, fonts, and logo.
- Select Save Changes.
.
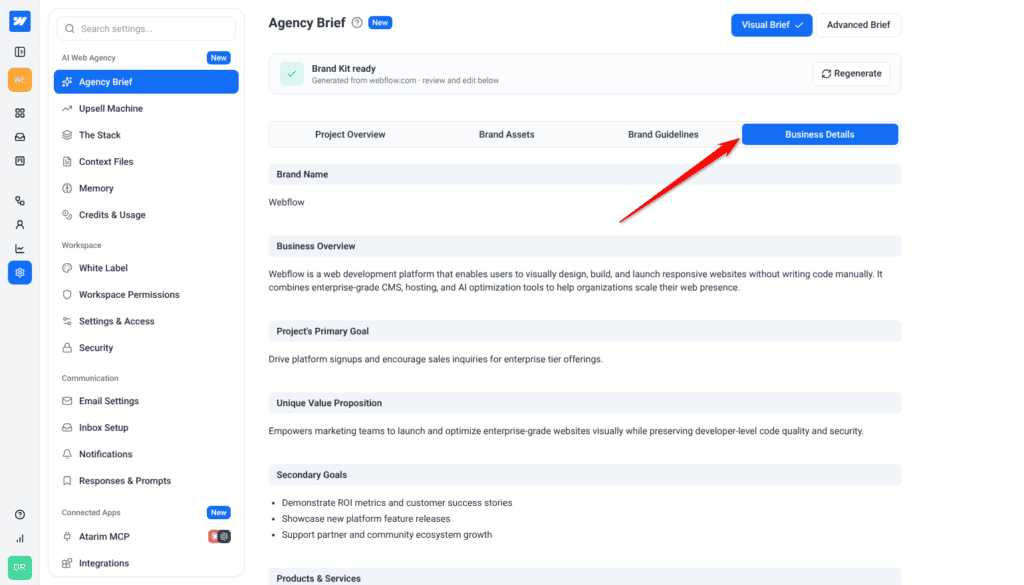
Step 4: Business Details
The commercial context behind your work — what you sell, who to, and what success looks like.
Why it matters: this is where Index draws your products and goals for SEO work, and where Lexi gets the business context behind copy. It’s also what stops the AI leaving gaps — it won’t invent a price or a metric, so anything not recorded here simply won’t appear in published content.
- Open Agency Brief and select the Business Details tab.
- Complete Brand Name — the name the AI uses for your business.
- Complete Business Overview — what your business does, in plain terms.
- Complete Project’s Primary Goal — the one outcome that matters most.
- Complete Unique Value Proposition — what you offer that others don’t.
- Add any Secondary Goals.
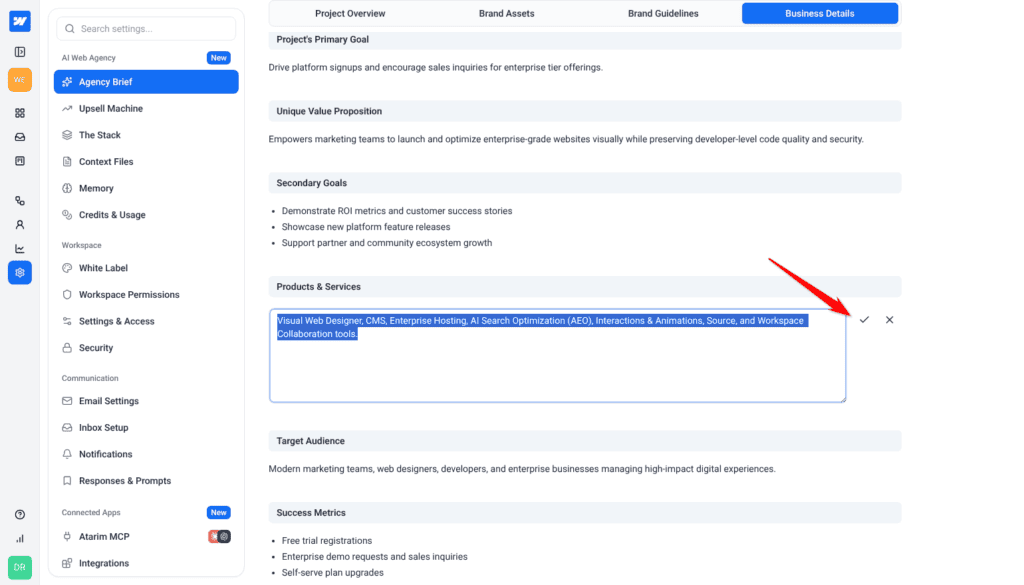
- List your Products & Services.
- Describe your Target Audience.
- Define your Success Metrics — how you’d know the work succeeded.
- Select Save Changes.
Step 5: Brand Guidelines
Your project category, brand personality, communication style, design direction, and visual boundaries.
Why it matters: these are the fields Pixel checks a design against and Lexi writes to. Fill them in and proposals arrive already matching your style; leave them empty and you’ll spend your time rejecting suggestions instead of using them.
Instructions:
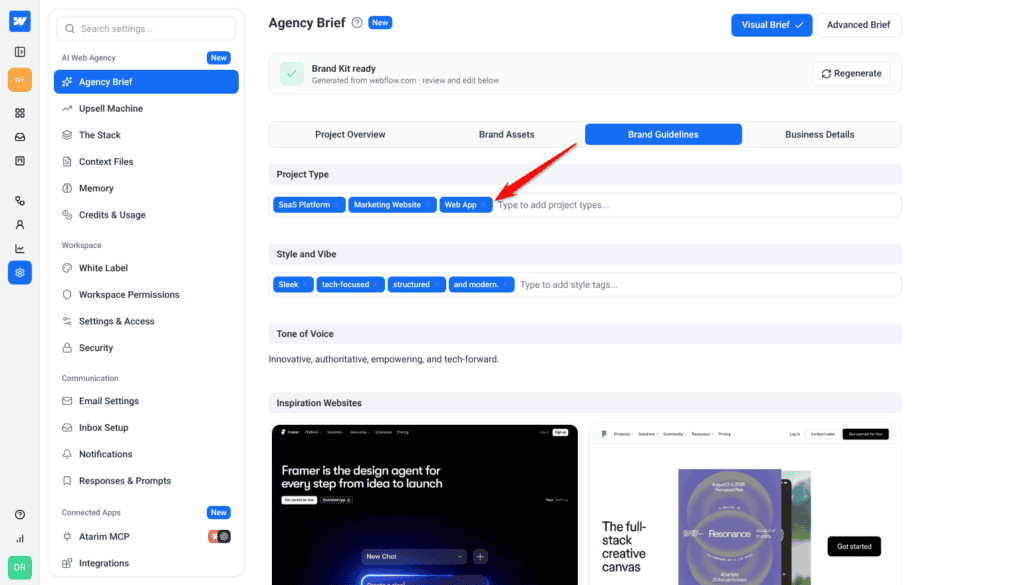
- Open Agency Brief and select the Brand Guidelines tab.
- In Project Type, type a category and press Enter to add it. Add as many as apply — each appears as a tag with an × to remove it.
- In Style and Vibe, add keyword tags the same way.
- In Tone of Voice, describe how your brand should sound.
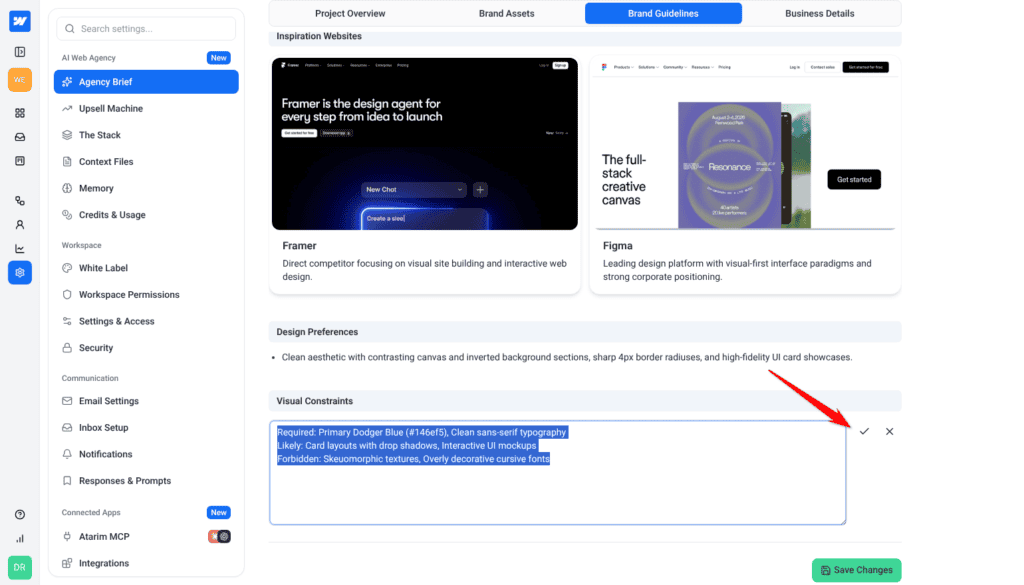
- Add your preferred visual direction in Design Preferences.
- Add anything to avoid in Visual Constraints.
- Select Save Changes.
| Field | What it does | Examples |
|---|---|---|
| Project Type | The type of website or product you’re building | Corporate Website, eCommerce, SaaS Platform, Landing Page, Web App |
| Style and Vibe | Keywords describing your brand personality or visual style | Modern, Clean, Trustworthy, Bold, Minimalist |
| Tone of Voice | How your brand should sound in writing | Professional and informative; friendly and casual; confident and expert |
| Inspiration Websites | Sites you like, used to guide design direction | Any public URL |
| Design Preferences | Layouts, UI elements, or visual choices you prefer | Spacious layout, rounded buttons, strong CTA contrast, minimal navigation |
| Visual Constraints | Anything that should be avoided or limited | No autoplay video, avoid clutter, no excessive animation, avoid dark backgrounds |
Step 6: Brand Assets
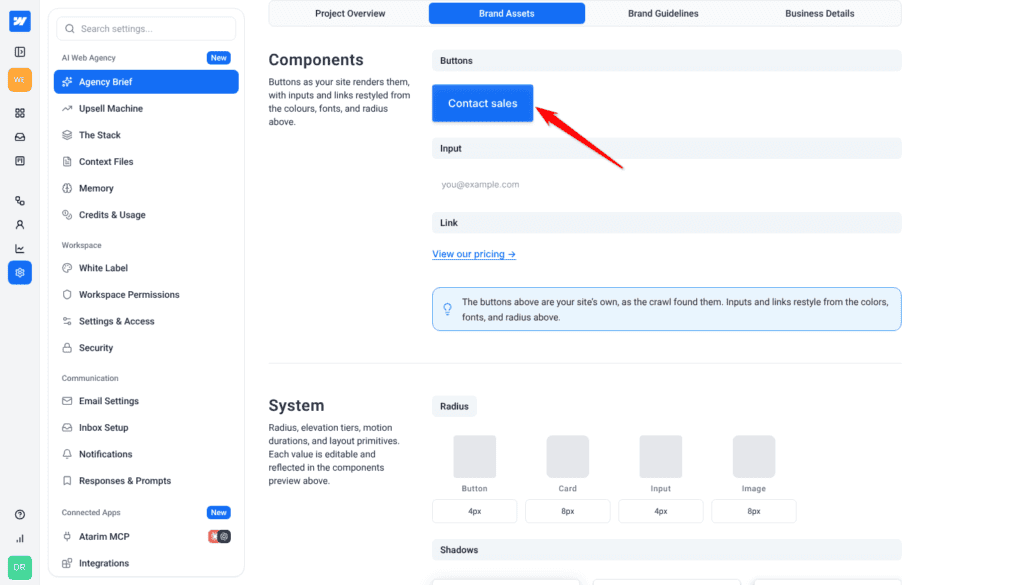
Your full design system in one place — logo and favicons, colour palette, fonts, spacing and motion values, and the technology detected on your site. It’s more than a logo-and-colours form.
Why it matters: Specialists are instructed to pull exact values from your brief instead of improvising. These are the values they use. Without them it has nothing specific to match, and falls back to the safe, anonymous choices you’d recognise anywhere.
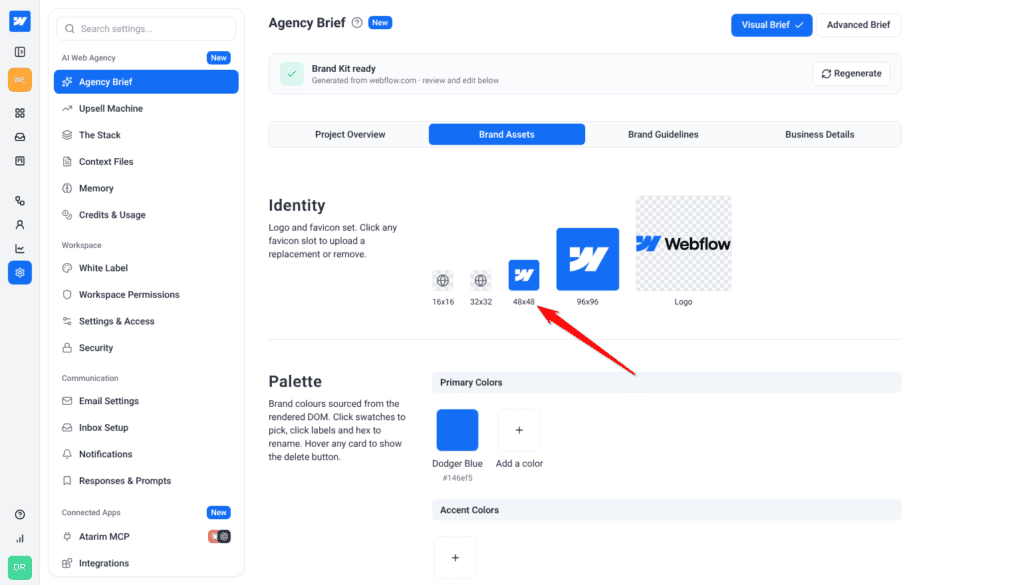
Identity
Logos and favicons are stored by URL, so the image needs to be reachable online before you add it.
Instructions:
- Open Agency Brief and select the Brand Assets tab.
- Under Identity, select Add a logo, paste the URL of your logo image, then select Add logo.
- Select any favicon slot — 16×16, 32×32, 48×48, or 96×96 , paste the image URL and select Save, or select Remove.
Palette
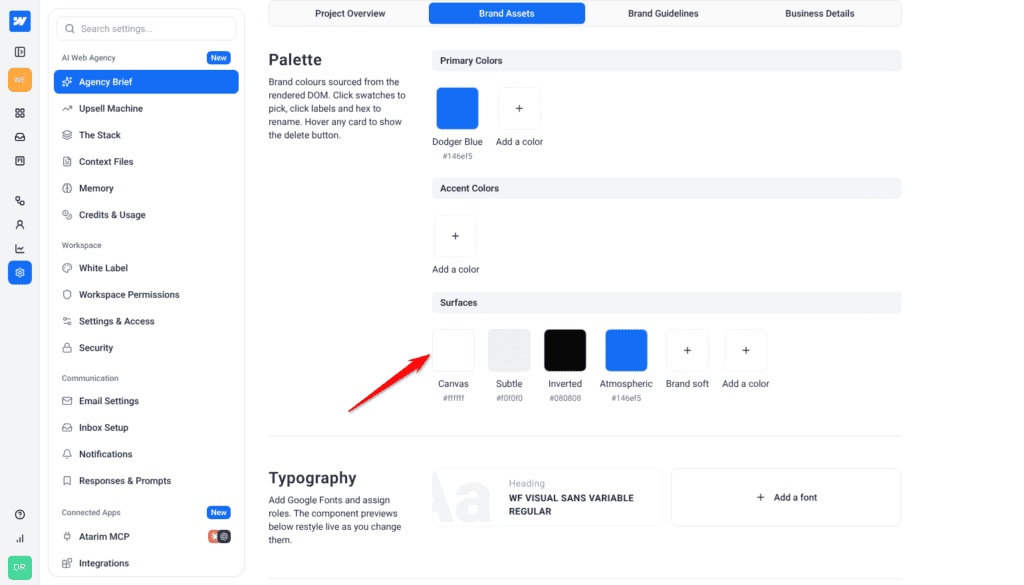
Primary and Accent are yours to set. The Surfaces beneath them are detected from your site, and are worth checking rather than assuming.
Instructions:
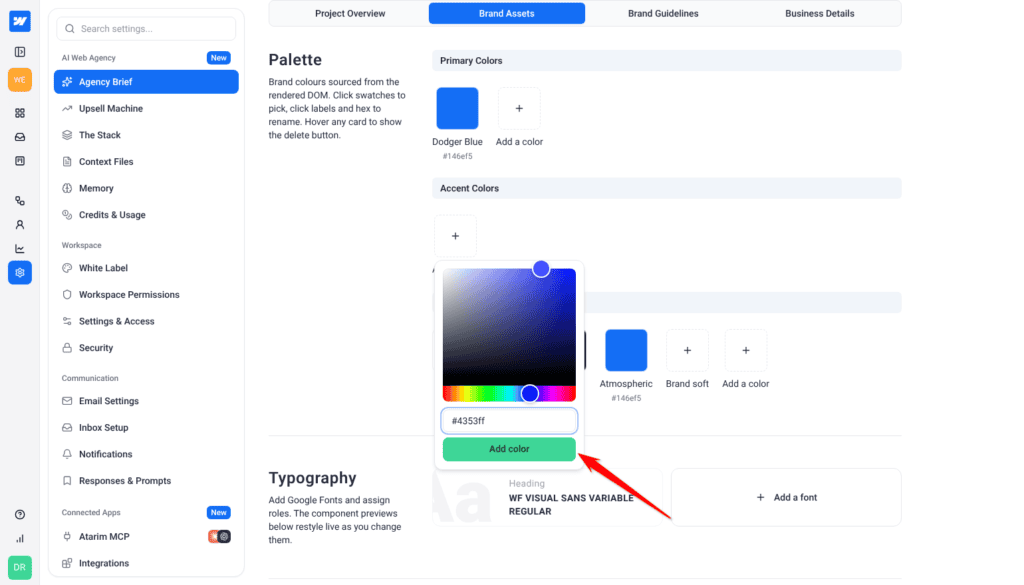
- Under Primary Colors, select Add a color. Drag on the gradient to choose visually, or type a hex value into the field beneath it, then select Add color.
- Do the same under Accent Colors for your supporting colours.
- Review Surfaces — Canvas, Subtle, Brand soft, Inverted, and Atmospheric. These are detected from your site, and you can add more or adjust them.
- Select a swatch to change a colour, or select its label or hex value to rename it. Hover any card to reveal its delete button. The five named surfaces can be recoloured but not renamed or deleted.
Typography
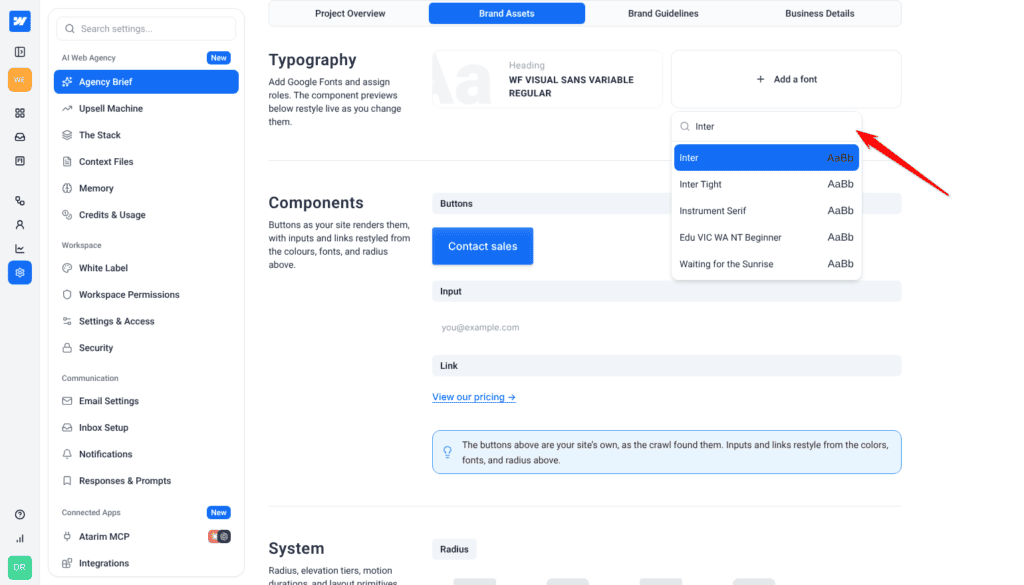
Fonts come from Google Fonts, so anything outside that library has to be handled elsewhere.
Instructions:
- Under Typography, select Add a font. Search Google Fonts by name — each result previews in its own typeface — then select one to add it.
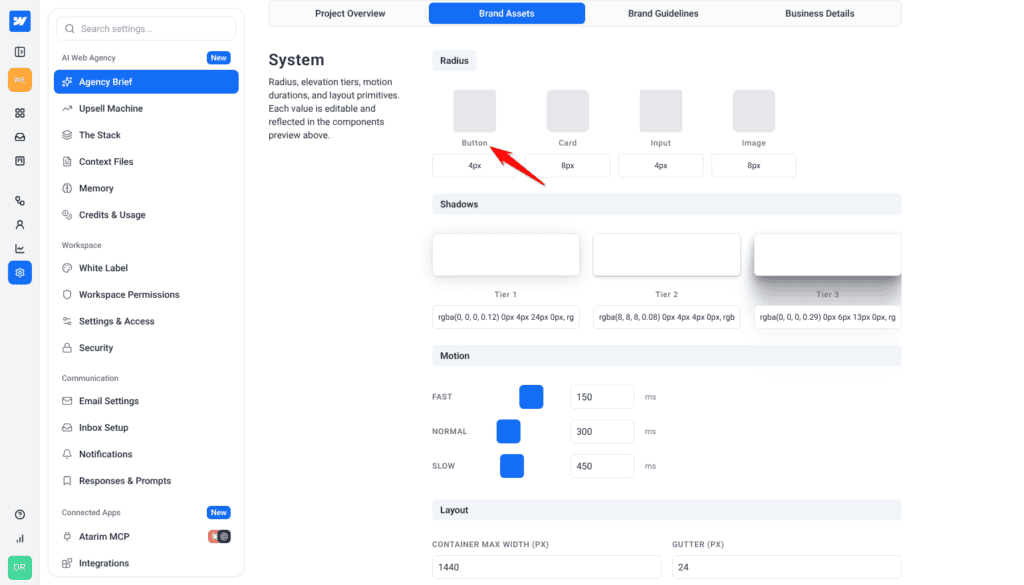
System
These four groups are what give generated work its house feel — corners, depth, pace and spacing.
Instructions:
- Under Radius, set the corner radius for Button, Card, Input, and Image.
- Under Shadows, set the three elevation tiers.
- Under Motion, set durations in milliseconds for Fast, Normal, and Slow.
- Under Layout, set Container max width and Gutter in pixels.
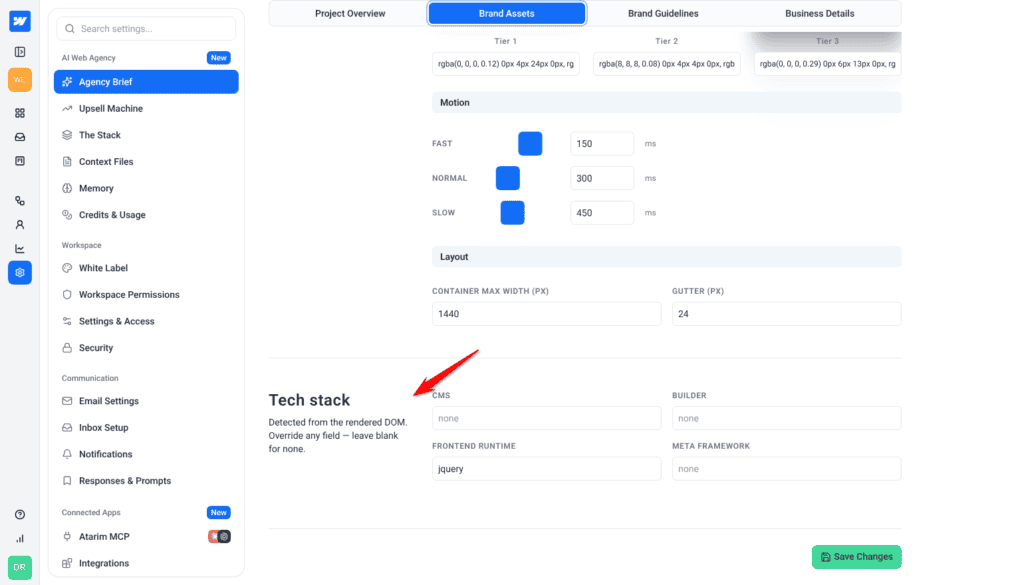
Tech stack
Leaving a field blank tells the AI there is nothing to assume, which beats letting a wrong default stand.
Instructions:
- Review CMS, Builder, Frontend runtime, and Meta framework. Override any field, or leave it blank for none.
- Scroll to the bottom and select Save Changes.
| Field | What it does | Examples |
|---|---|---|
| Logo & Favicon | Your main logo and favicon, for brand recognition and consistency | PNG or SVG |
| Typography | The fonts used across your site, product, or marketing | Inter, Poppins, Roboto, Helvetica |
| Primary Colors | Main colours used in logos, buttons, backgrounds, and core UI | #635BFF #0A2540 #FFFFFF |
| Accent Colors | Supporting colours for highlights, icons, badges, and secondary UI | #00D4FF #36CFC9 #F5F7FA |
Step 7: The Advanced Brief
The same brief, shown as raw fields instead of guided tabs, with a free-text box for instructions you write yourself.
Why you’d use it: when the guided sections can’t express something specific about how you work, or when you want standing instructions the AI follows on every request.
Instructions:
- Open Agency Brief.
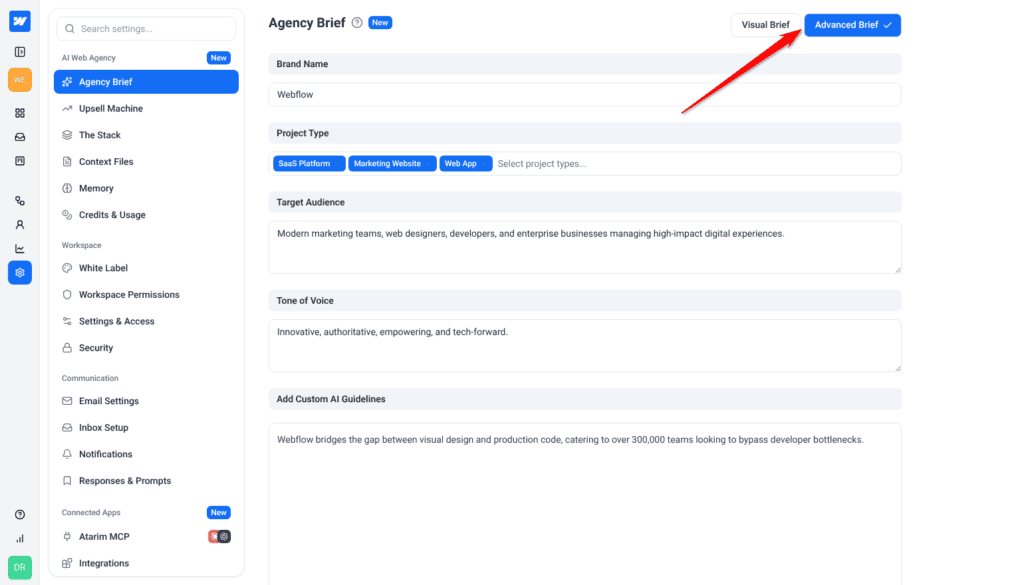
- Select Advanced Brief in the toggle at the top of the page.
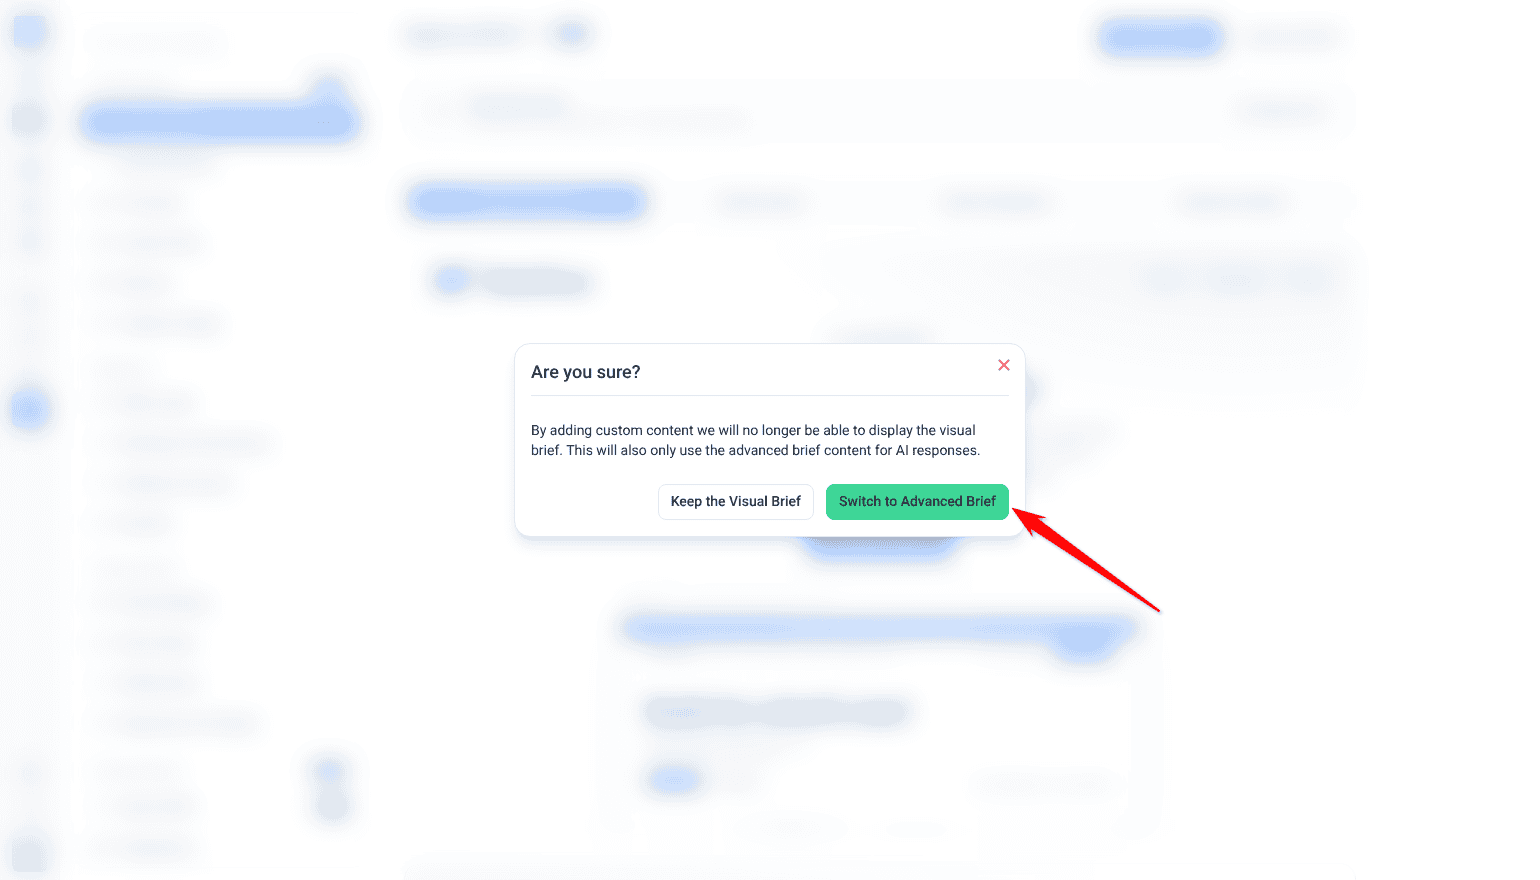
- Read the Are you sure? dialog. It explains the visual brief can no longer be displayed, and only Advanced Brief content will be used for AI responses.
- Select Switch to Advanced Brief, or Keep the Visual Brief to cancel.
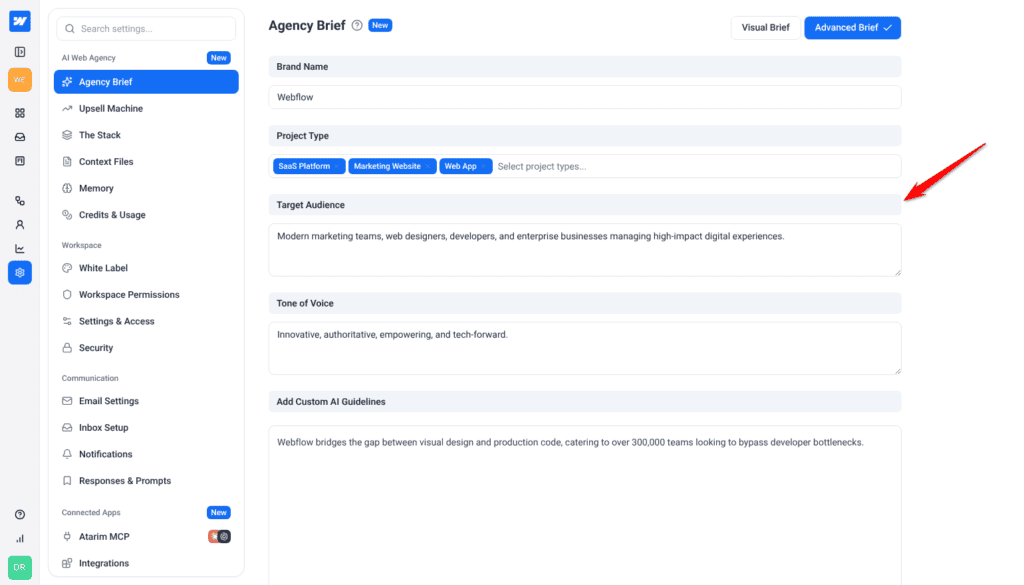
- Complete the fields shown on screen.
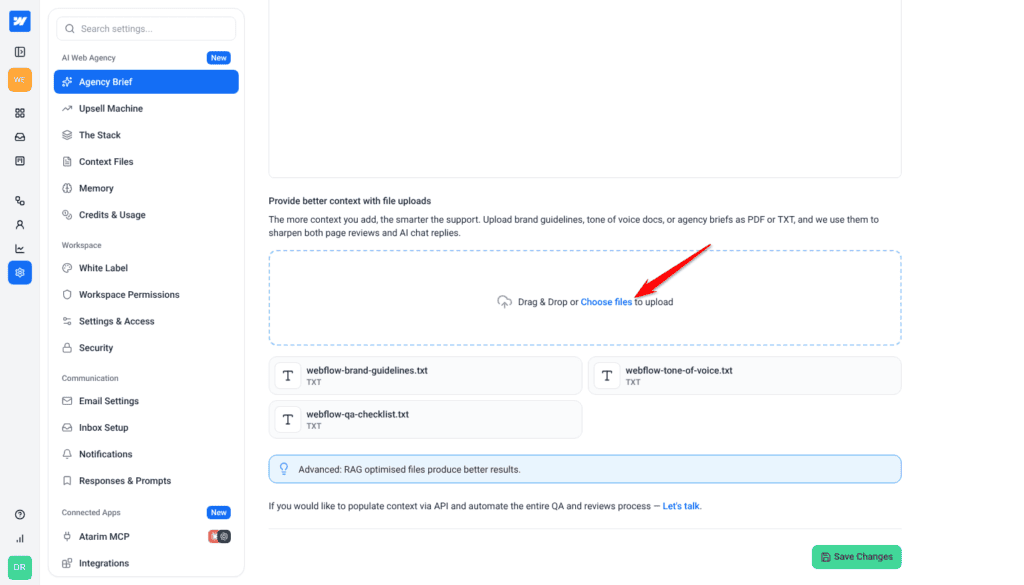
- Optionally add supporting documents in the upload area beneath them.
- Select Save Changes.
| Field | What it does |
|---|---|
| Brand Name | Your company or product name |
| Project Type | The category that best matches your website or business — eCommerce, SaaS Platform, Corporate Website, Web App |
| Target Audience | The users or customers you want to reach |
| Tone of Voice | How your brand should sound in communication |
| Add Custom AI Guidelines | Standing instructions for the AI to follow — “focus on conversion clarity”, “keep messaging concise”, “prioritise trust signals” |
| File uploads | PDF or TXT files providing additional brand or project context |
Step 8: Adding Context Files
A separate library of supporting documents — brand guidelines, QA checklists, tone-of-voice docs, policies.
Why it matters: the AI reads them as background reference during page reviews and chat, so you don’t repeat your standards in every request. Upload a QA checklist once and reviews follow it; upload a privacy policy and you can ask how well a page communicates your data practices.
Uploading Your Files
Context files carry what a brand kit cannot — tone guides, past proposals, anything you would hand a new hire.
Instructions:
- From the main dashboard, select Settings.
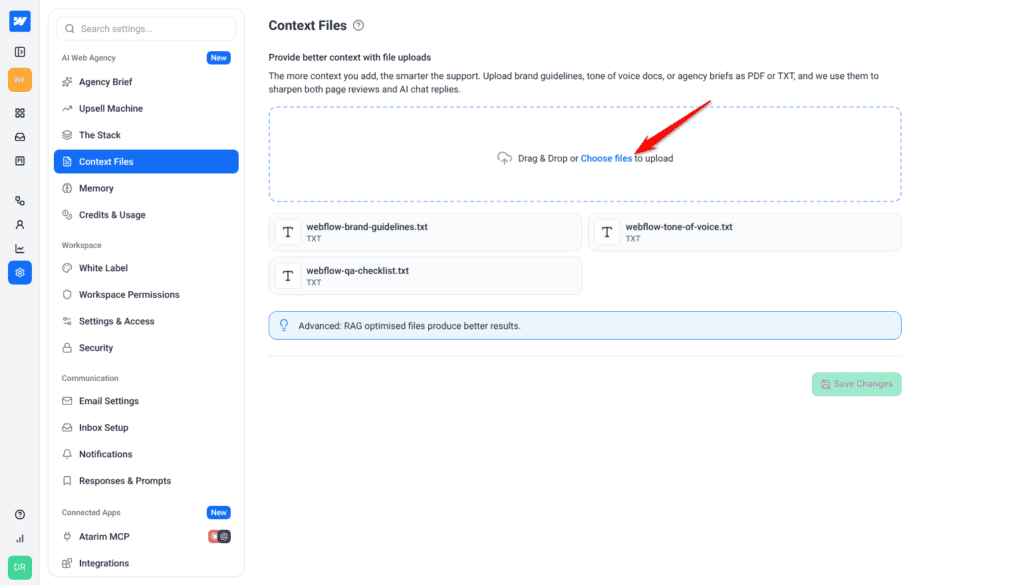
- Under AI Web Agency, select Context Files.
- Find the section headed Provide better context with file uploads.
- Drag files onto the dashed upload area, or select Choose files to browse. While you drag, the area fills with a prompt reading “Drop PDF and TXT files here”.
- Confirm your files appear in the grid below the upload area. Each card shows the filename, the file type in capitals, and a small icon. A message confirms the upload, for example 3 files uploaded successfully!
Step 9: Giving One Client Their Own Brief
A brief that belongs to a single project, separate from your workspace one.
White-label clients and sub-brands need their own voice. A project brief keeps that client’s tone, audience, and brand details attached to their project alone.
Opening a Project Brief
The project brief is the per-project layer, and it overrides the agency-wide brief wherever the two disagree.
Instructions:
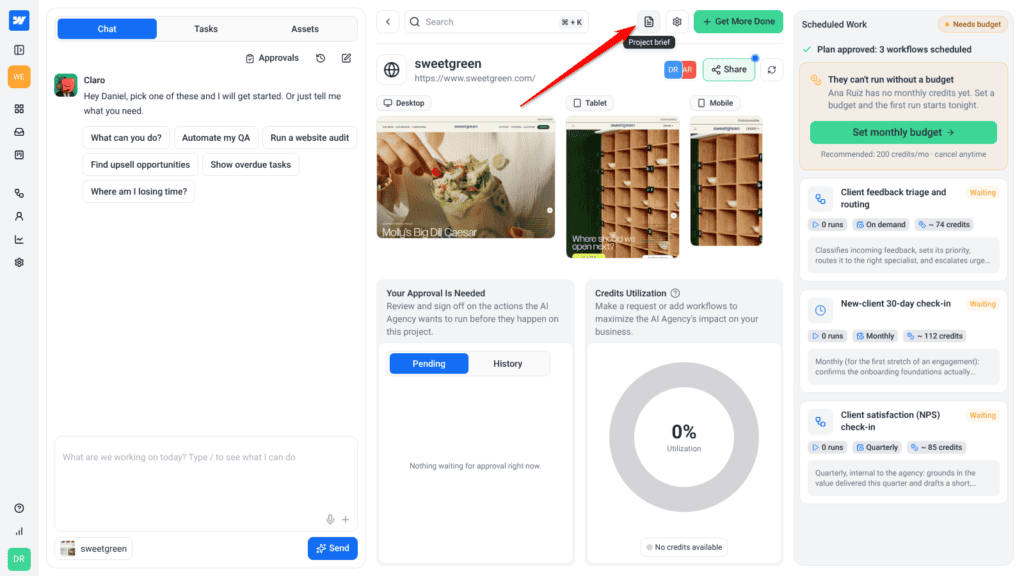
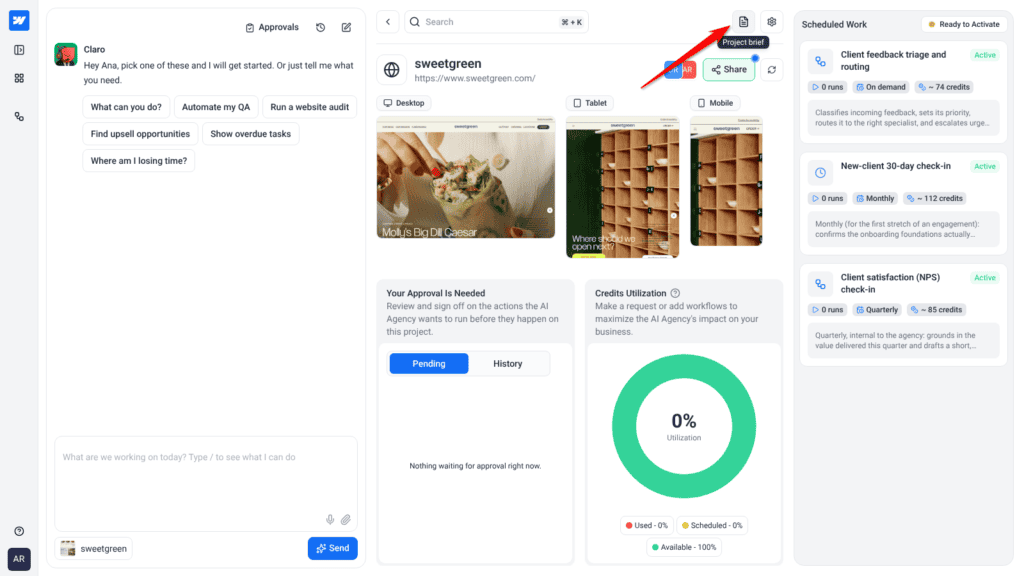
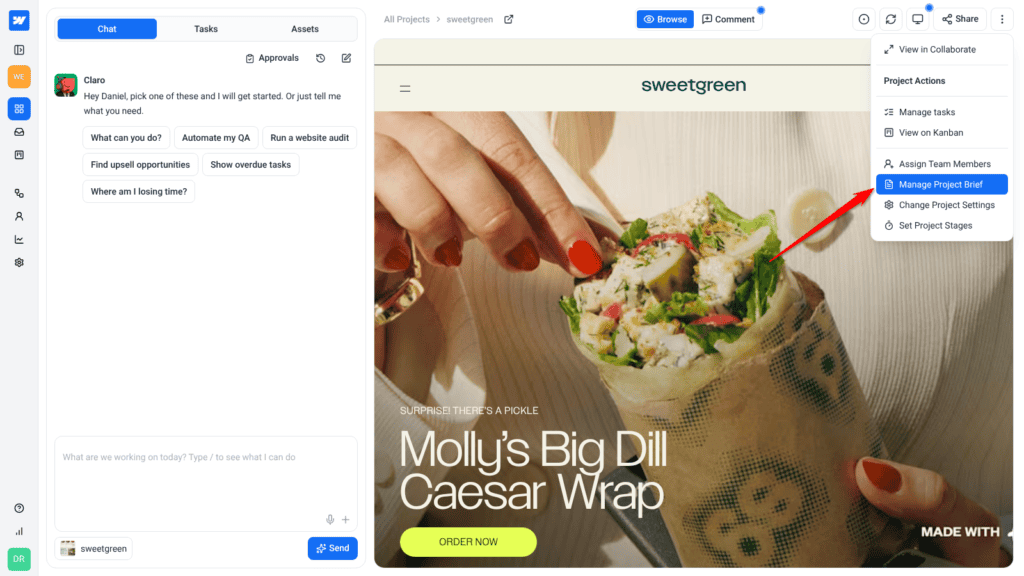
- Open the project’s dashboard.
- In the top bar on the right, select the document icon. Hovering it shows the tooltip Project brief. It sits immediately left of the gear icon for Project settings.
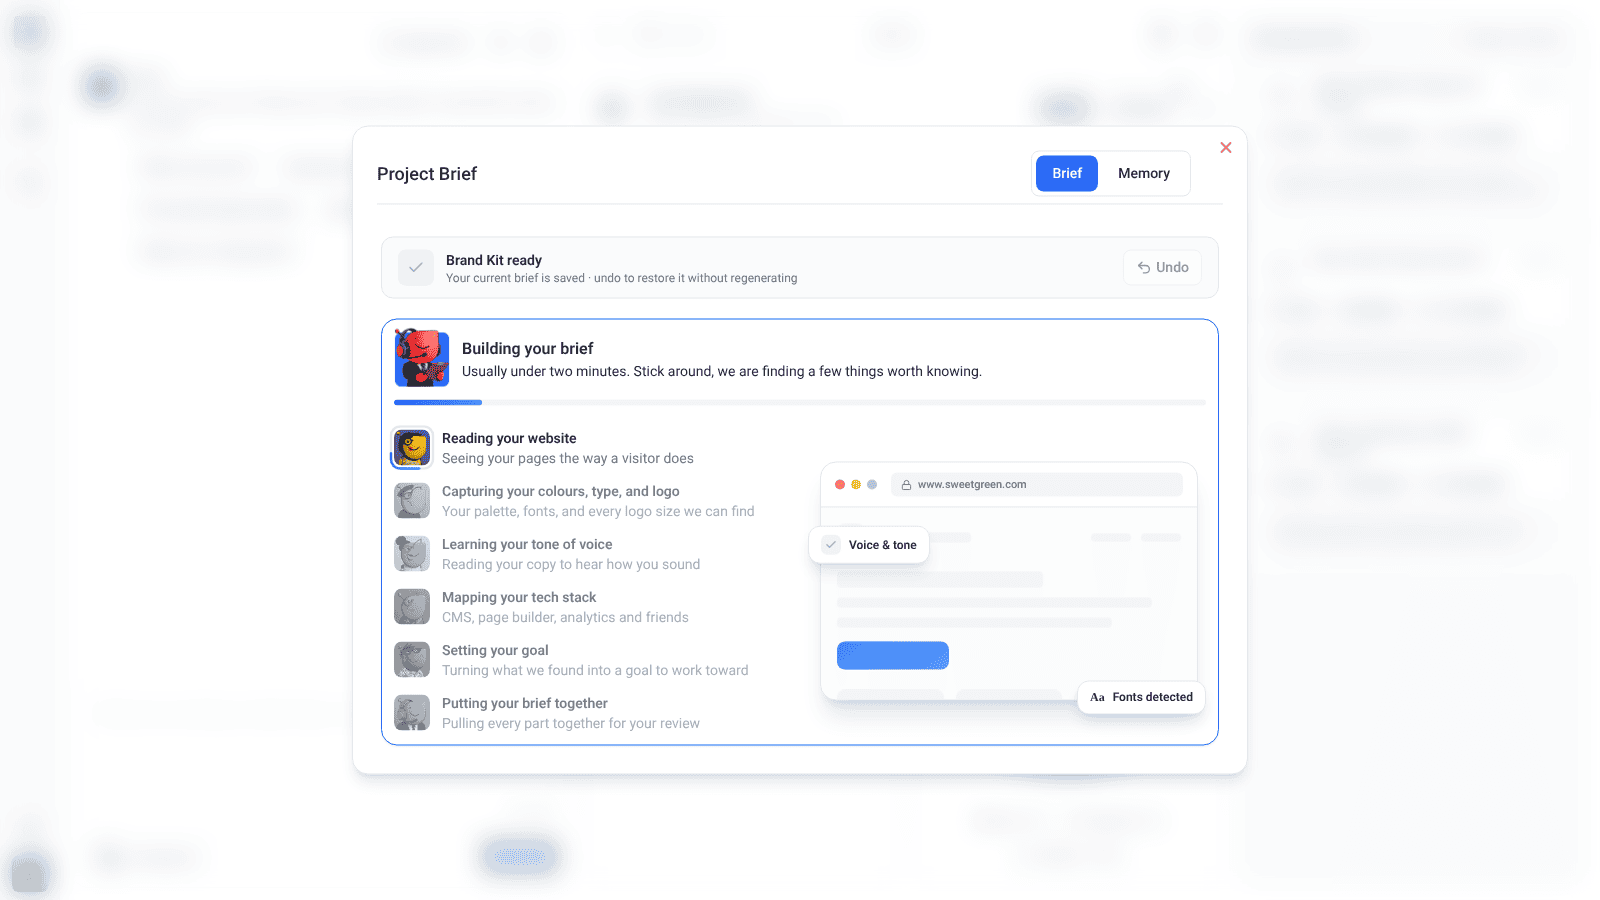
- The Project Brief modal opens.
The Memory tab
The Project Brief window has three tabs: Brief, Stack and Memory. Stack shows only to owners and admins. Memory shows what your AI experts remember about this one project, such as the client’s preferences and constraints. They write to it as they work, so you do not have to repeat yourself.
Instructions:
- In the Project Brief window, select Memory.
- Read what your experts have saved. To change it yourself, select Edit, make the change and select Save file.
- To ask for a change in plain language, write it under Notes for your experts. Your experts fold it into the memory in the next sweep.
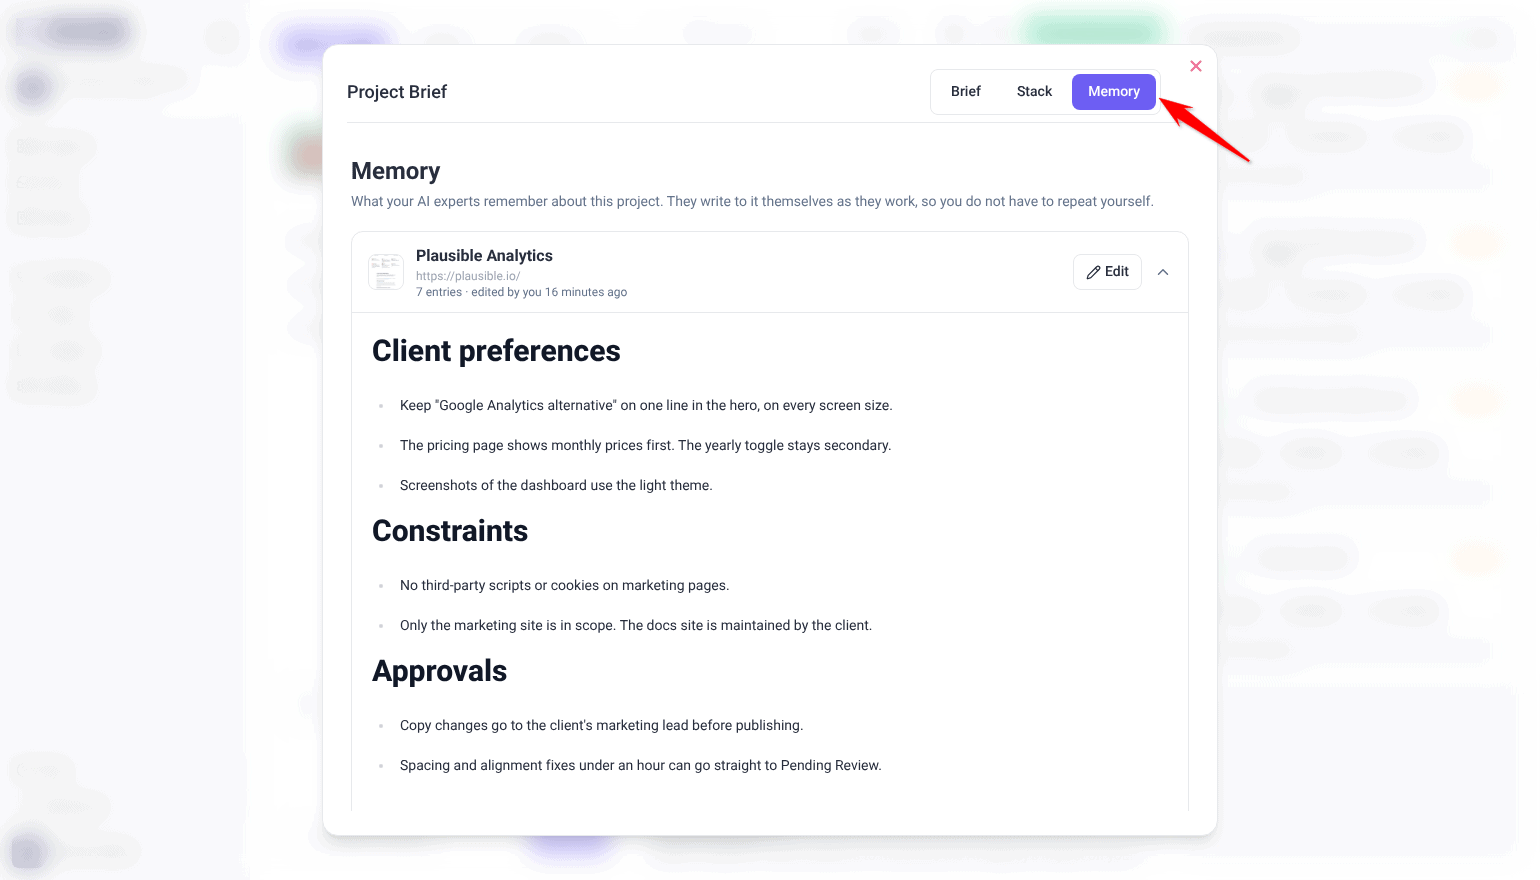
A project’s memory is read in task chats on that project, along with your workspace memory when it bears on the request, and where the two disagree, the project memory wins. The same memory is under Settings › Memory, with every other project’s. See Memory.
Step 10: Setting Your Own Profile
Your role and experience level, held on your user profile rather than in the brief.
Why it matters: your role sets what you can do; your experience level sets how things are explained to you. It’s deliberately separate from brand voice — anything a client sees follows the brief regardless of your setting.
Instructions:
- Select your avatar at the foot of the sidebar, then View Profile.
- Under Which of these describe you best? (Select all that apply), choose every role that applies.
- Scroll to Level of experience and pick one.
- Your selections save automatically.
| Experience level | What changes |
|---|---|
| I’m a beginner | Clear, supportive feedback with detailed explanations of why |
| I’m an intermediate | Balanced, practical advice that builds on existing knowledge |
| I’m an expert | Advanced, detailed feedback with technical depth |
| I’m the final boss | Concise, high-level insights and strategic recommendations |
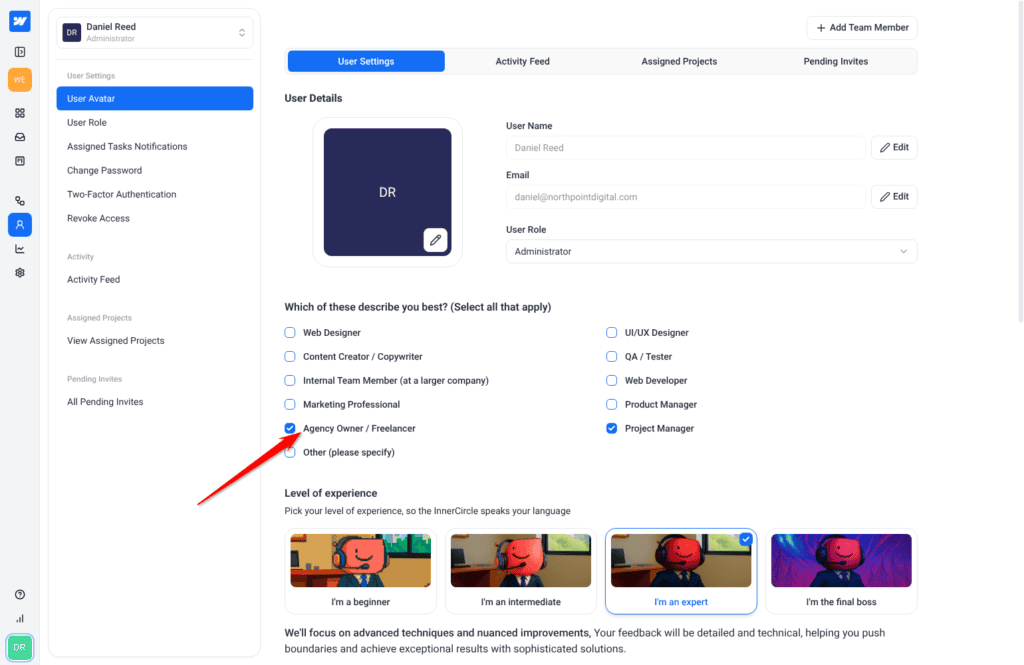
The role options are: Web Designer, Content Creator / Copywriter, UI/UX Designer, QA / Tester, Web Developer, Product Manager, Project Manager, Marketing Professional, Agency Owner / Freelancer, Internal Team Member (at a larger company), and Other (please specify).
FAQs
Does generating a brief use credits?
Yes. Generating is an AI action and draws on the same pool as page reviews, task chat, and workflows. It appears in Settings > AI Web Agency > Credits & Usage as “generated brand guidelines”, with the person who ran it and the date. Editing fields by hand costs nothing.
What happens if I run out of credits?
In a Project Brief, Generate Brief becomes unavailable, but the brief itself doesn’t lock. You can still build or correct it by typing into the fields directly.
The generated brief describes the wrong company. What now?
Run it again. It sometimes finds a different brand with a similar name, and generating once or twice more usually lands on the right one. That’s faster than correcting every field by hand.
Generation failed. What does that mean?
The set-up view shows We could not read this site. with “The page blocked our crawler or timed out. Check the URL is public and try again.” underneath, and the button changes to Try again. Submitting with an empty field shows “Please enter a URL” instead. Neither state loses anything you’d already entered. A firewall, WAF or IP restriction can present as any kind of read failure, so if your site sits behind one, see how to whitelist Atarim.
The brief generated but the colours and fonts are wrong.
That is a different state from a failed generation. The status bar reads Brand assets unavailable and says the brief below is still usable, but its colours, fonts and logo are not the real ones. Regenerate to try again.
What happens if I leave my Agency Brief empty?
The AI has nothing specific to match, so it falls back to generic defaults for things like colour and type. It still won’t invent real-world values — an email address, phone number, price, or statistic left unrecorded is omitted from published content rather than faked.
What’s the difference between the Visual Brief and the Advanced Brief?
They’re two views of the same brief. The Visual Brief is a guided editor split into four tabs and is the default. The Advanced Brief shows the raw fields plus a free-text box for standing instructions you write yourself. Start with Visual and move to Advanced only when the guided sections can’t express something.
Will I lose my work if I switch to the Advanced Brief?
Atarim warns you first with an Are you sure? dialog. Once you switch, only the Advanced Brief’s content feeds AI responses, and switching back may lose some or all of the detail you entered. Copy anything you want to keep before switching either way.
Does a project brief inherit from my Agency Brief?
No. A project brief never copies your Agency Brief. When you add a project with a URL, Atarim drafts its brief from that site in the background; otherwise it starts empty. It also means editing your workspace brief never updates a project brief that already exists — client briefs are maintained per project.
Does turning off Enable Global Settings change a project’s brief?
No. That switch lives in Project Settings. Turning it off lets the project have its own white label and its own Project Permissions. The brief is separate and is always specific to the project.
Do I need to save after uploading a file?
No. Files upload and save as soon as you add them, and a message confirms it. Removing a file deletes it straight away.
Does my experience level change what my clients see?
No. Your role and experience level sit on your own user profile and adjust how things are explained to you. They don’t affect how the AI talks to anyone else on your team, and they never change client-facing copy — that always follows the brief.
There’s no save button on my profile. Are my selections saving?
Yes. Roles and experience level save on their own about two seconds after you stop making changes. Pause briefly before navigating away, or the last change won’t stick.