How To Create Task In Atarim
Ten ways a task gets created — the ones you trigger, and the ones that happen on your behalf.
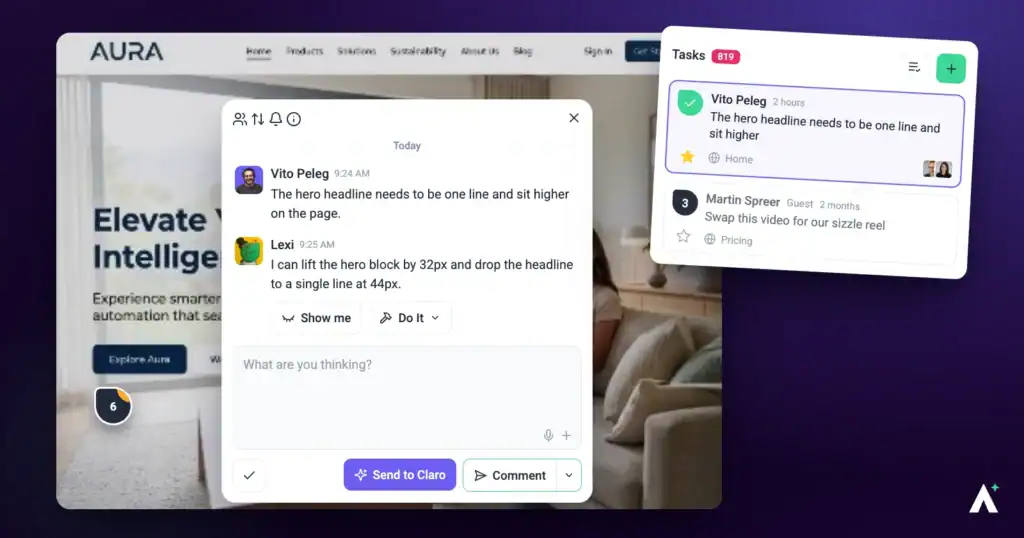
Tasks land in the same underlying system no matter how they start. Some you create directly — a click on a page, a form in the Inbox, a message to the AI. Others arrive without anyone opening Atarim, because a review found something, an email came in, or an automation ran on schedule.
Once a task exists, everything works the same way regardless of how it started. Managing it from there is covered in How to Manage Tasks in Atarim.
Where You Can Leave Feedback From
You’re rarely required to go anywhere specific to create a task.
- Inside the dashboard. Opening a project shows the page in place, right there instead of the project grid. This is the default and covers most day-to-day work — no new tab, nothing to install, nothing to log into.
- On any website, using the Chrome extension. Leave feedback on a site that isn’t set up as a project yet and hasn’t had anything installed on it. Useful for competitor research or a site you’ve just been handed. See How To Install The Atarim Chrome Extension.
- On your WordPress site, using the plugin. Feedback left on the site itself arrives as tasks in Atarim. See Introducing the New Atarim WordPress Plugin.
- Through a shared link. Recipients can leave feedback without an Atarim account. Covered in Method 6.
- Inside Figma. Comments on a linked Figma file arrive as Atarim tasks. Covered in Method 2.
Whichever surface you’re on, the task that gets created is the same, and it lands in the same Inbox and Boards.
Step-by-Step Guide
Atarim supports multiple ways to create tasks, combining human feedback with AI-powered reviews to ensure clarity, context, and speed.
Method 1: On a Live Page
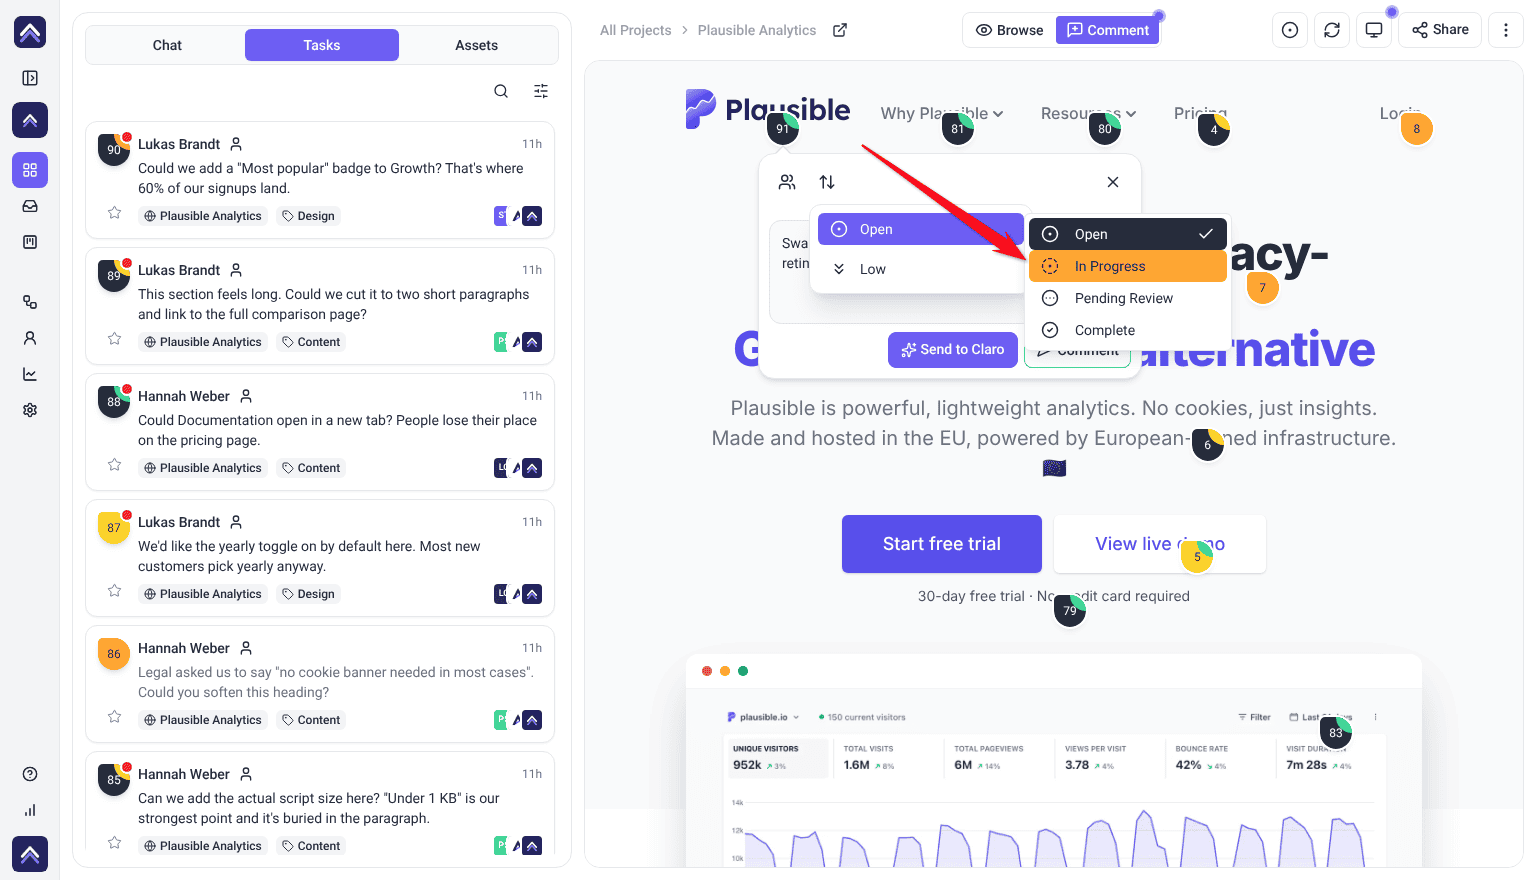
Leave a comment on any live web page and it becomes a task automatically. Atarim captures a screenshot and highlights the exact area you clicked. This removes ambiguity and helps your team understand exactly what needs to be addressed.
You don’t need to open the website separately to do this. Opening a project shows the page in place, right there on the Projects screen instead of the project grid, with the AI chat panel alongside it.
Instructions:
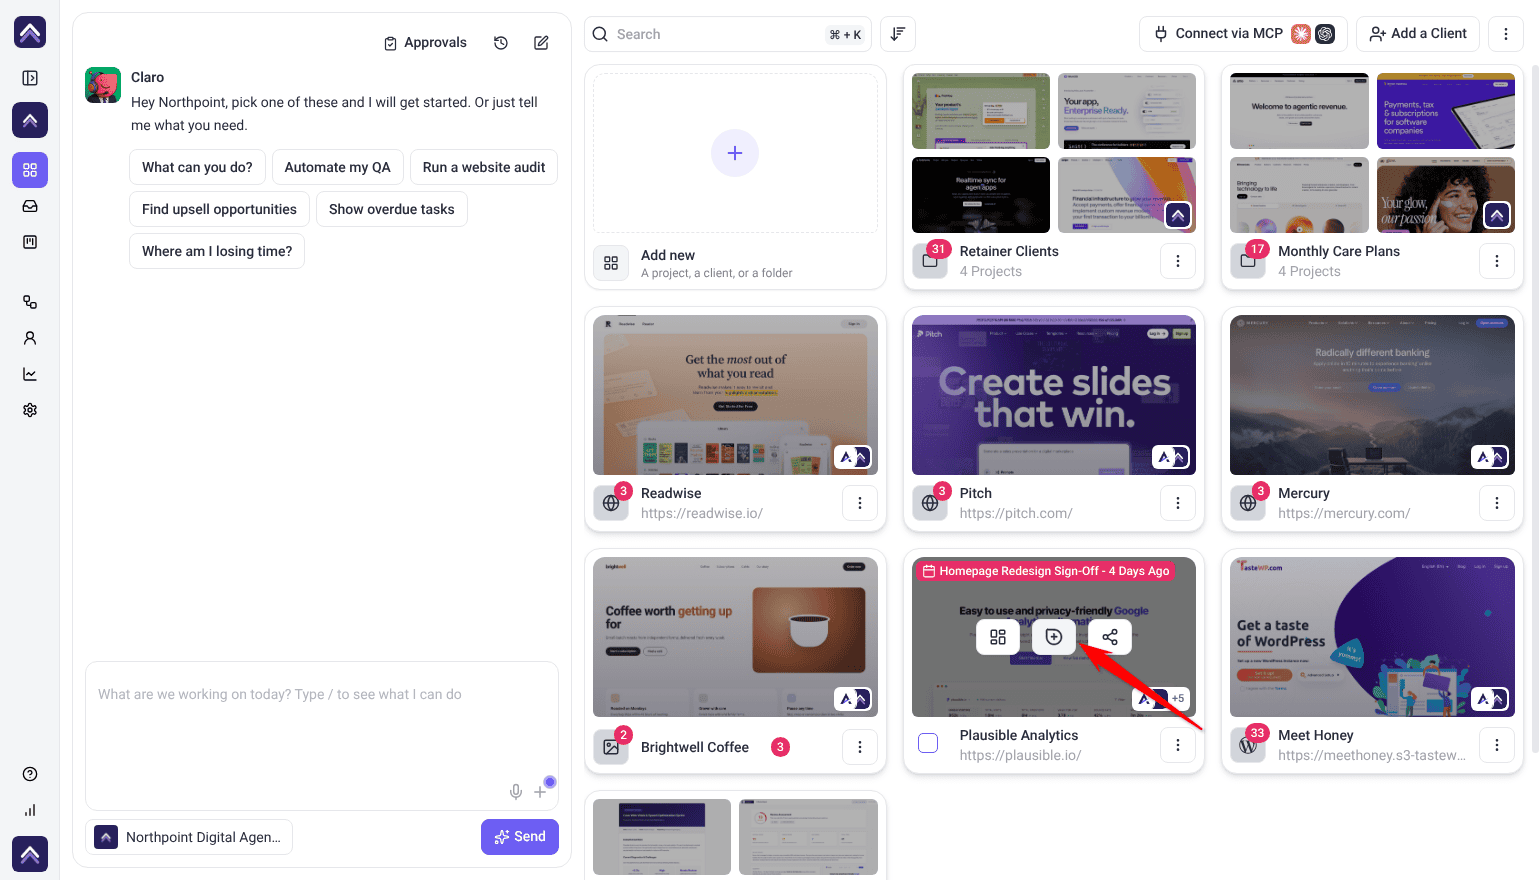
- On the Projects screen, hover over the project card’s preview and select Open. The page opens in place.
- The page opens in Browse mode so you can click around it normally without leaving feedback.
- When you’re ready to comment, switch to Comment using the Browse/Comment toggle in the bar above the page.
- Click anywhere on the page — directly on the element you want to comment on.
- Type your comment and submit it.


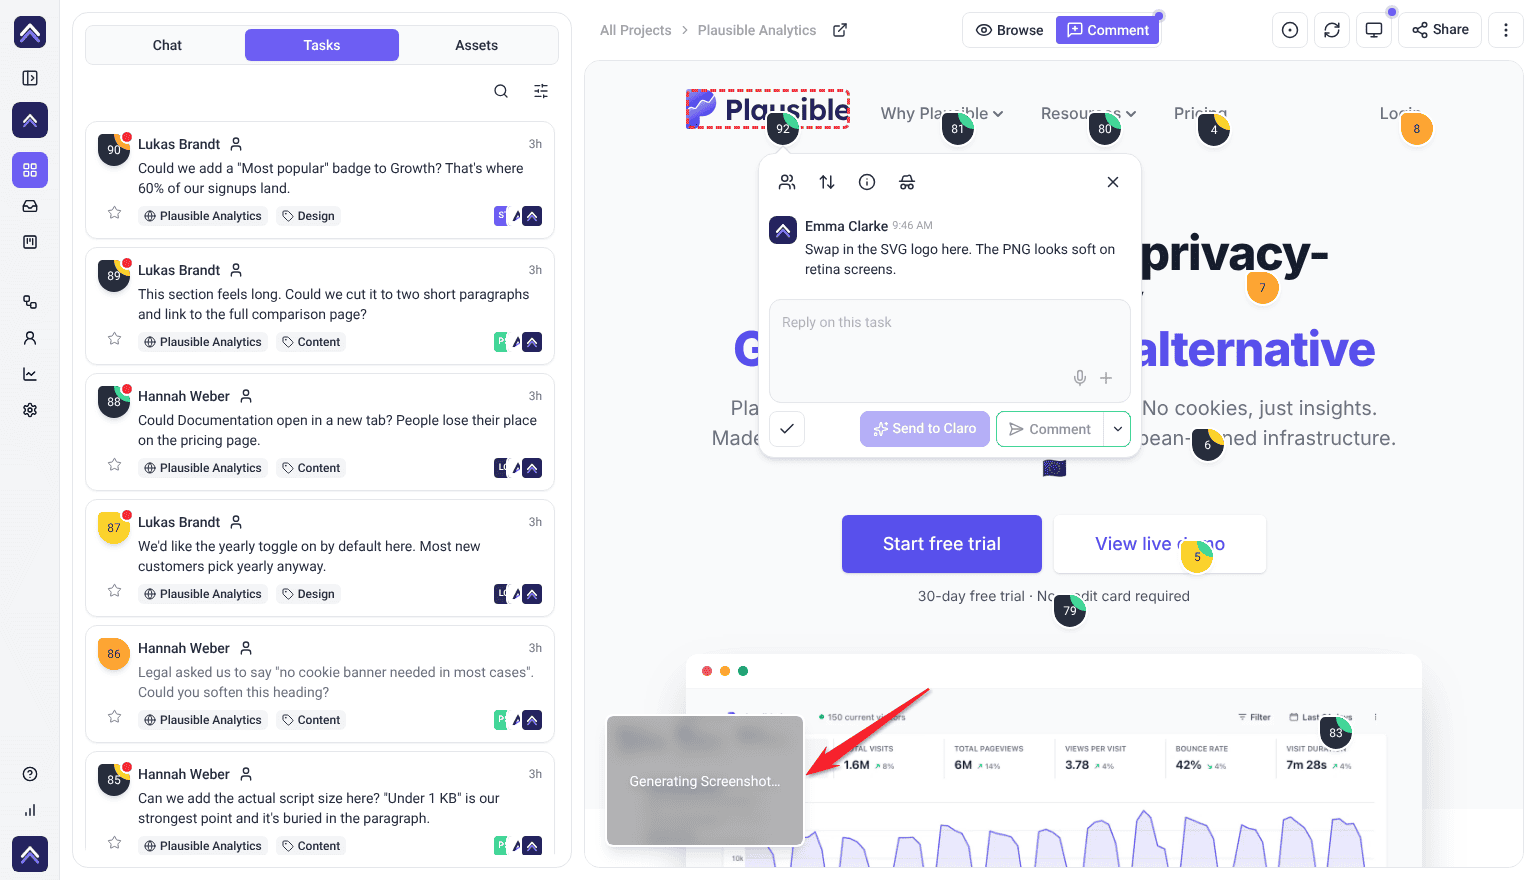
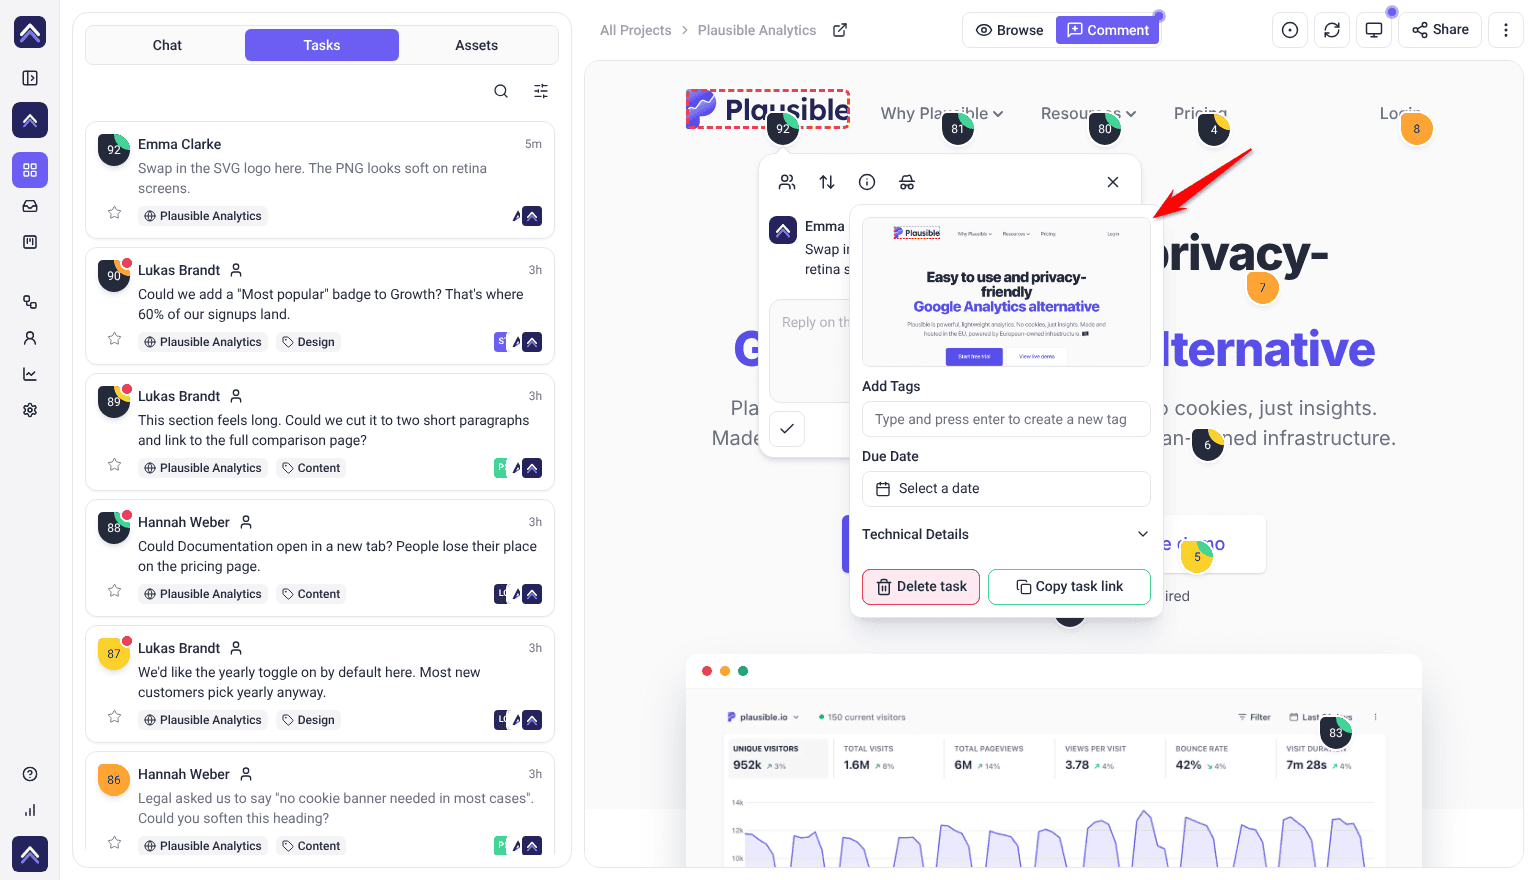
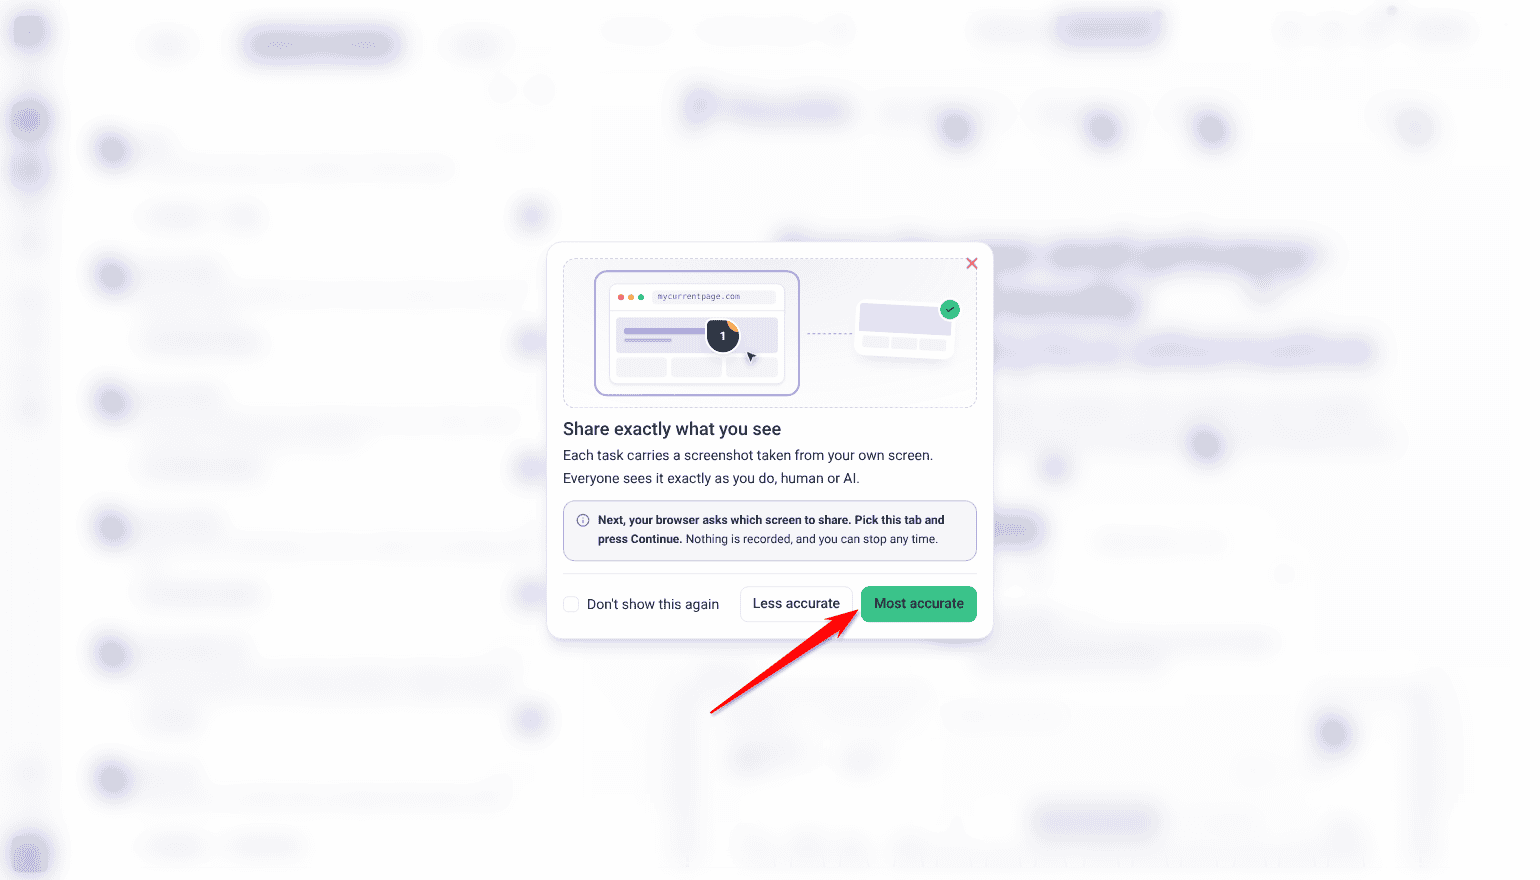
Exact screenshots in Chrome and Edge. In Chrome, Edge and other Chromium-based browsers, Atarim can take the screenshot from your own screen, so it shows exactly what you see, including pages you are logged in to. When you post a comment on the page, a card titled Share exactly what you see appears. Select Most accurate, then pick this tab in your browser’s sharing window. Nothing is recorded, and you can stop sharing at any time.
Select Less accurate, or use another browser, and Atarim takes the screenshot from the page’s address instead, which may not match your screen exactly, for example on a page behind a login. The card comes back the next time you open the page unless you tick Don’t show this again. If nothing happens on the page for about two minutes, a Still working on this page? card switches sharing off unless you select Keep capturing.

Method 2: On a Design or Image Project
The same pin-and-comment mechanic works on uploaded designs and images, not just live web pages.
Instructions:
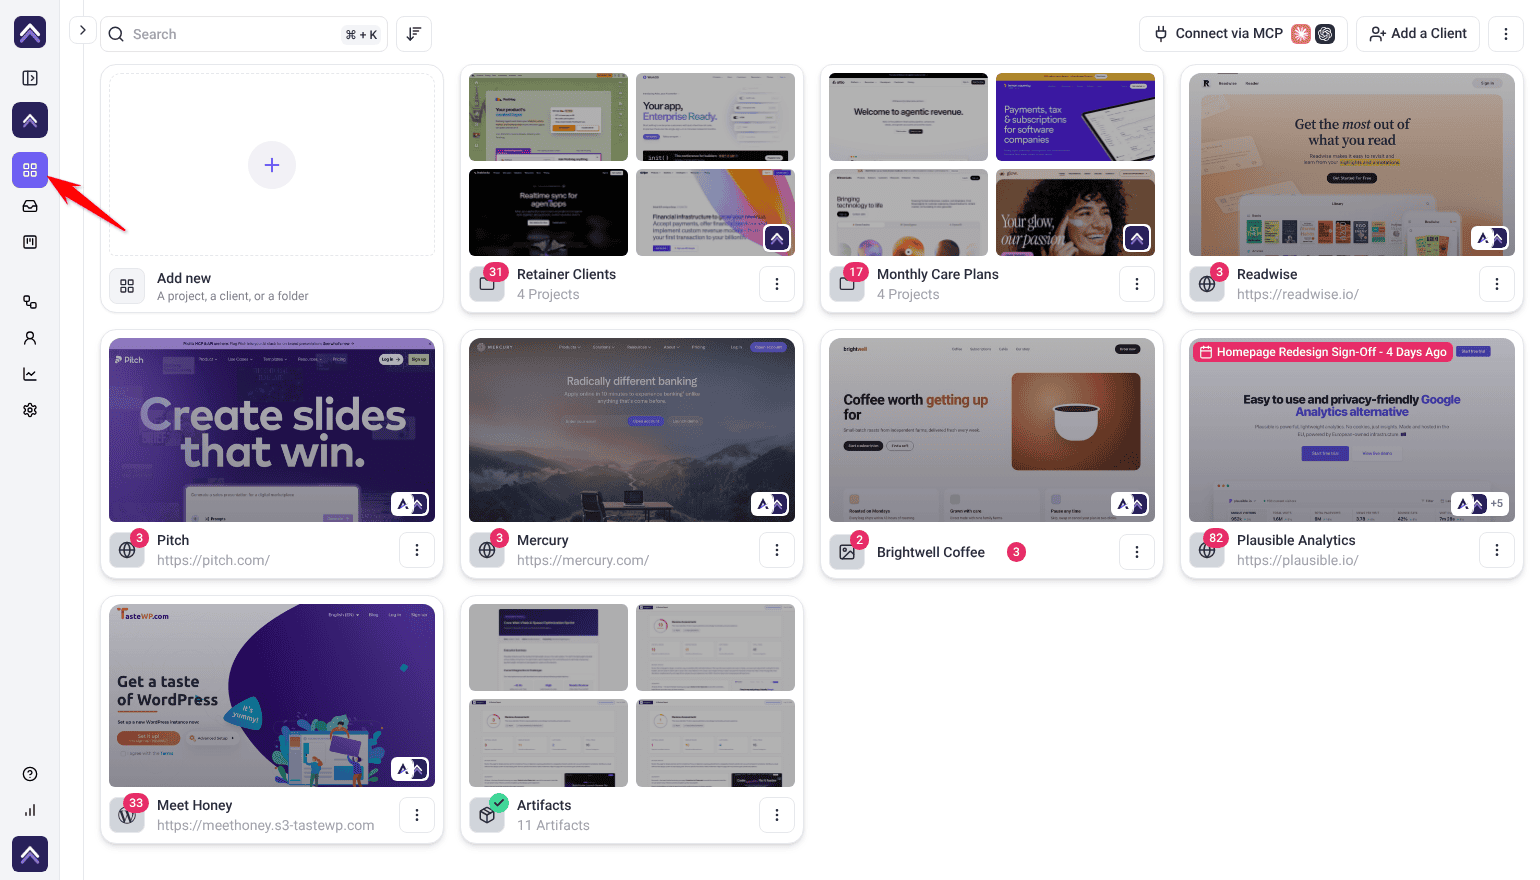
- In the left sidebar, select Projects.
- Select Add new, the first card in the project grid.
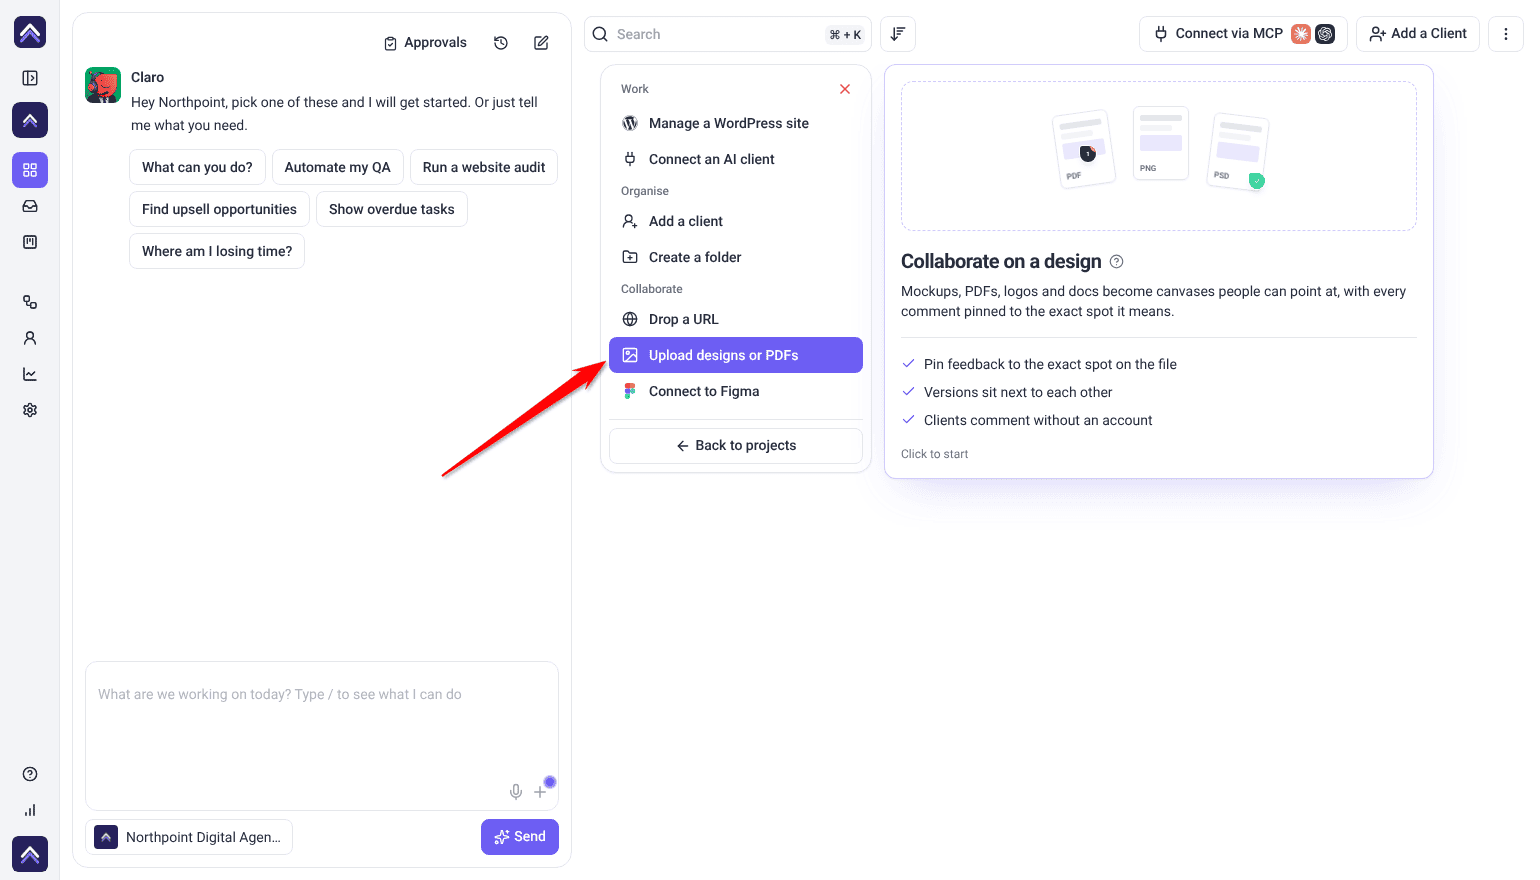
- Choose Upload designs or PDFs to upload files, or Connect to Figma to import from a Figma link.
Option A — Upload your design files
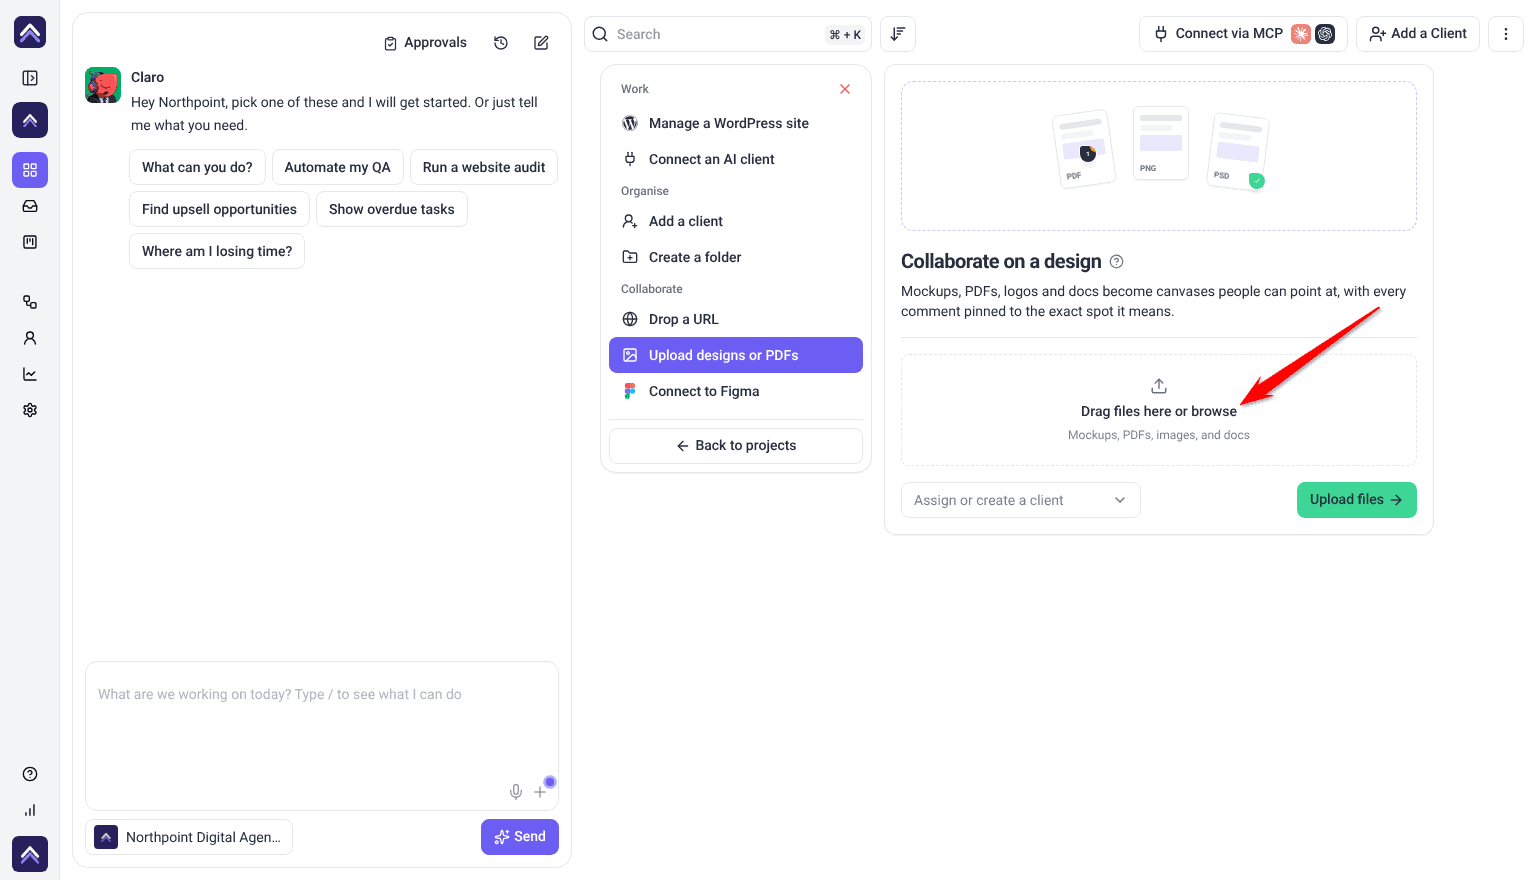
- Drag your files onto the drop zone, or select browse to pick them.
- You can add up to 20 designs at a time, each under 20 MB: JPG, PNG, GIF, PDF, Adobe (AI, PSD, EPS) and AutoCAD (DWG, DXF) files.
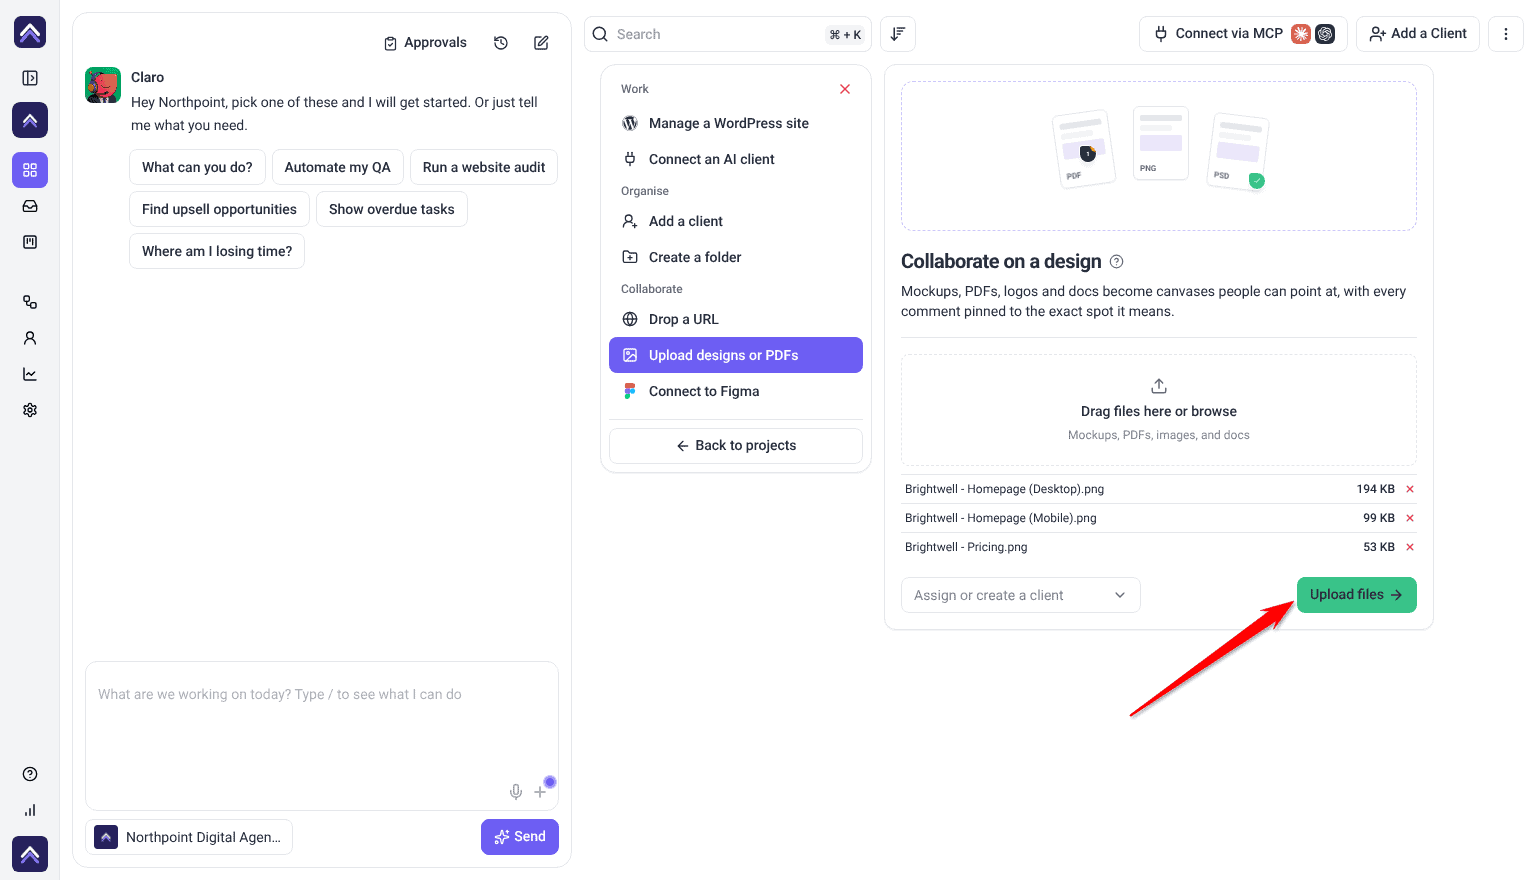
- Select Upload files. The project opens straight away while the files finish uploading. All the files go into a single multi-page project, and you can add more later.
Option B — Import from Figma
- Select a frame in Figma and copy its URL. Leaving no frame selected imports the full page.
- Paste it into Figma link and select Import from Figma.
- To push designs from inside Figma instead, select Install Figma plugin to get the Atarim Figma plugin.
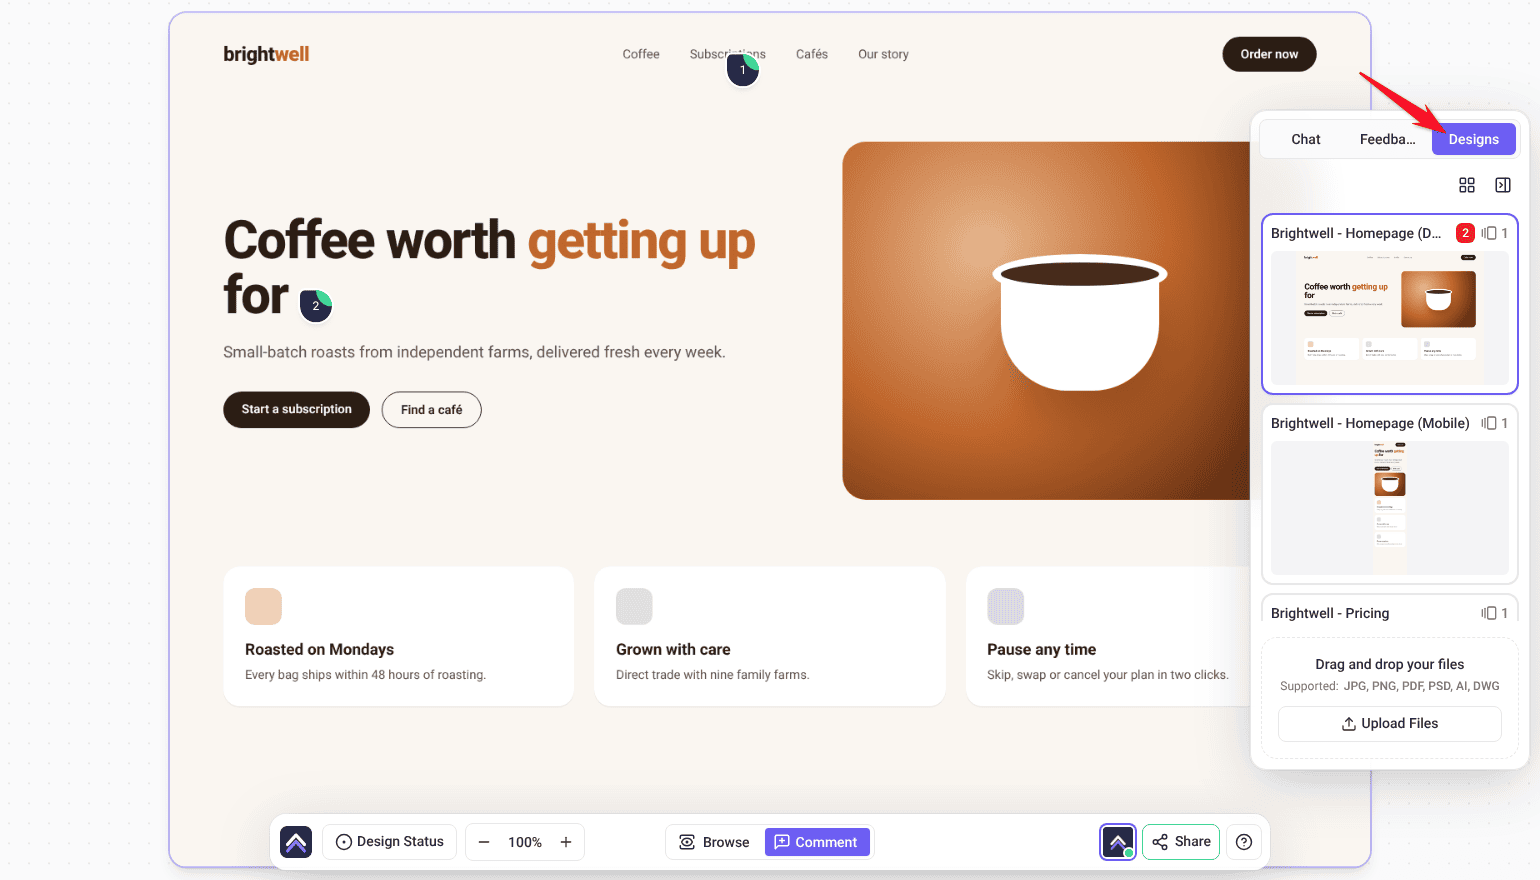
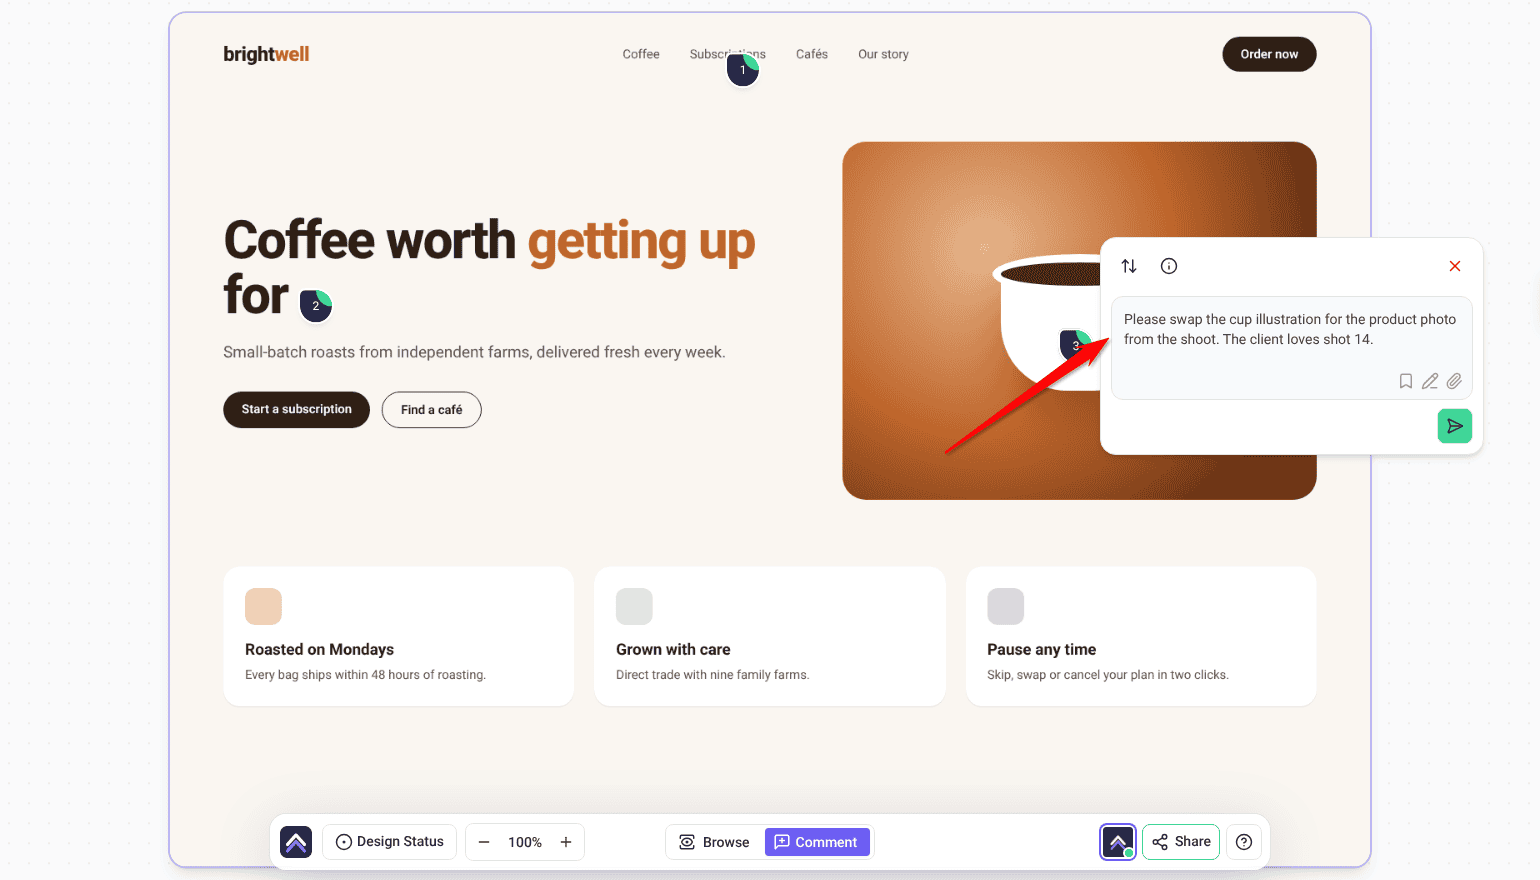
Once the project exists — creating a task on the design
- Open the design project you just created.
- Click on the design at the exact spot you want to comment on.
- Type your comment and submit it.
- A task is created automatically, pinned to that point on the design, with the surrounding area captured.
Once Figma is connected, comments arrive as tasks
You don’t have to leave Figma to create work. A comment left on a linked Figma file arrives in Atarim as a task on that design project, so nobody has to copy feedback across.
Method 3: From a Board Column
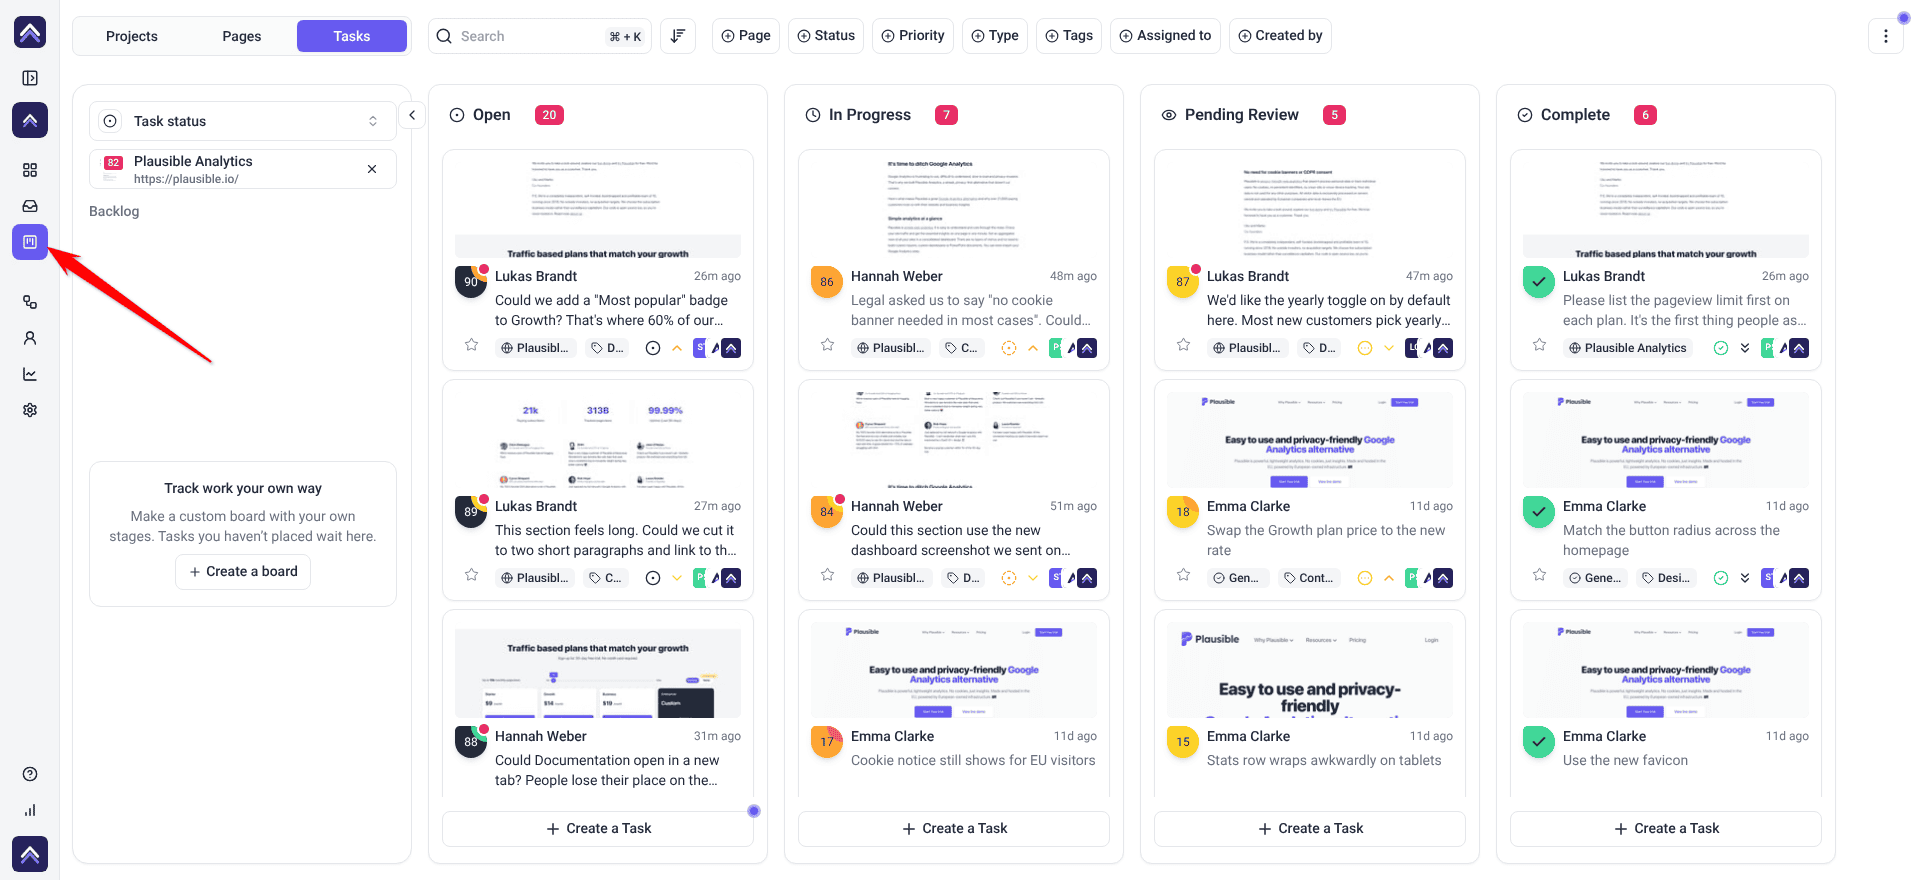
On the Task status board, each column is a status, and you can create a task straight from one — it opens already set to that column’s status.
Instructions:
- Open Boards from the left navigation.
- Select the Tasks tab, then choose a board from the board picker at the top of the left panel, such as Task status.
- Find the column that matches the task’s starting status: Open, In Progress, Pending Review, or Complete.
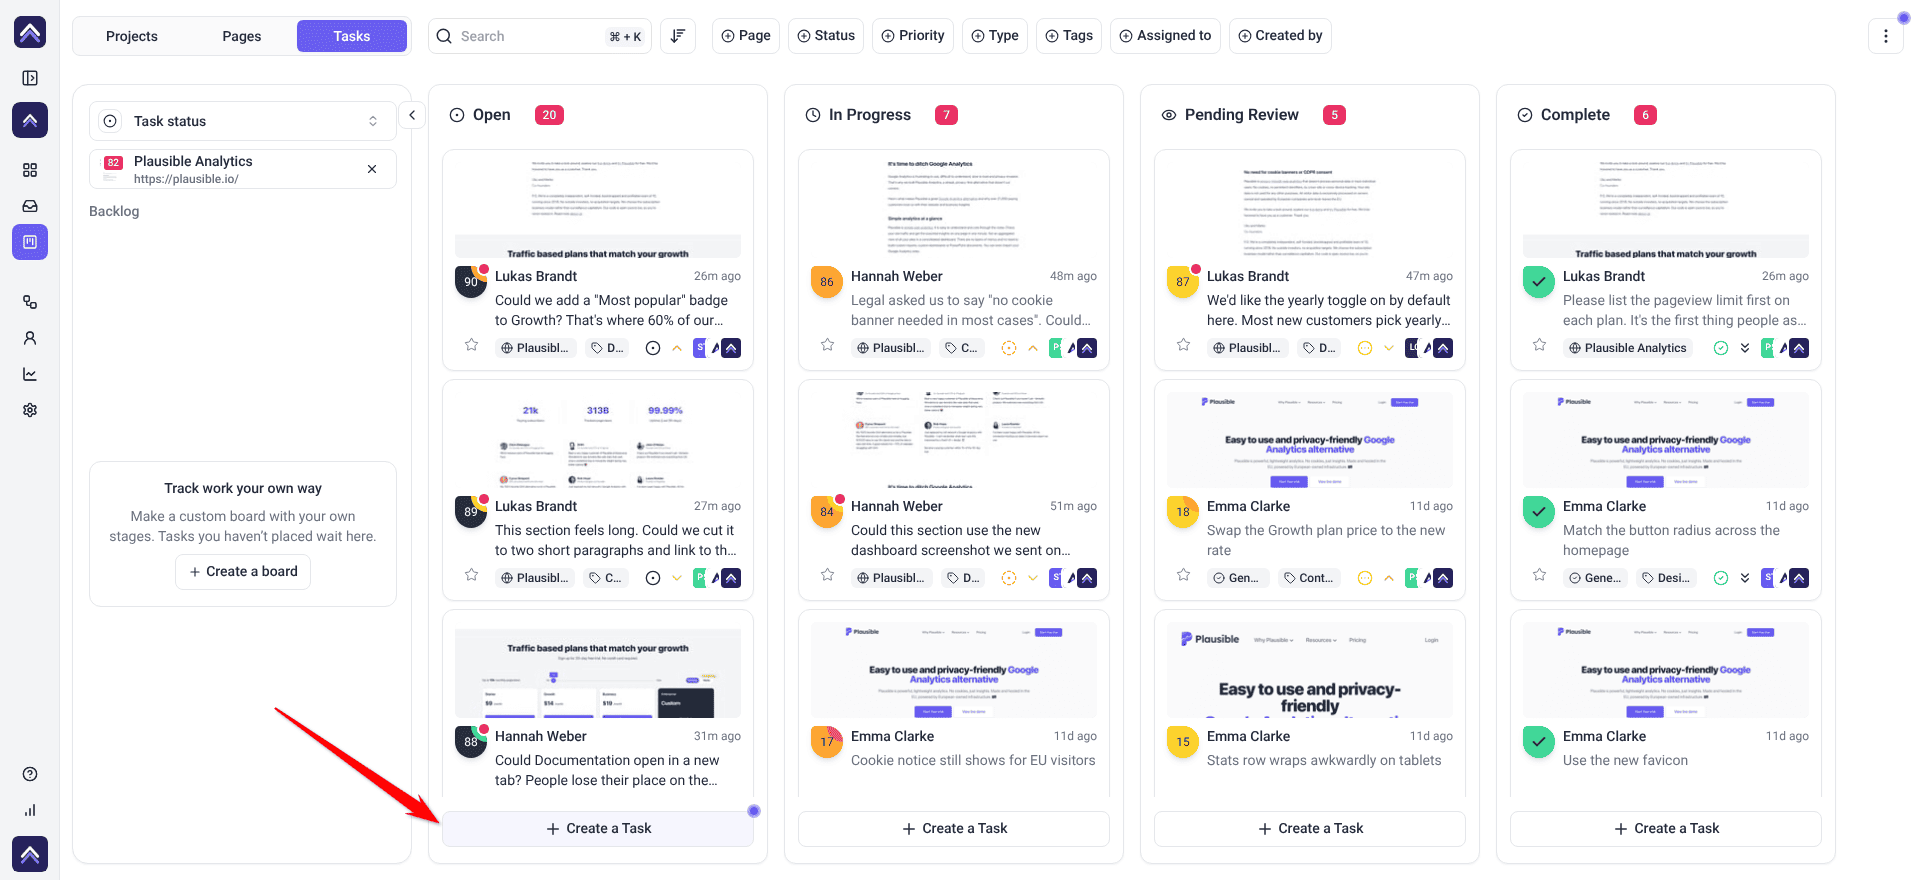
- Click Create a Task at the bottom of that column.
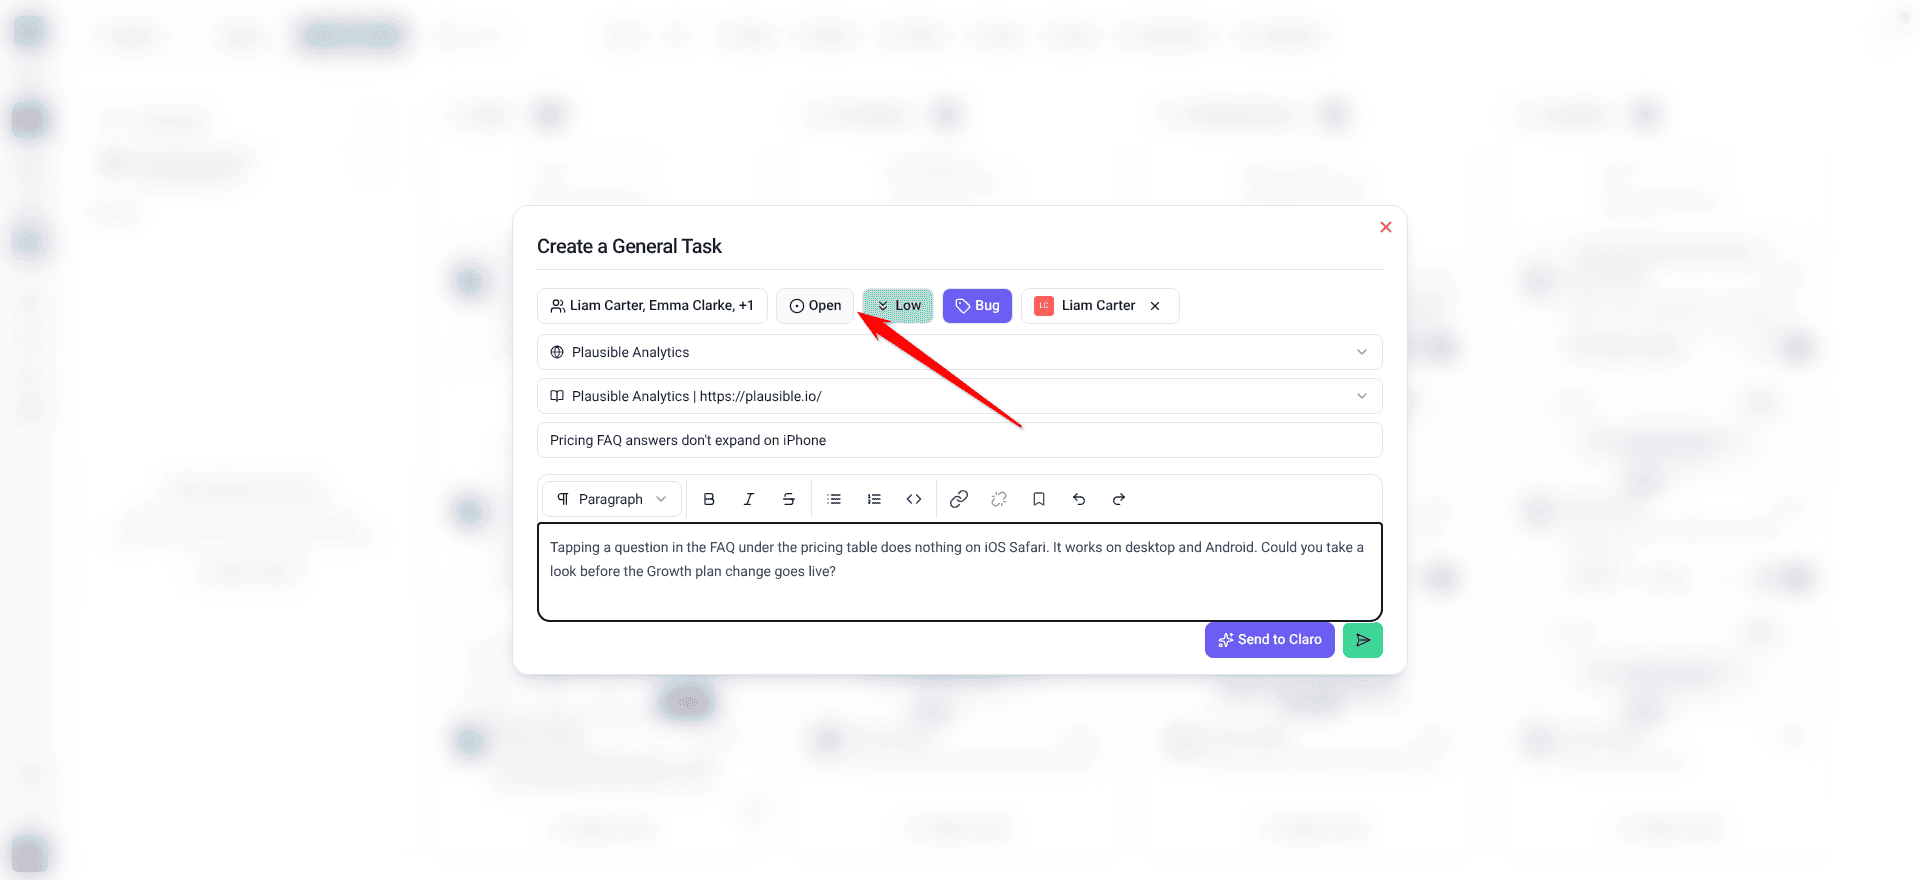
- In the Create a General Task window, review the prefilled status. It automatically matches the column where you created the task.
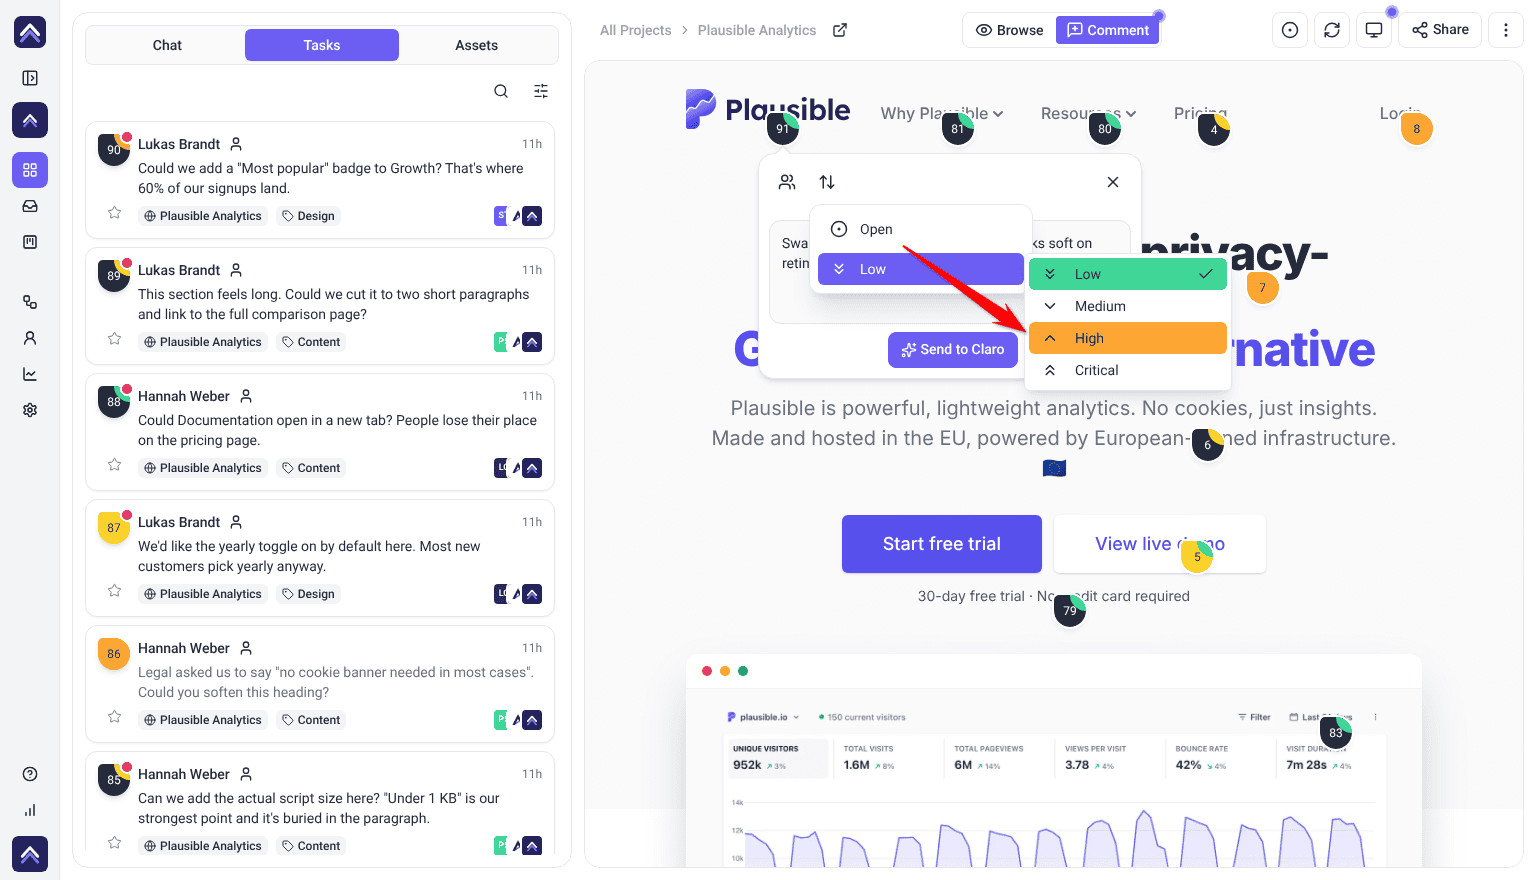
- Select the task priority, tags, and assignee.
- In Select a Site, choose the project, then the page in Select a page.
- Enter a clear title in Task Title.
- Add the task details or instructions in the message field.
- Select the send (arrow) button to create the task, or Send to Claro to hand it straight to the AI.
A task created from a board column automatically uses that column’s status. For example, creating it from In Progress sets the task status to In Progress.
Method 4: From the Inbox
The Inbox has a built-in way to add a general task, handy for work that isn’t tied to a specific spot on a page or design.
Instructions:
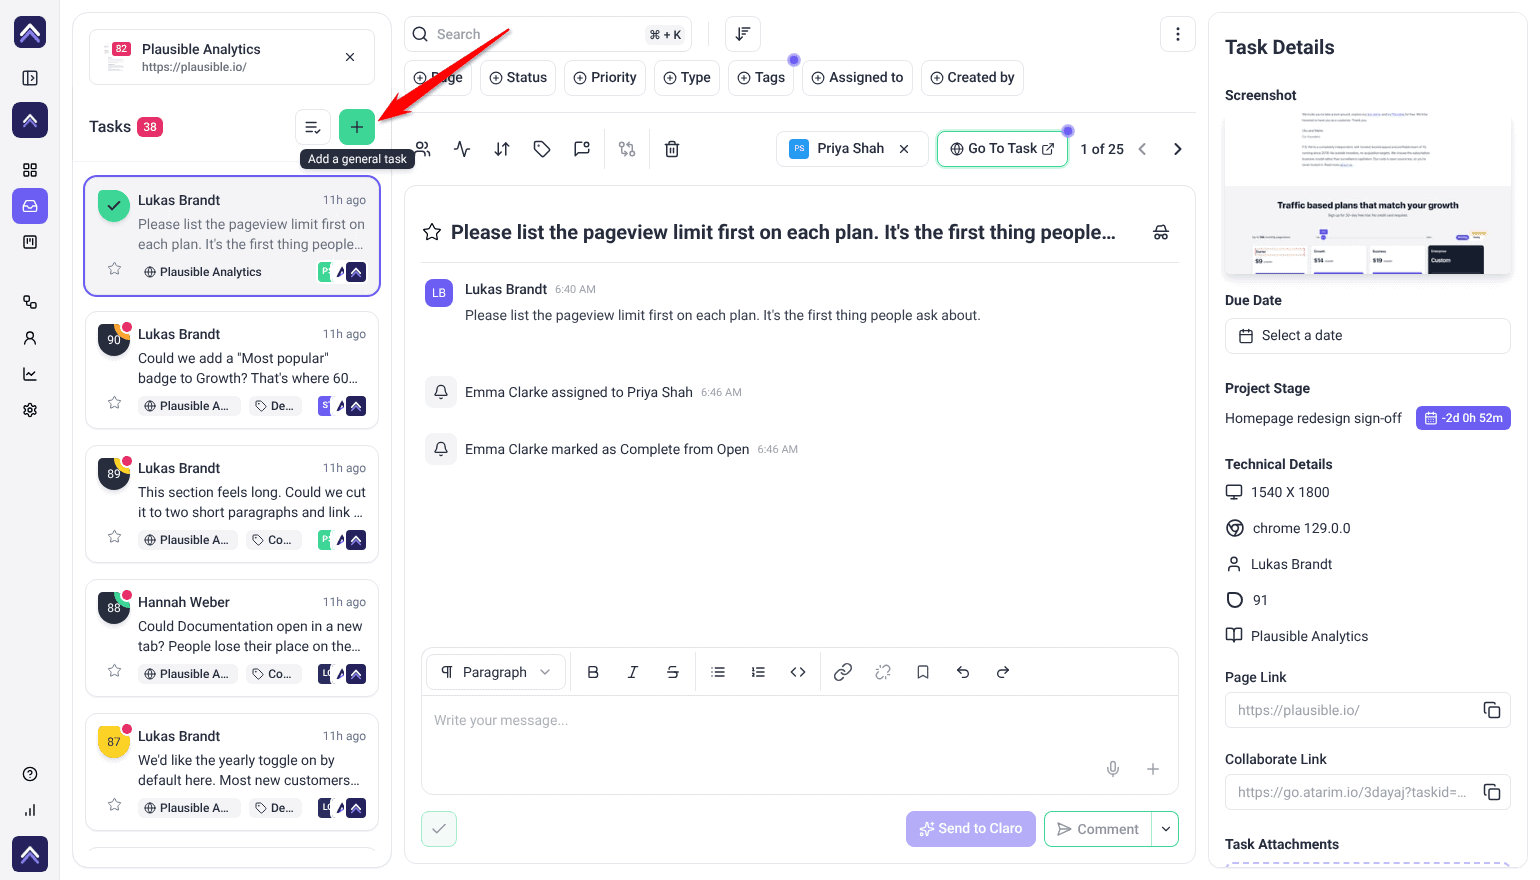
- Open Inbox from the left navigation.
- Click the + button beside the task list to add a general task.
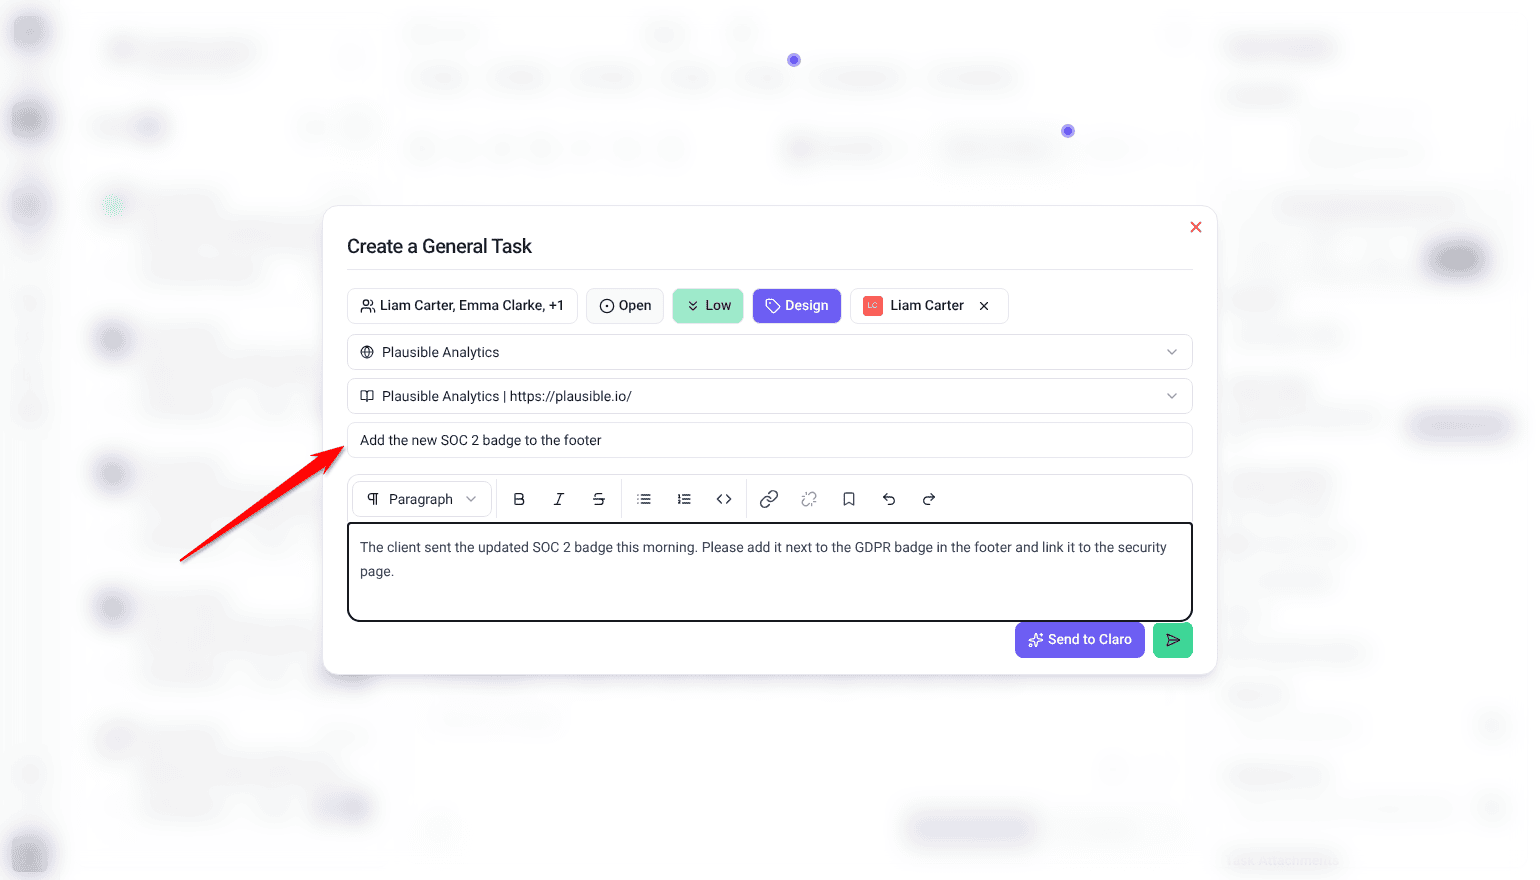
- In the Create a General Task window, select the people who should be notified about the task.
- Choose the task status, priority, tags, and assignee.
- In Select a Site, choose the project where the task should be created.
- In Select a page, choose the relevant page for the task.
- Enter a clear title in Task Title.
- Add the task details or instructions in the message field.
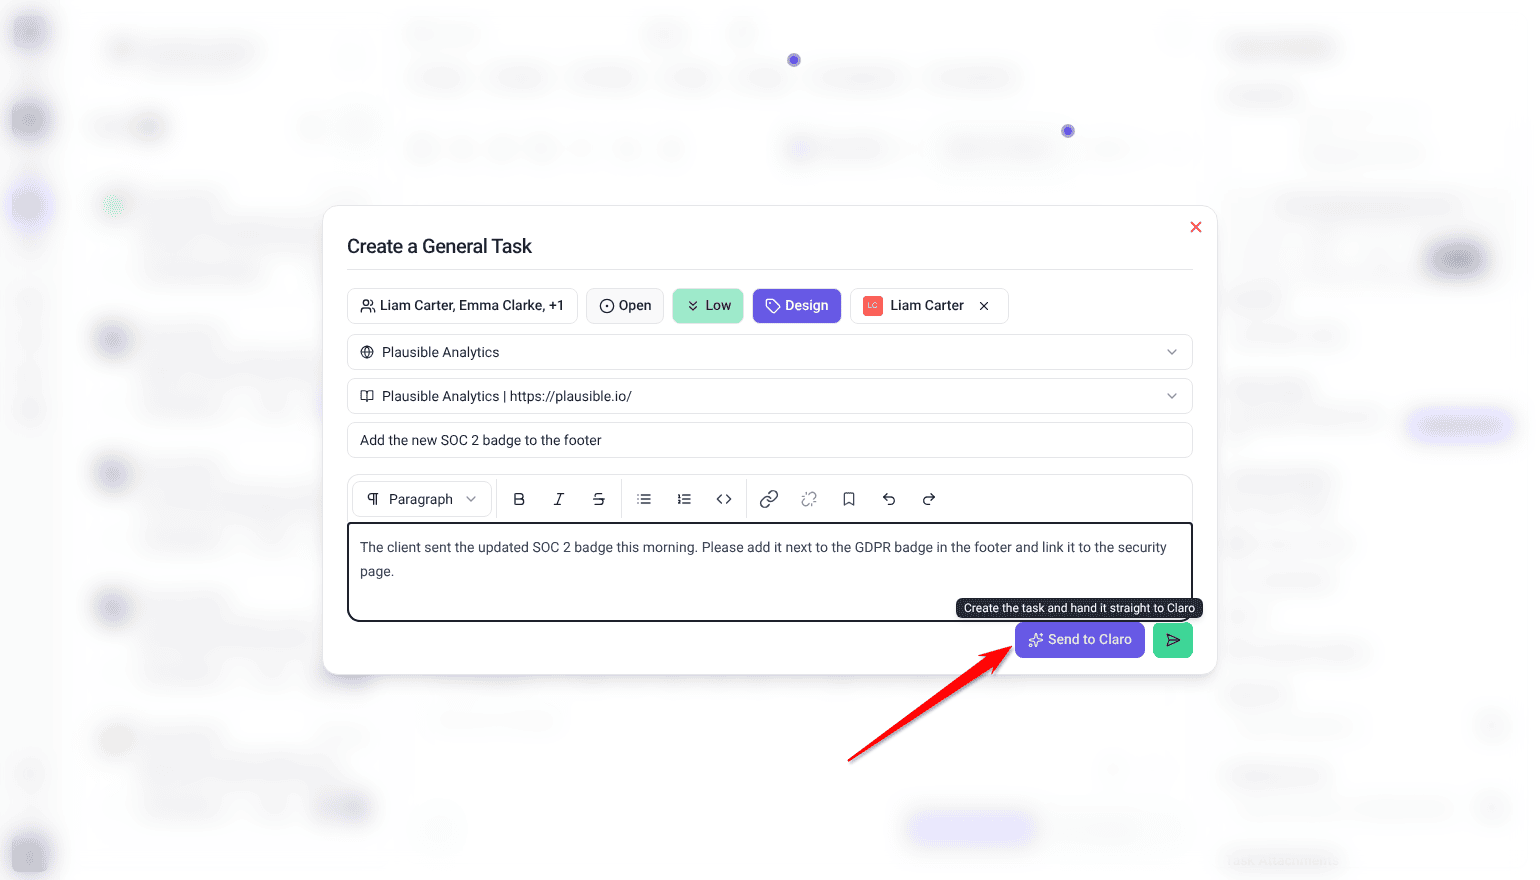
- Select the send (arrow) button to create the task, or Send to Claro to hand it straight to the AI.
Creating the task
The Create a General Task window has up to two buttons in the bottom right:
- The send button (arrow icon, tooltip Submit your task) creates the task and posts your message as its first comment. Everyone with access to the project can read it.
- Send to Claro (sparkle icon) creates the task the same way, then hands it to your AI team. The specialist that fits your message replies inside the task. You’ll only see this button if your role has AI Chat turned on, and Claro only replies if the workspace has AI credits available.
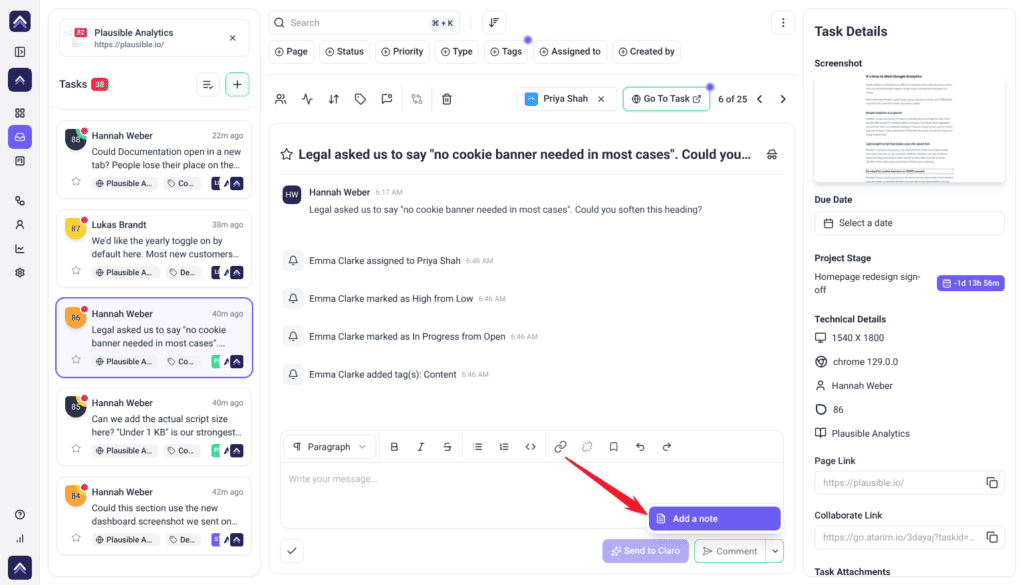
Internal notes can’t be added while creating a task. To add one, create the task first, open it, then use the dropdown next to the Comment button and choose Add a note. Notes are visible only to Admins and Team Members, and depend on your plan.
Method 5: From the Project Front End
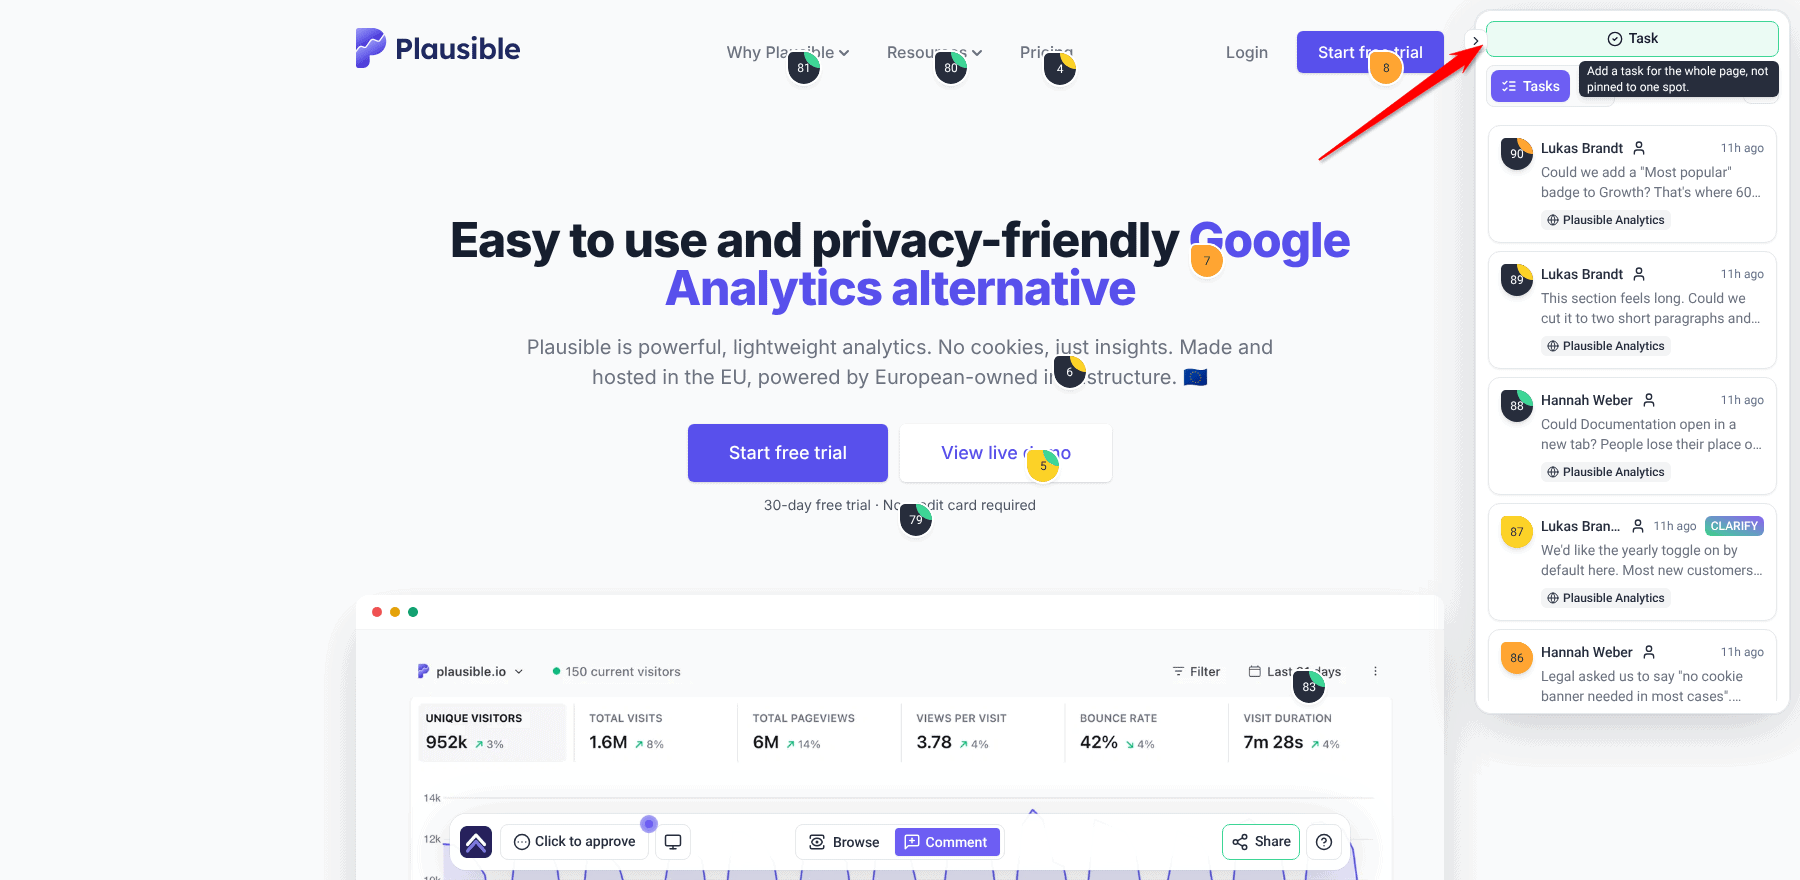
On the site itself, the Atarim sidebar has a Task button for a task about the page as a whole, not one spot on it.
Instructions:
- Open the page on the site itself, or from the project’s share link.
- At the top of the sidebar, select Task.
- Enter a comment describing the task.
- Select Comment to create the task.
Method 6: As a Client or Guest, Without an Account
Clients and stakeholders don’t need an Atarim account to give feedback. Share a link to the page and they can create tasks straight away. This works while the project’s General Access setting under Share is Anyone with the link. If it is Only people with access, invite them instead.
Instructions:
- Use Share in the Collaborate bar to copy a link to the page.
- Send it to whoever needs to review the work.
- They click the element they want to comment on, type their feedback, and submit it.
- When they submit their first comment, a Let others know who you are card asks for their name and email. They tick I agree to the terms & conditions and select Save.
- The task appears in your Inbox and on your Boards like any other.

Method 7: By Asking the AI
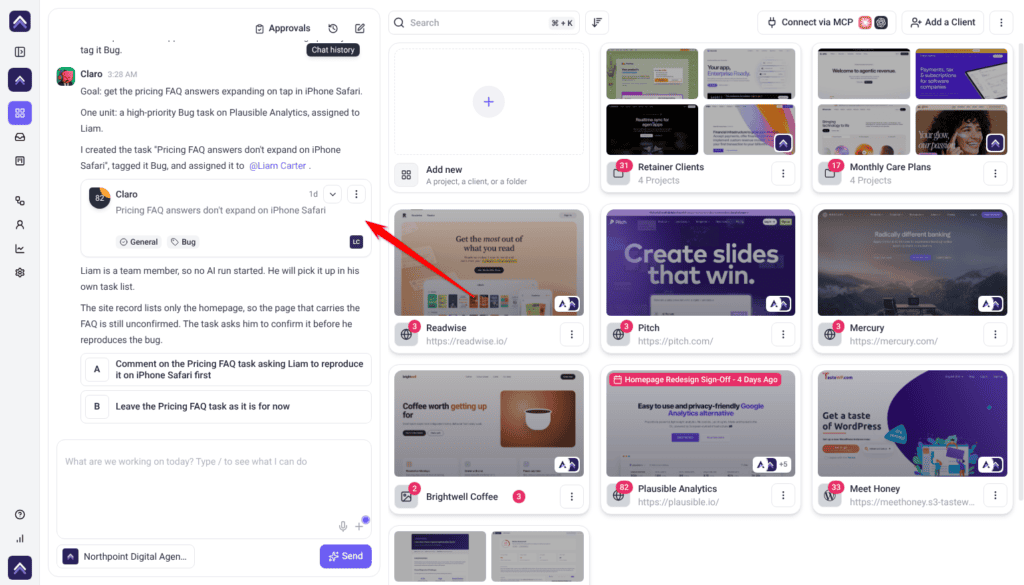
In the AI chat you can simply ask for a task and it gets created — title, description, priority, status, assignee, and visibility all set in one go. The result comes back as a task card in the chat.
Instructions:
- On the Projects screen, use the chat panel on the left.
- Describe the work you want captured, naming the project if the chat isn’t already focused on one.
- The AI creates the task and shows it to you as a card. Click through to open it.
The AI can also pin a task to a specific spot on a page without anyone clicking it, and you can ask it to start the work as it creates the task. If you describe something too big for one task, it can break the request into a parent task with the individual jobs as subtasks beneath it.
From Tools You Already Use
You can also create Atarim tasks from outside Atarim. Each of these has its own setup guide.
- Trello, Asana, ClickUp, Jira, Monday.com, Teamwork, and Basecamp — import an existing board or list and each item becomes an Atarim task. See Trello, Asana, ClickUp, Jira, Monday.com, Teamwork, or Basecamp.
- Zapier, Make, Pabbly, or a webhook — create tasks from almost anywhere else, so a form submission, helpdesk ticket, or spreadsheet row can become a task. See Zapier, Make, Pabbly, or Webhooks.
Method 8: From an AI Page Review
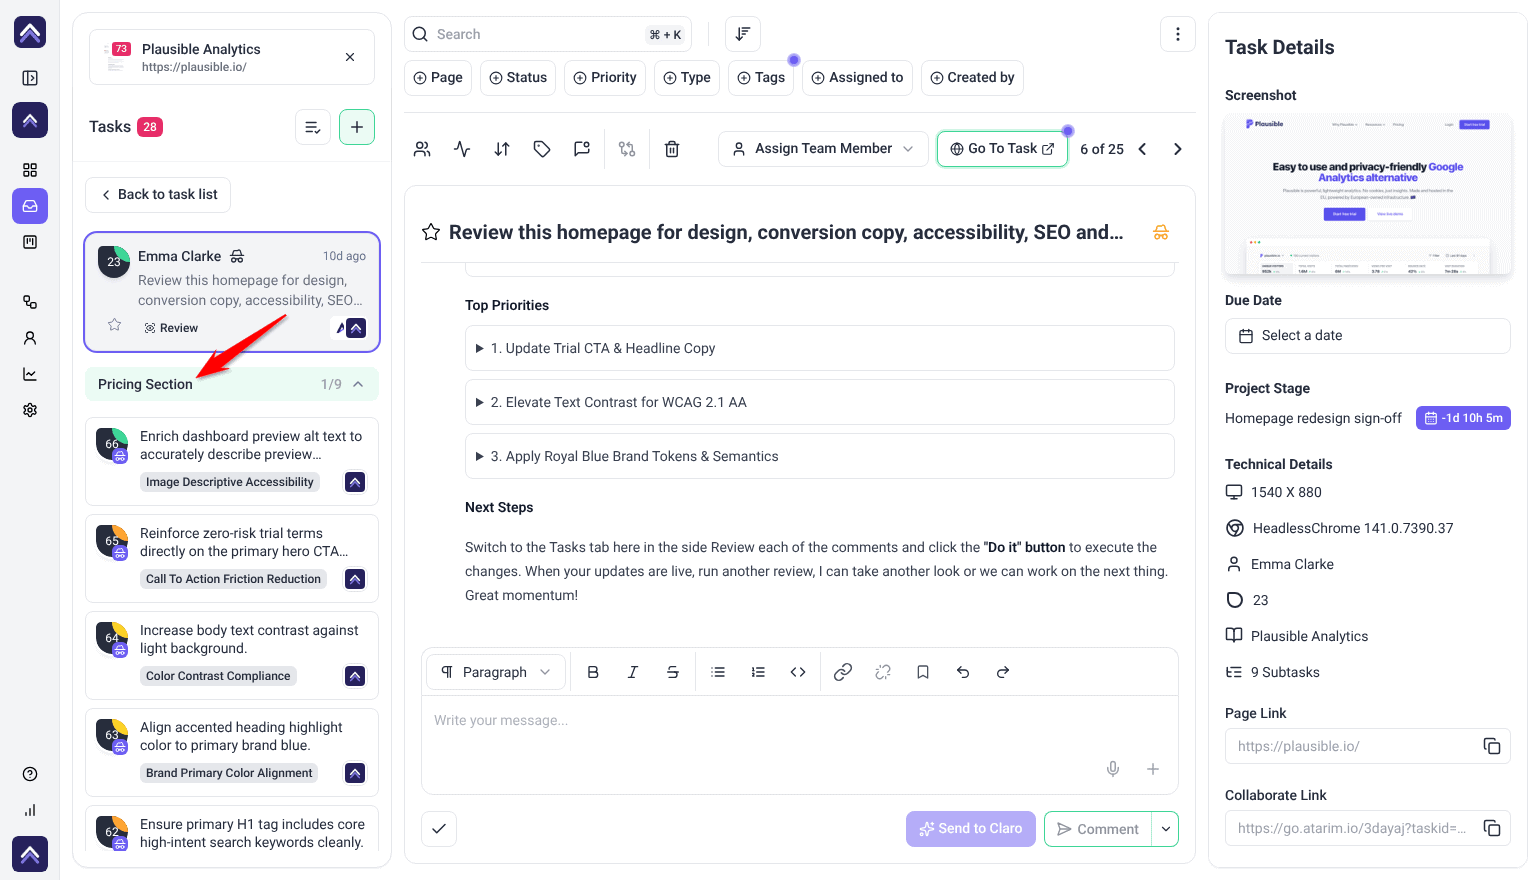
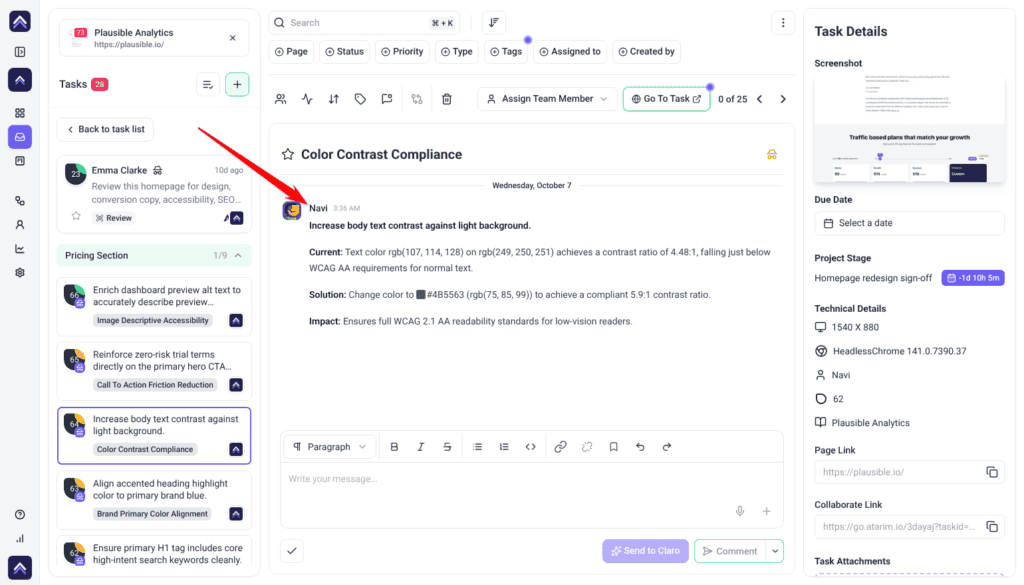
A review doesn’t just report back. It files the work. Running one creates a task to hold the session. When the review finishes, every finding becomes its own task, pinned to the element it relates to. Findings that can be fixed for you come with Show me to preview the change and Do It (Beta) to apply it on WordPress sites. Nothing changes on the site until you select Do It.
What gets created
- A review task holding the whole session. It’s internal, so clients don’t see it, and it’s titled with the review intent you gave.
- A task for each section of the page the review worked through, named after that section. These sit under the review task.
- One task per finding, grouped under the section it was found in, pinned to the element, carrying the priority the expert assigned and credited to the expert that found it — Pixel, Navi, Glitch, Lexi, or Index.
Go through the tasks afterwards and mark any you don’t need as Complete.
Method 9: By Forwarding an Email
Client requests that arrive by email don’t have to be retyped. Forward or CC your workspace’s Atarim address and the email becomes a task.
Setting it up (once)
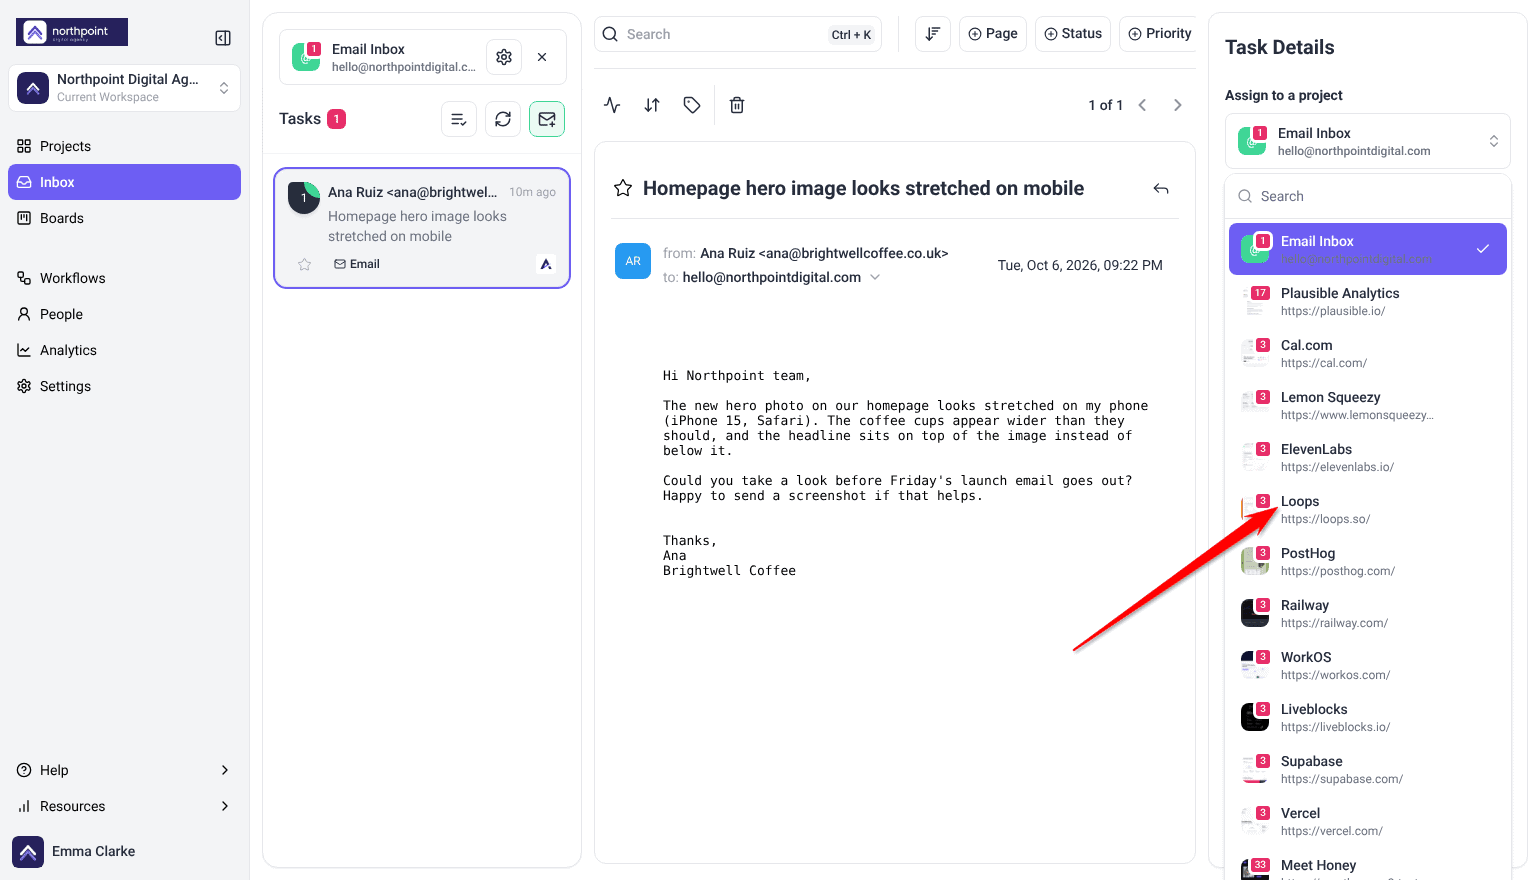
- Open Inbox from the left navigation. If email isn’t set up yet, select Set up inbox to start the four-step setup: Address, Receive email, Send from your domain, and Signature.
- Work through the steps. On Receive email, you’ll find Your forwarding address. Copy it and set your email provider to forward mail to it.
Using it
- Forward the email to your forwarding address, or add that address to CC on a thread you’re already in.
- The email arrives as a task in the Email Inbox, not yet attached to a project. If the sender already collaborates on exactly one of your projects, it goes straight to that project instead. Learn More About Handling Emailed Requests
- Select the task — or several at once — and choose the project to assign it to. It picks up a project task number at that point.
Method 10: From an Automation
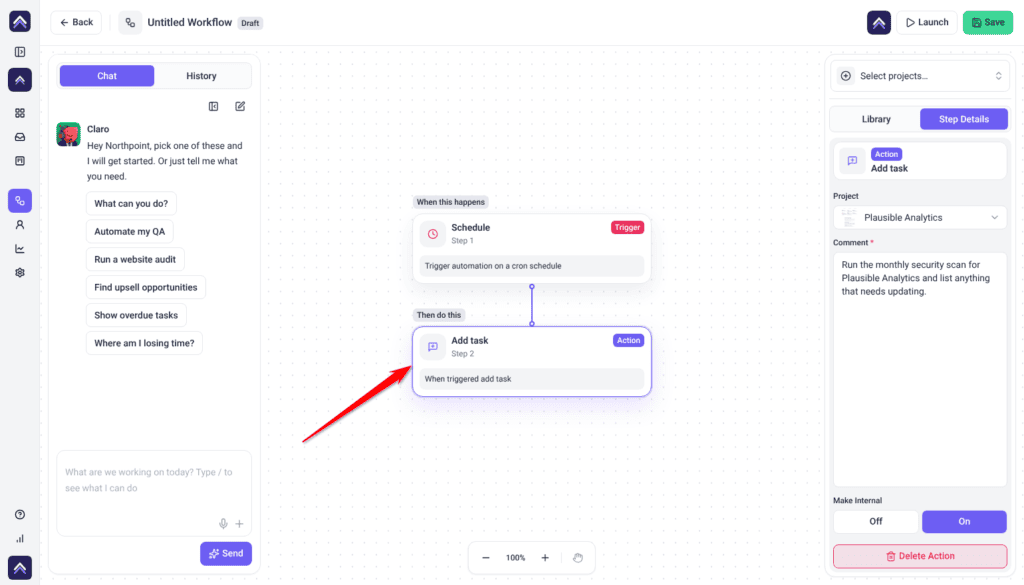
An automation’s Add task step files tasks on your behalf, on whatever schedule or trigger you set. This is how recurring work — a monthly security scan, a weekly backlog sweep — turns into tasks without anyone opening the app.
Instructions:
- Open Workflows from the left navigation.
- Add or edit a workflow and insert an Add task step.
- In Project, choose a project, or Trigger project to use the project that started the workflow.
- Write the comment. This becomes both the task title and its first message.
- Toggle Make Internal if the task shouldn’t be visible to clients.
Tasks created this way open at priority Low and status Open, and carry a comment noting they came from an automation.
An automation can also run an AI review as one of its steps. When it does, that review files its own findings as tasks exactly as described in Method 8 — so a single scheduled workflow can end up creating a whole set of tasks.
Refining a Task as You Create It
Separate from how a task starts, you can sharpen it before it becomes actionable work.
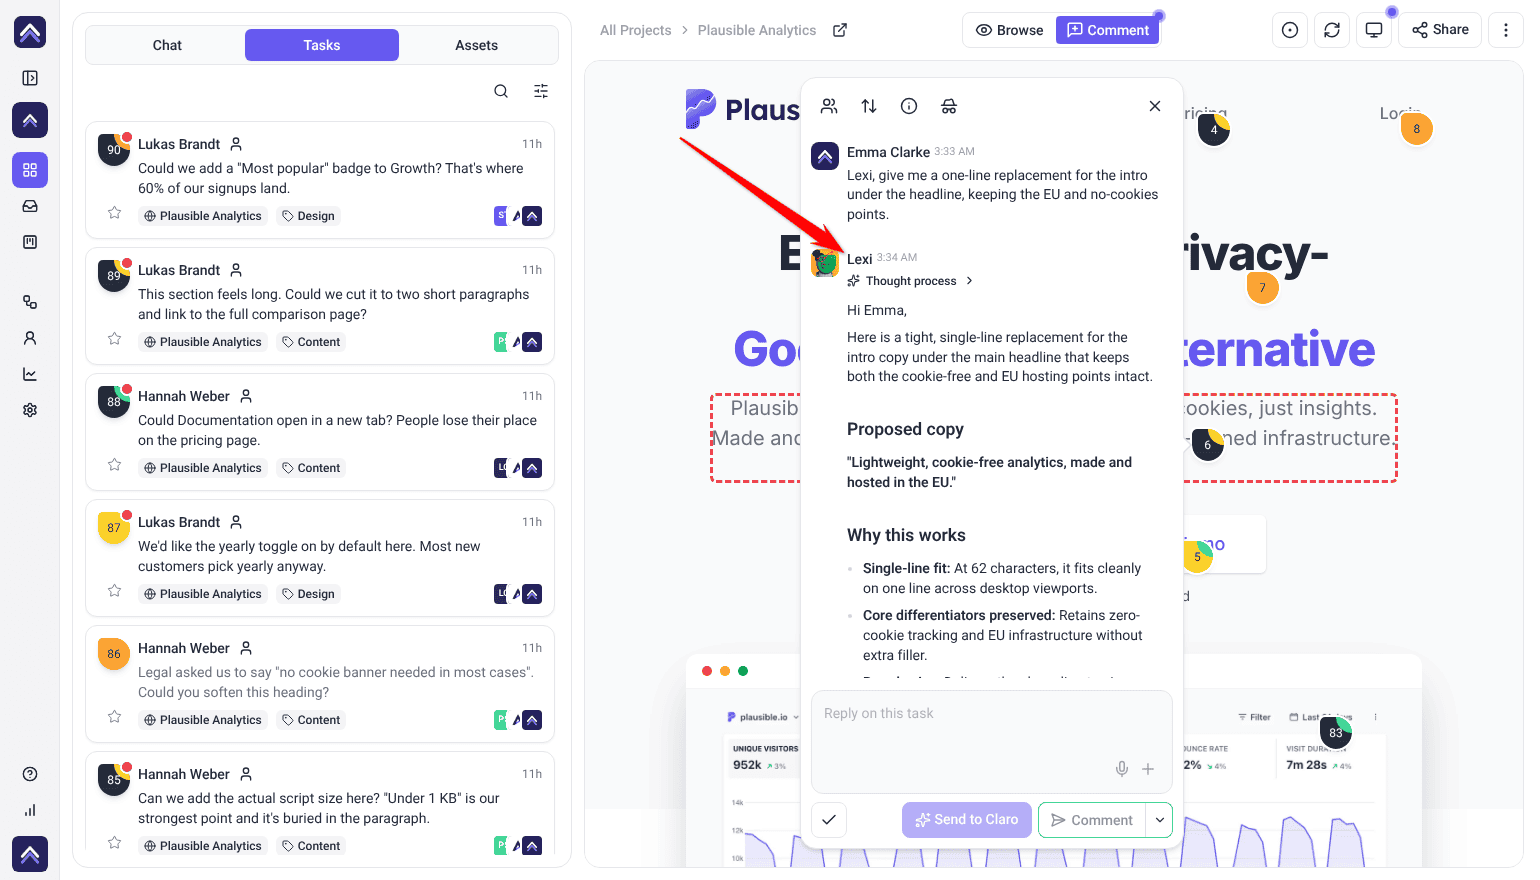
As you leave a comment on a page or design, the AI chat lets you get input from the InnerCircle agents right there — so instead of writing a task alone, you refine it in real time. The task itself is created the same way any comment is; the AI just helps you sharpen it first.
Select Send to Claro instead of Comment, and Claro, with the InnerCircle specialists, helps you:
- Clarify vague feedback
- Improve copy and messaging
- Validate design decisions
- Strengthen task clarity before assignment
FAQs
Do I need to open the website separately to leave feedback on it?
No. Open the project from the Projects screen and the page opens in place, right there instead of the project grid, ready for feedback. You stay on the dashboard the whole time — there’s no separate tab to open and nothing to log into. Design and image projects are the one exception; they open on their own canvas screen.
I clicked the page and nothing happened. Why can’t I leave a comment?
The page opens in Browse mode so you can navigate it normally. Switch to Comment using the toggle above the page, then click the element you want to comment on.
Do my clients need an Atarim account to give feedback?
No, as long as the project’s General Access is set to Anyone with the link. Send them a link to the page and they enter a name and email with their first comment. Everything they create arrives in your Inbox and Boards as a normal task.
Can I leave feedback on a website that isn’t set up as a project yet?
Yes, using the Chrome extension. It lets you comment on any site without adding it first and without installing anything on the site itself.
Do I have to install something on my client’s website?
Not necessarily. Working inside the dashboard needs nothing installed. The WordPress plugin and Chrome extension are options, not requirements.
We already track work in Trello. Do we have to start again?
No. Connect Trello and import the board — each card becomes an Atarim task. The same works for Asana, ClickUp, Jira, Monday.com, Teamwork, and Basecamp.
Can I create tasks without attaching them to specific elements on the website?
Yes. General tasks aren’t tied to a specific element. Create one from a board column, from the Inbox using the + button, or with the Task button at the top of the Atarim sidebar, on the site or through its share link.
Can I add files to tasks while creating them?
Yes, when you comment on a page or design. On a page, select + in the comment box and choose Attach a file, or drag the file onto the task panel. On a design, select the attachment icon. Whether you can attach files depends on your plan.
Does clicking on a page really create a task on its own?
Yes. In Comment mode, clicking an element places a pin, and when you type a comment and submit it, that comment is saved as a task automatically. It receives a task number and appears in the Tasks list in the sidebar, and in your Inbox and Boards.
Is a screenshot captured automatically?
Yes. When you create a task on a live page or a design, Atarim captures the surrounding area and highlights the exact element you clicked. You can also select + and Annotate screenshot to draw on a screenshot and attach it.
Do I need to describe where the problem is in my comment?
No. The pin lands on the element you clicked, so write about what needs to change, not where it is on the page.
Can I dictate a comment instead of typing it?
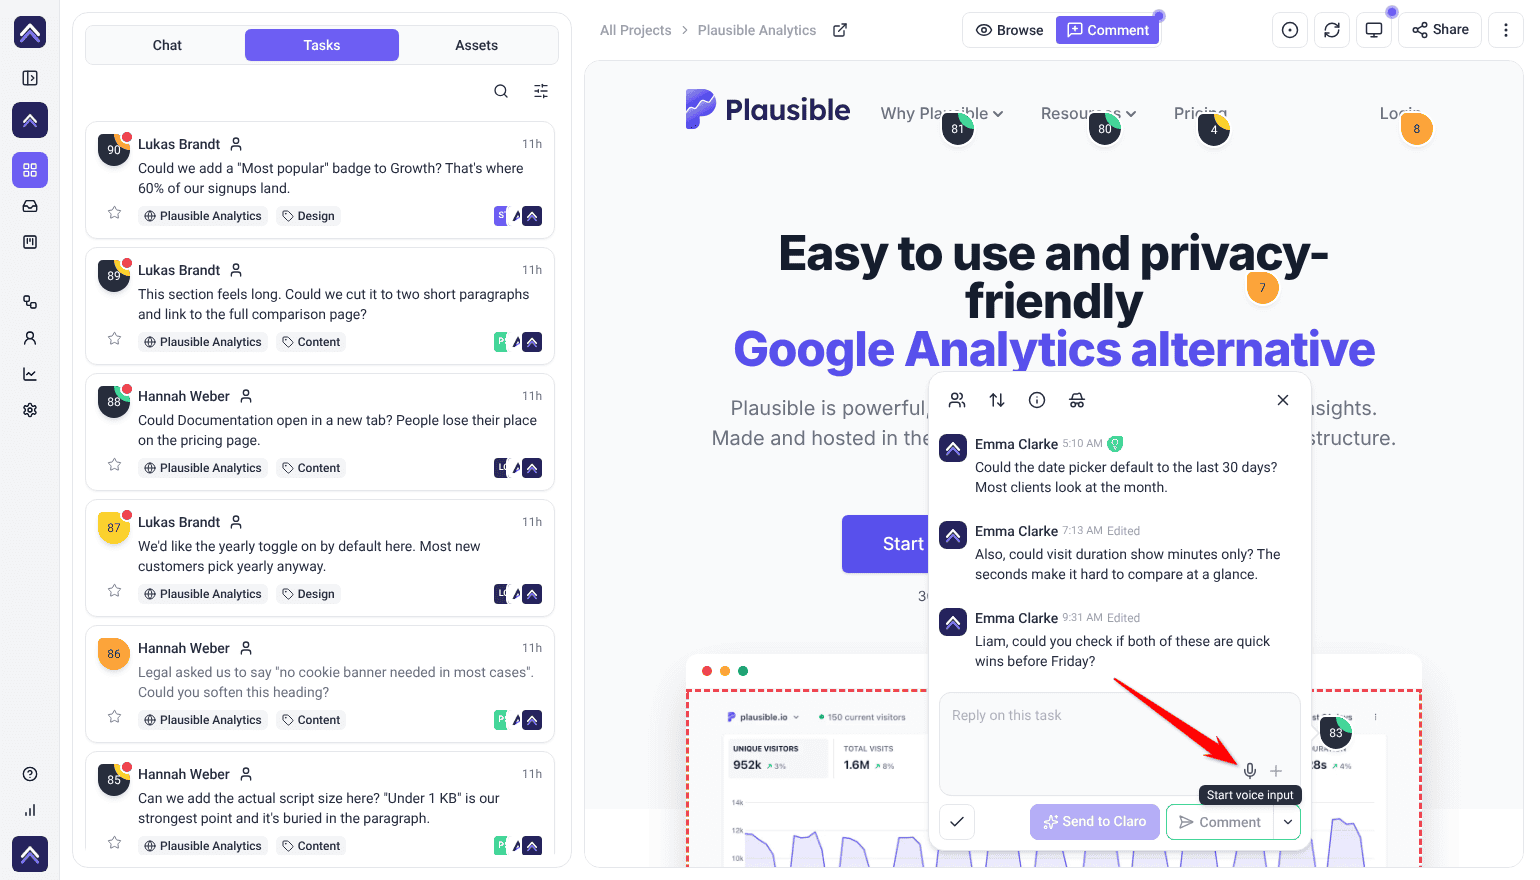
Yes, in Chrome and Edge. The comment box has a voice input control: start it, speak, and stop it when you’re done.
A task appeared that nobody created. Where did it come from?
Check three things, in this order: an active workflow with an Add task step, a completed AI review that filed its findings, and your email forwarding address. All three create tasks without anyone opening a create-task window.
Can clients create tasks using AI?
It depends on their role. Whether a role can use AI in tasks is set by AI Chat in Workspace Permissions. Guests can’t use it.
Conclusion
However a task starts — a live-page comment, a design annotation, a Figma thread, a manual entry, a client with nothing but a link, an import from another tool, a forwarded email, an automation, or an AI review finding — it lands in the same underlying task system, so assignee, priority, due date, and visibility all work the same way regardless of origin.
For what to do with a task once it exists, see How to Manage Tasks in Atarim.
Tips & best practices
- In People, turn on Add to tasks by default for team members who should be added to new tasks automatically. Tasks from automations don’t use it.
- Decide visibility as soon as a task exists. If clients shouldn’t see it, make it internal right after you create it. It’s easier than explaining to a client why they can see an internal note.
- Tasks from automations and forwarded emails start at Low priority, while review findings keep the priority the expert gave them. If you rely on priority to sort your queue, plan a triage pass.
- Check for an automation before assuming an unexplained task was a mistake — a workflow’s Add task step creates tasks silently by design.