Atarim MCP: Connecting Claude, Codex, and Other Coding Agents
Connect Claude, Codex, or any MCP-compatible assistant to your Atarim workspace in three steps: copy the Server URL, add it to your assistant, and authorize the connection.
Agencies whose developers work inside an AI coding assistant like Claude or Codex day to day
Anyone who wants a client request to turn into working code without copy-pasting context back and forth
Teams setting this up for the first time on a new computer
Required knowledge
None to understand what it does — setting it up involves pasting a short command or a line of text into another app, so a little comfort with technical steps helps
You'll need to be an Owner or Administrator on your workspace; this isn't available to Team Members, Website Owners, or Collaborators
Tools & resources needed
Settings > Connected Apps > Atarim MCP
Claude, Codex, or another AI coding assistant installed on your computer
An existing project already set up in Atarim
An active Atarim plan that includes MCP
If your developers work inside an AI coding assistant — Claude, Codex, or something similar — Atarim MCP connects that assistant directly to your workspace. Once connected, it can read tasks, look up sites, and even trigger approved actions on its own, so a client request captured in Atarim can turn into working code without anyone manually copying details across. Setup is short: copy your Server URL from Atarim, add it to your assistant, and approve a one-time browser prompt — the sections below walk through each part, including the exact setup for Claude, Codex, and other MCP-compatible tools.
Step-by-Step Guide
What This Actually Does
Think of it as a direct line between Atarim and your developer’s AI assistant. Normally, if a client leaves a request in Atarim, someone has to read it, understand it, and go explain it to whatever tool they’re coding in. With Atarim MCP connected, the assistant can just look the information up itself — what site it’s about, what the task says, what’s already been done. “MCP” stands for Model Context Protocol, an open standard that a growing number of AI tools support for exactly this kind of connection — Atarim is simply one of the things they can connect to.
Concretely, once connected, your assistant can:
Read and manage tasks — pull up a task’s full content, change its status or priority, assign it, tag it, or break it into subtasks, all without anyone switching over to Atarim to do it manually.
See every site and client in the workspace — list projects, look up a specific site’s details, screenshots, or pages, and check who a client is before starting work.
Work with your automations — list existing workflows, check past runs, and even trigger one on demand — useful for a developer who wants to kick off a scheduled workflow early rather than waiting.
Trigger an AI design review on a specific page or graphic directly from the conversation.
Run SEO research — look up search volume, keyword difficulty, competitors, backlink profiles and what’s actually ranking, without leaving the conversation for a separate SEO tool.
Work on a linked Duda site — connect an Atarim project to a site in your Duda account, then work with its content, store and site data the same way.
Fire a Zapier action on demand — run a single action on your connected Zapier account when it’s needed, rather than waiting for a Zap to trigger on its own.
Handle the work around the work — clients, folders, milestones, tags, reference documents and the project’s plugin stack are all reachable too, so an assistant can set a job up and close it out, not just do the middle part.
Make real changes on a connected WordPress site through the same bridge the rest of Atarim uses — not just read information, but actually execute WordPress actions your assistant has access to. That reach includes the two heaviest jobs on the site: running WP-CLI for work no other action covers, and scanning the site for known vulnerabilities in its plugins, themes and core. Both are described in the Atarim WordPress plugin article.
That last point is the one worth being precise about: connecting your assistant this way doesn’t loosen any of Atarim’s existing safeguards. If something your assistant tries to do would normally need your sign-off in the Approval Queue, it still does — the tool that runs gated actions is explicitly built to “never decide on its own” and only proceed once you’ve clearly said yes or no in the conversation. Connecting MCP changes how the request reaches you, not whether it still needs your approval.
Without MCP
With MCP connected
Someone reads the client’s task, then explains it to the developer.
The assistant reads the task directly, in the conversation.
Developer switches to Atarim to check status, tags, or history.
The assistant looks it up without switching tools.
Approval Queue still applies to anything gated.
Approval Queue still applies — MCP changes the request path, not the safeguard.
Where to Turn It On
The Server URL is the only thing you need to copy. Authentication is handled for you.
Instructions:
In Atarim, from the main dashboard, select Settings.
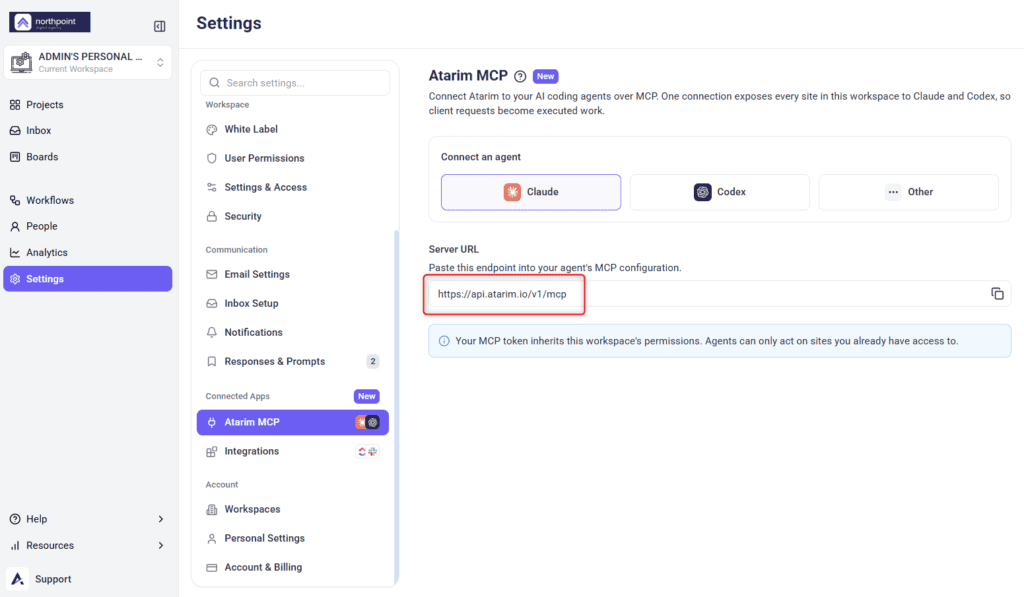
Under Connected Apps, select Atarim MCP.
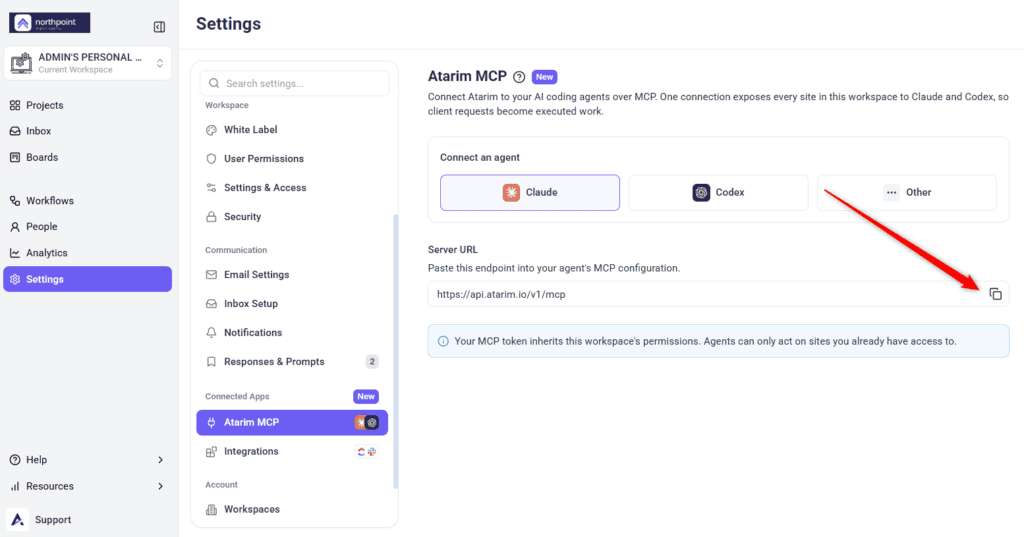
Under Server URL, select the copy icon at the right of the field. A message confirms Server URL copied to clipboard. The address is https://api.atarim.io/v1/mcp.
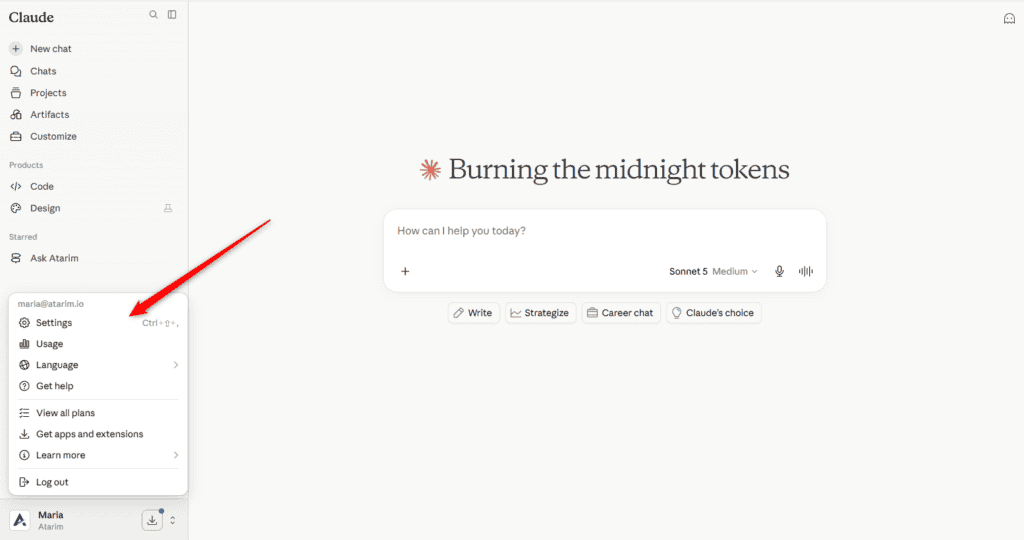
Switch to Claude and open Settings, then Connectors.
Select Add at the top right, then Add custom connector.
In the first field, enter a name: Atarim.
In the second field, paste the Server URL you copied.
Leave OAuth Client ID and OAuth Client Secret empty — Atarim registers the client automatically.
Select Add.
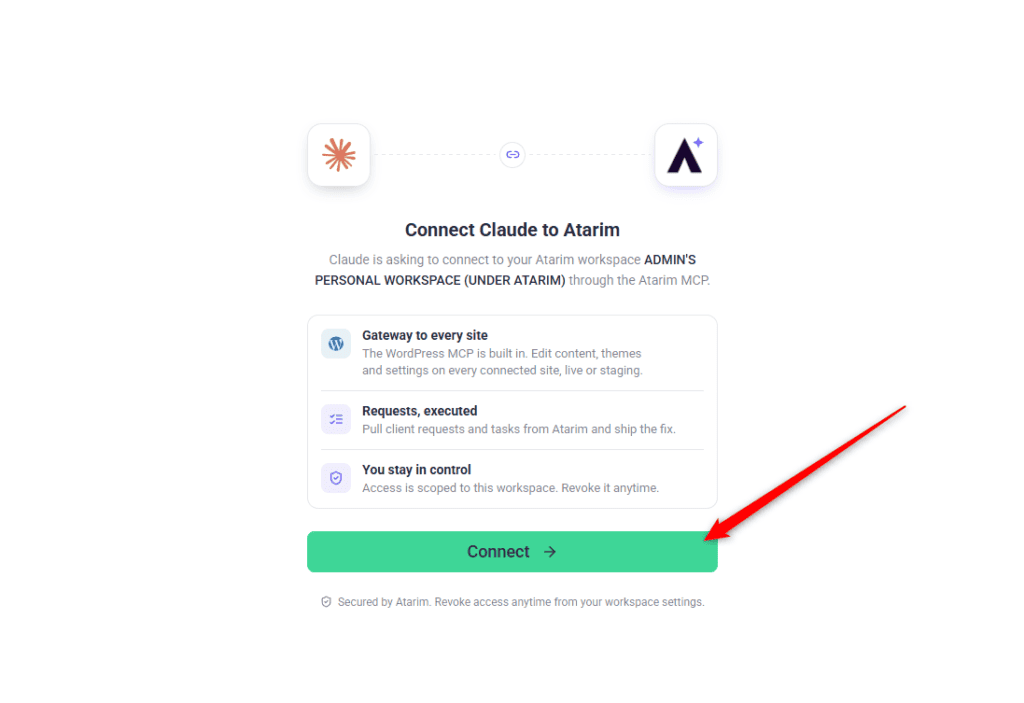
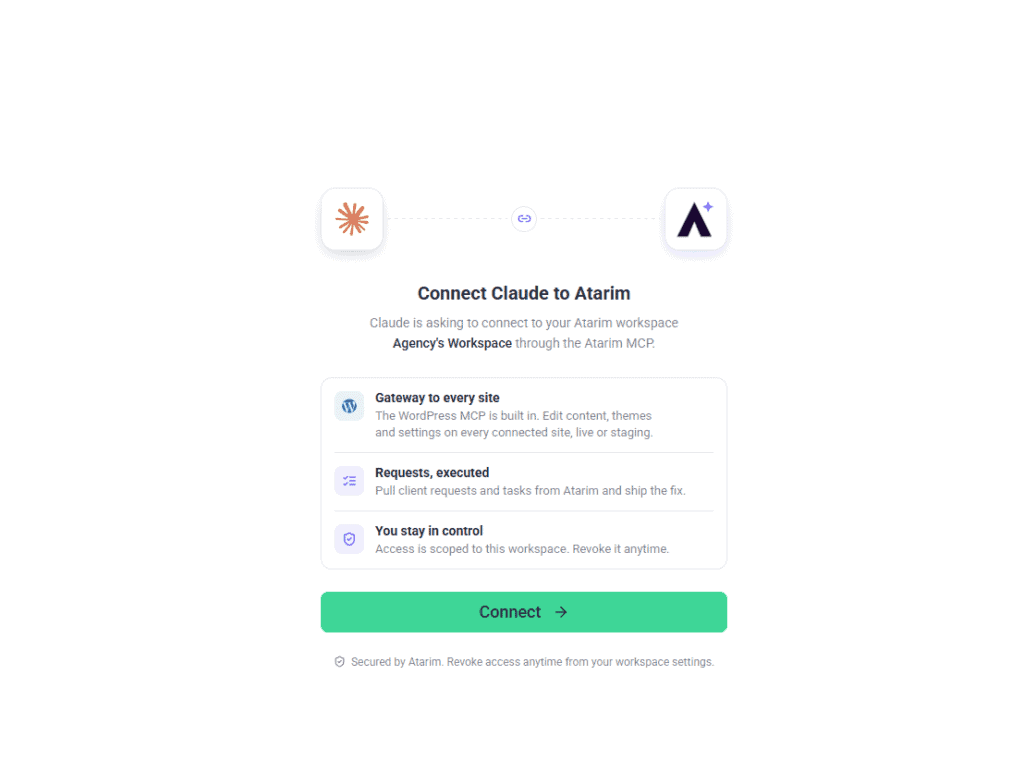
A browser page opens headed Connect Claude to Atarim, naming the workspace. If you aren’t signed in to Atarim, you’ll sign in first and return here.
Select Connect. The button shows Connecting…, then the page confirms You’re connected.
You’re returned to Claude automatically. If not, select Close this tab.
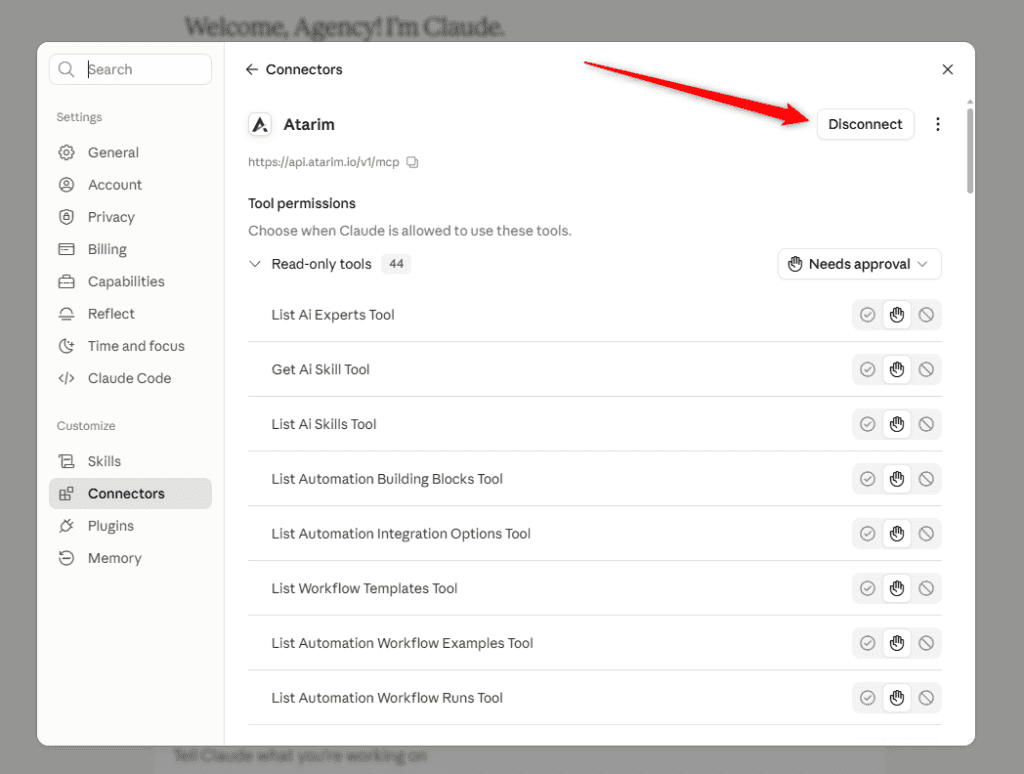
Back in Claude, confirm Atarim now appears in your connector list.
Test it — ask Claude which Atarim workspaces you have access to. You should see your own workspaces named back, not a generic answer.
Tip
The Server URL is the same for everyone in your team. There is nothing to generate and nothing to personalise — the workspace and permissions come from the account you sign in with during setup, not from the address.
Open Atarim MCP Settings
Open Claude Settings
Copy the Atarim MCP Server URL
Open Connectors in Claude Settings
Enter the Atarim Connector Name and Server URL
Connect Claude to Atarim
Authorize Claude to Connect to Your Atarim Workspace
Confirm Claude Is Connected to Atarim
What It Can and Can’t See
Nothing extra. Whatever your Atarim account already has access to is exactly what a connected assistant can see and act on — nothing more. There’s no separate permissions screen to configure here; it simply follows the same access rules your account already has. If you want to limit what an assistant can touch, the way to do that is the same as anywhere else in Atarim — adjust what your own account has access to.
And on top of that access scoping, anything that would normally be gated behind your approval — like an install on a client’s site — stays gated. Your assistant can surface that a request needs a decision, but it can’t make that decision for you.
The Browser Prompt You’ll See
After you add the Server URL to your assistant, expect one extra thing to happen the first time:
Your assistant opens a browser tab pointing at Atarim.
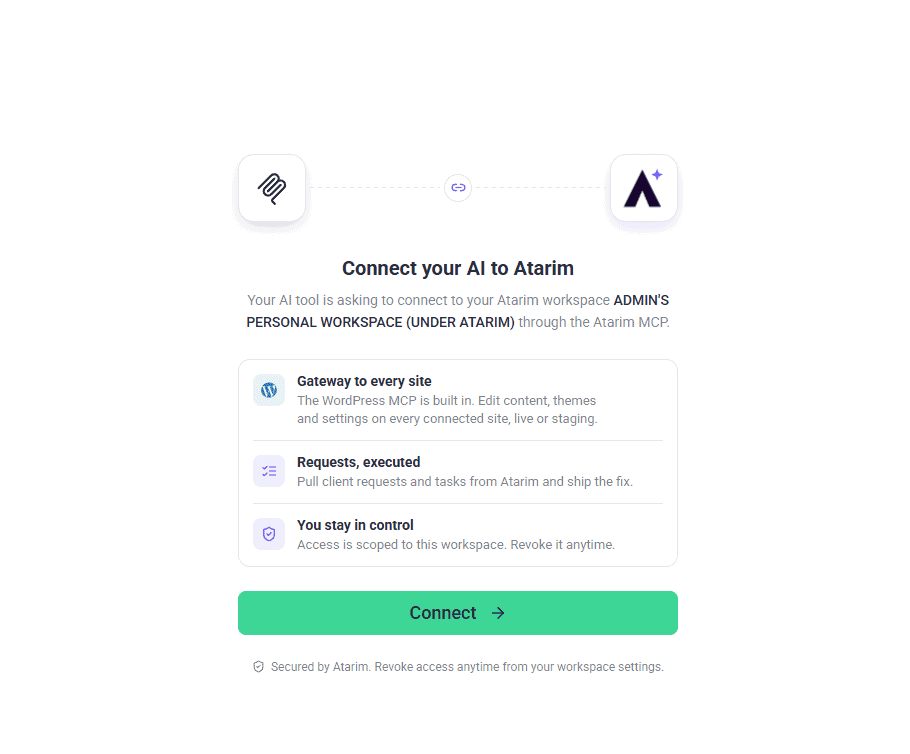
You’ll see a summary of what the connection grants access to.
Select Connect to authorize it — this is a standard, secure login step (OAuth), not an error.
Close the tab. Your assistant is now connected.
This happens automatically as part of adding the URL in the steps below — you don’t need to go looking for it, just don’t be surprised when a browser window pops up mid-setup.
Choosing Your Setup Path
All three paths use the same Server URL — the difference is only in how you hand it to your assistant:
Assistant
Method
Where to look
Claude Code (CLI)
One-line terminal command
Terminal
Claude Desktop
Paste URL into Settings, or edit a config file
Settings → Connectors / MCP servers
Codex
Terminal command, or edit the config file directly
Terminal, or Codex’s settings file
Other MCP-compatible tools
Paste URL into that tool’s own connector settings
Look for Connectors, Integrations, or MCP servers
Note
You only need to set this up in whichever assistant a given developer actually uses day to day — there’s no need to configure every tool.
Connecting Claude
Claude Code (command-line):
Add Atarim:
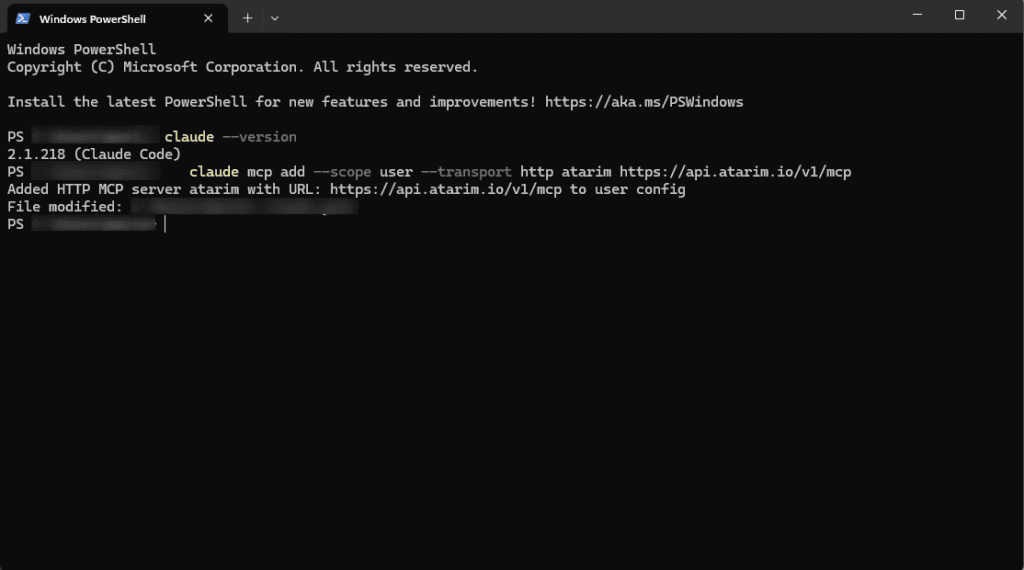
claude mcp add --scope user --transport http atarim https://api.atarim.io/v1/mcp
Start Claude Code:
claude
Manage servers (typed inside Claude Code, not the terminal):
/mcp
List servers:
claude mcp list
Remove Atarim:
claude mcp remove atarim --scope user
Check it’s installed:
claude --version
Claude Code
Claude Code is configured from the terminal rather than a settings screen, and the server is added per project unless you say otherwise.
Instructions:
Open a terminal.
Run the following, using the Server URL copied from Atarim:claude mcp add --transport http atarim https://api.atarim.io/v1/mcp
To make Atarim available in every project rather than only the current one, include --scope user:claude mcp add --scope user --transport http atarim https://api.atarim.io/v1/mcp
Start a new Claude Code session.
Enter /mcp to open the list of MCP servers.
Select atarim, then choose Authenticate.
Complete the approval step in the browser tab that opens.
Return to the terminal. Atarim now shows as connected.
PowerShell showing the Claude Code native installer running.
PowerShell confirming Claude Code was successfully installed, with version 2.1.218 and its file location.
PowerShell listing PATH entries, with the Claude Code install folder among them.
Terminal showing the claude mcp add command and confirmation that the Atarim server was added to the user config.
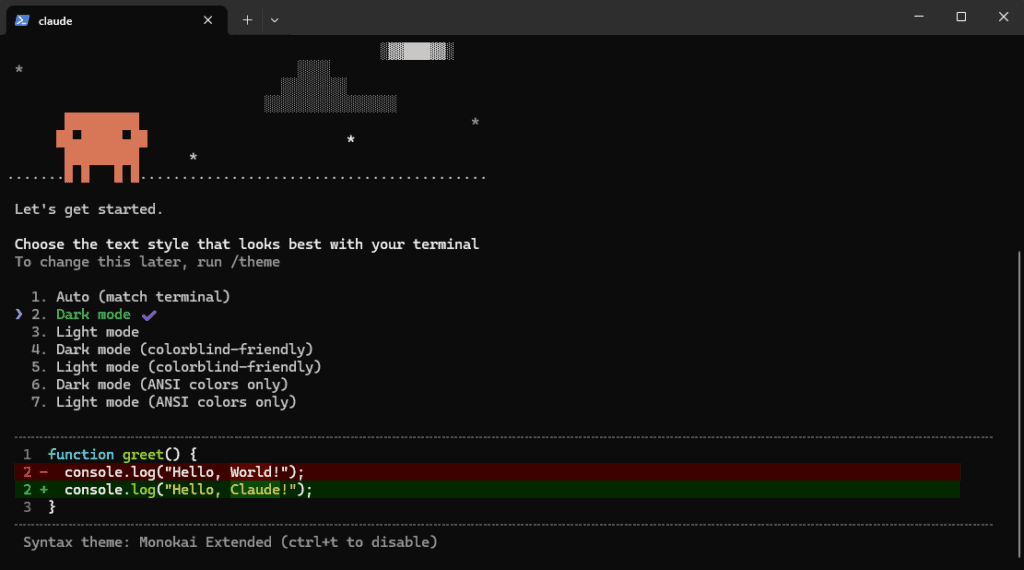
Claude Code first-run screen offering a choice of colour themes.
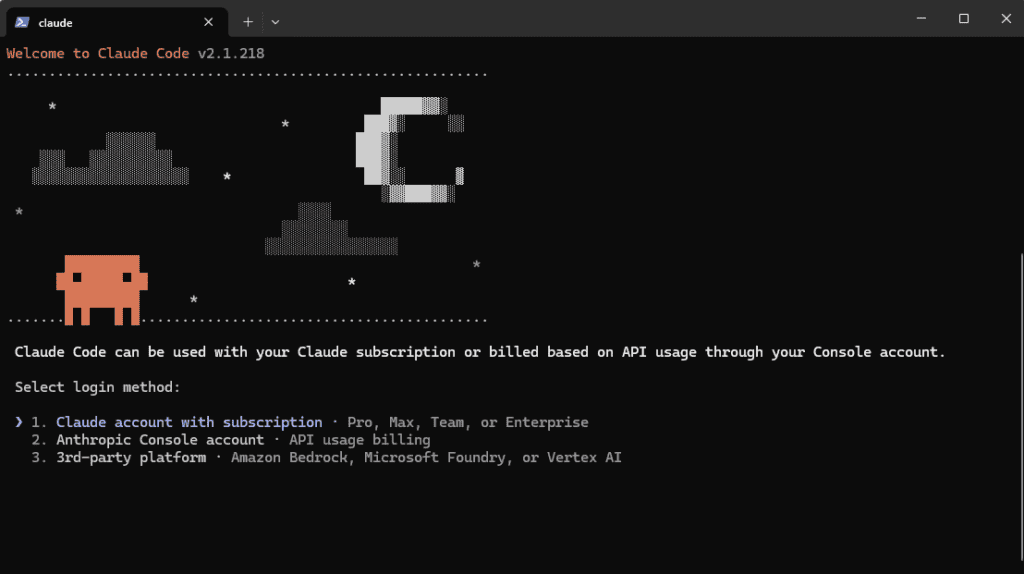
Claude Code login screen offering subscription, Console account, or third-party platform sign-in.
Claude Code showing a sign-in URL to open manually, with a prompt to paste the resulting code.
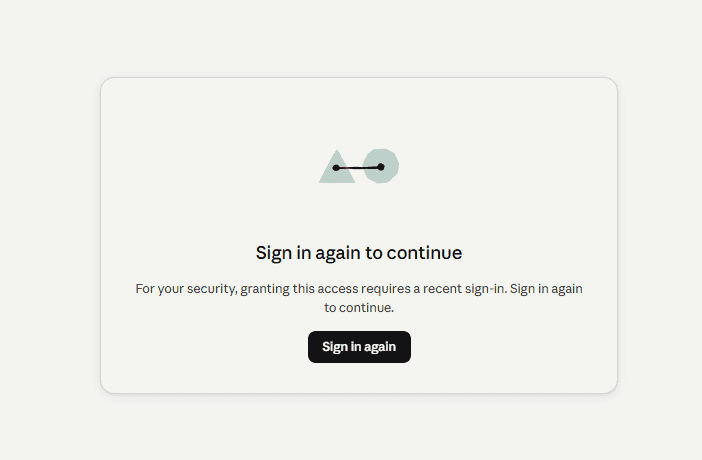
Claude prompt reading “Sign in again to continue,” with a Sign in again button
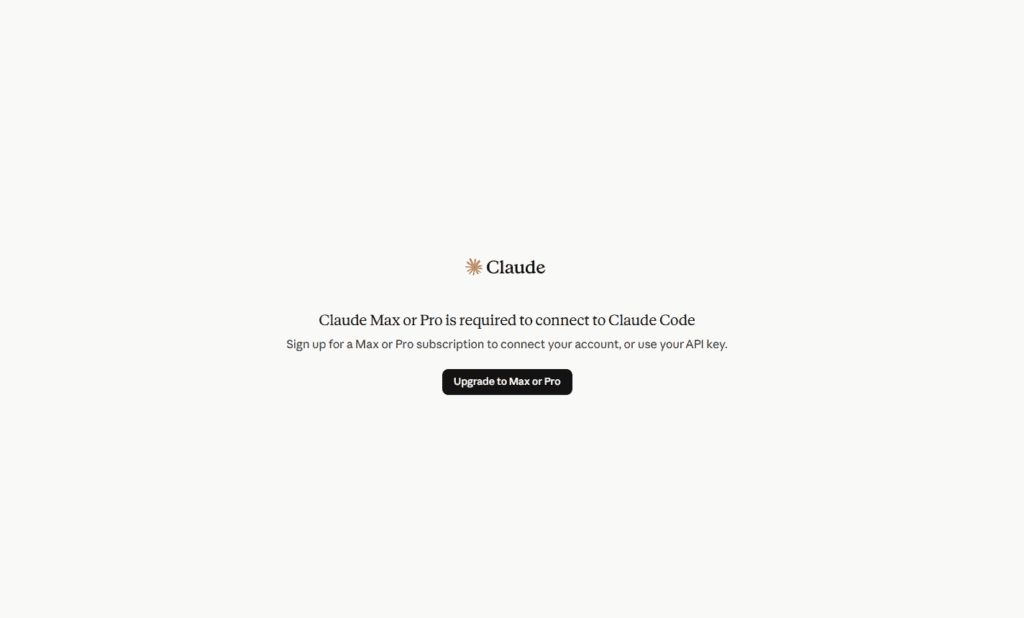
Claude message stating that a Max or Pro subscription is required to connect to Claude Code.
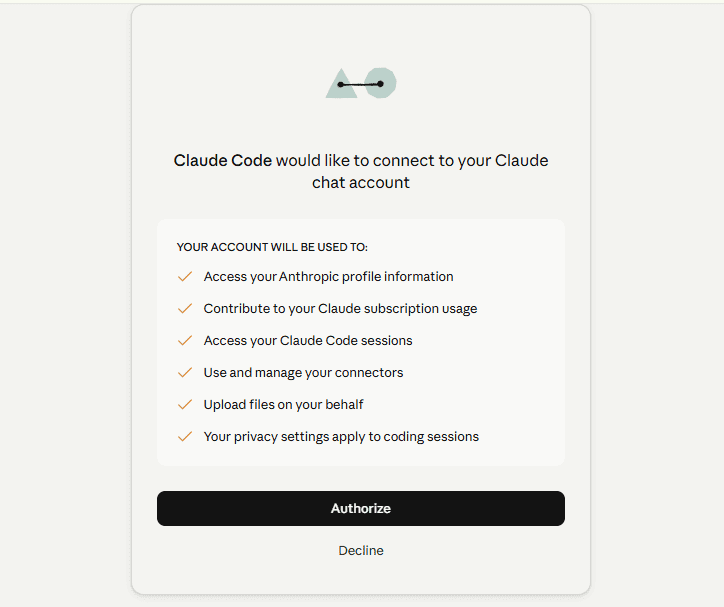
Authorising Claude Code to use your Claude account. This is not the Atarim connection — that comes later.
Confirmation page reading “You’re all set up for Claude Code.”
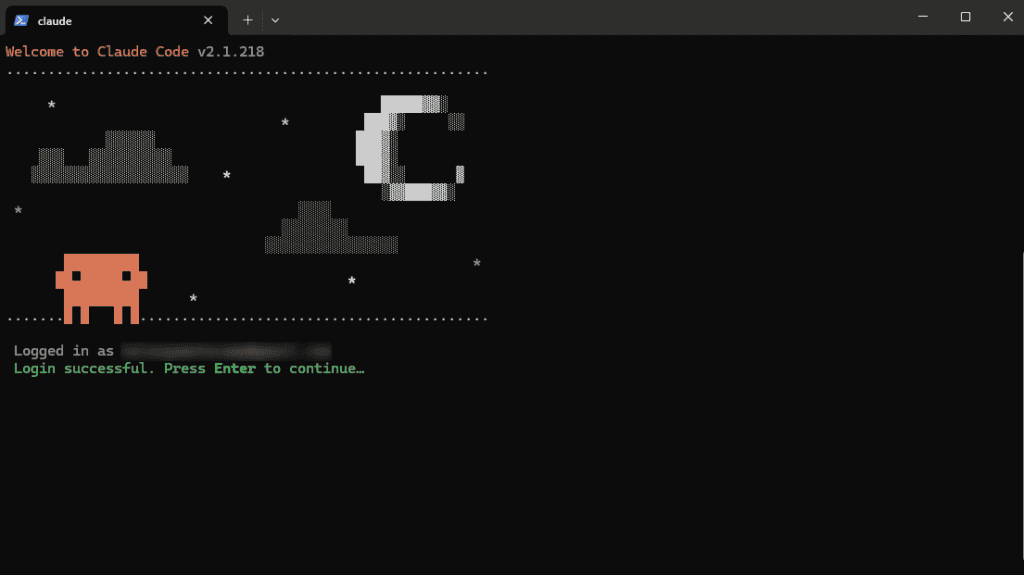
Terminal showing “Login successful. Press Enter to continue”
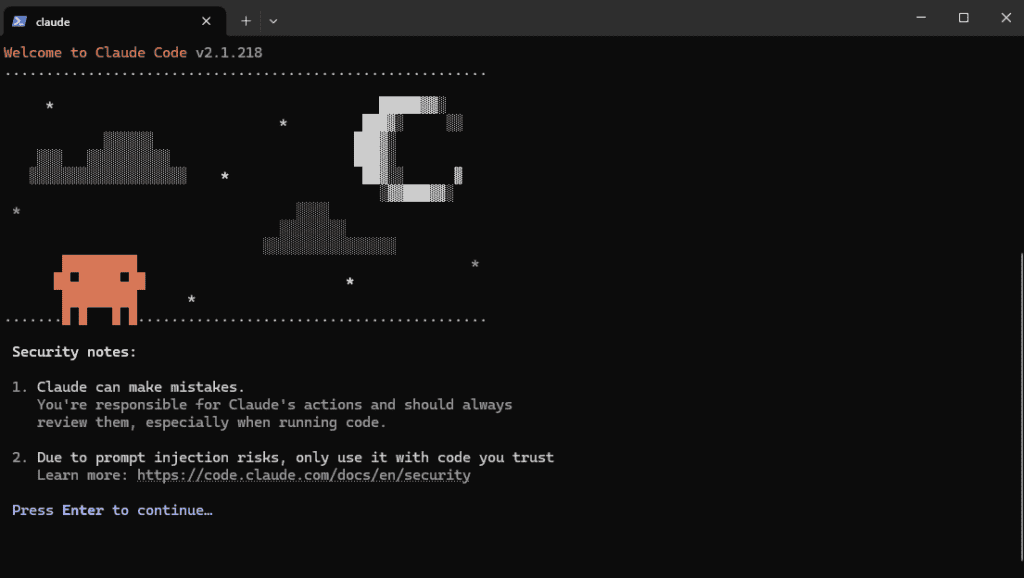
Claude Code security notice about reviewing its actions and only using it with trusted code.
Confirming you trust the folder Claude Code is running in
Claude Code showing a warning that one MCP server needs authentication, with the /mcp command being typed
The MCP server list, showing atarim awaiting authentication
Select Authenticate to connect Claude Code to Atarim
Claude Code authenticating with Atarim, showing a fallback sign-in URL and instructions if the browser doesn’t open.
Atarim approval page headed “Connect Claude to Atarim,” showing what the connection allows and a Connect button
Confirmation page reading “Authentication successful. You can close this tab and return to Claude Code”
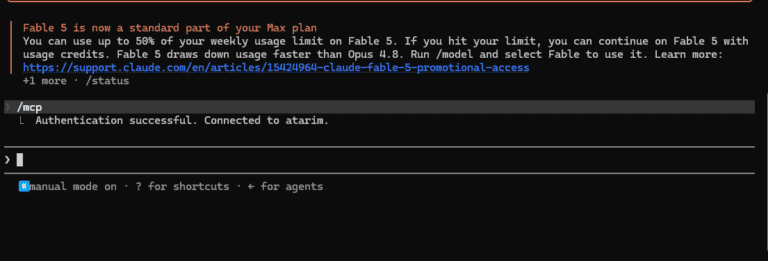
Claude Code terminal confirming “Authentication successful. Connected to Atarim.”
Note
Adding the server isn’t the whole setup. Until you authenticate in step 6, Claude Code knows the server exists but can’t reach anything in Atarim.
Claude Desktop:
Atarim isn’t listed in Claude’s connector directory, so it’s added as a custom connector.
Instructions:
In Atarim, copy the Server URL from Settings → Atarim MCP.
In Claude, open Settings, then Connectors.
Select Add, then Add custom connector.
In the first field, enter a name: Atarim.
In the second field, paste the Server URL: https://api.atarim.io/v1/mcp
Leave OAuth Client ID and OAuth Client Secret empty. Atarim handles this automatically.
Select Add.
Complete the approval step described above.
Atarim now appears in your connector list, and its tools are available in conversations.
Connecting Codex
Codex uses the same Server URL, entered through its own command.
Instructions:
Open a terminal.
Run the command below, using your actual Server URL from the Atarim MCP settings page.
MCP is an open standard, so the shape of this is the same anywhere: find the connector settings and paste the URL.
Instructions:
Open that assistant’s own settings.
Look for a Connectors, Integrations or MCP servers section. MCP is an open standard, so most AI coding assistants support this even without Atarim-specific instructions.
Paste in the Server URL from Atarim.
If asked for a connection type, choose remote or HTTP rather than a locally-run option — Atarim’s server is on the web, not on your computer.
Complete the approval step.
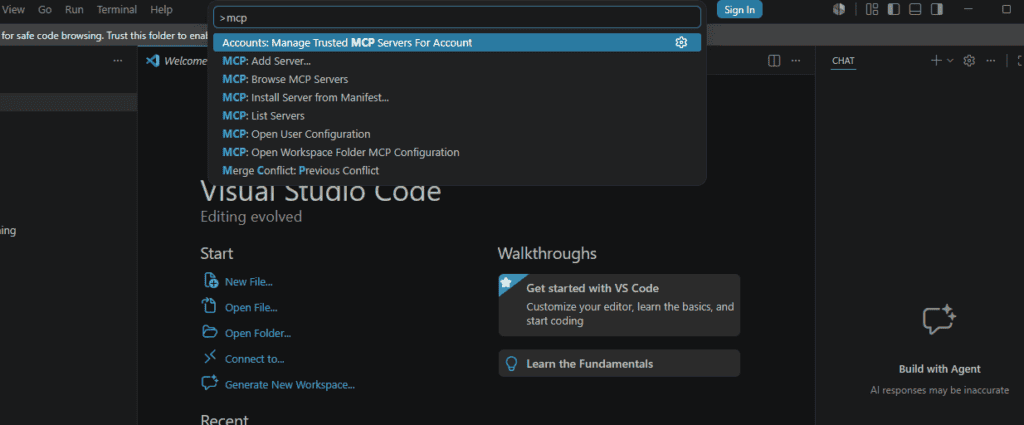
VS Code Command Palette showing MCP commands, with MCP: Add Server available
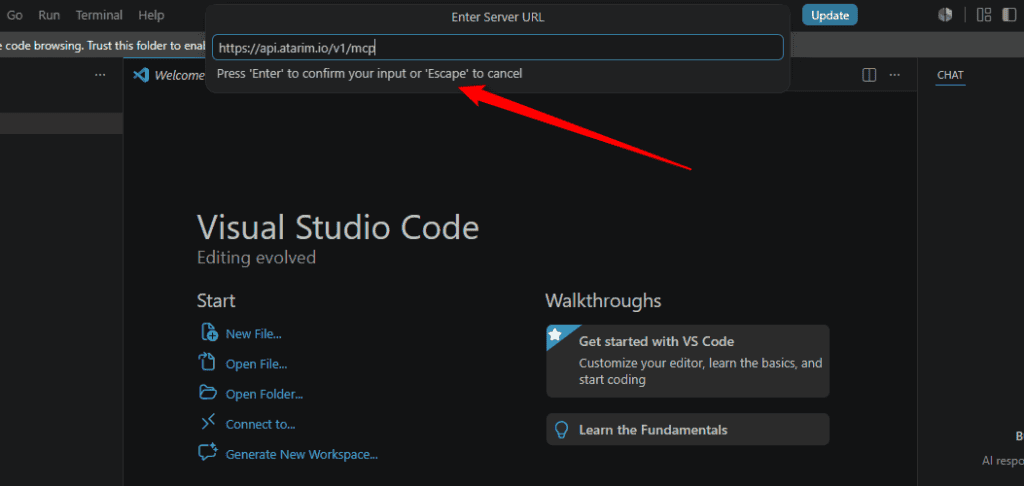
VS Code Enter Server URL prompt with the Atarim MCP endpoint entered
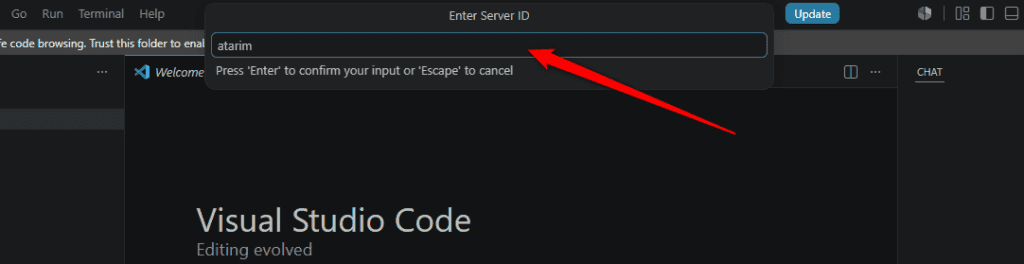
Naming the server “atarim” in VS Code
VS Code prompt to select the configuration target, offering Global or Workspace
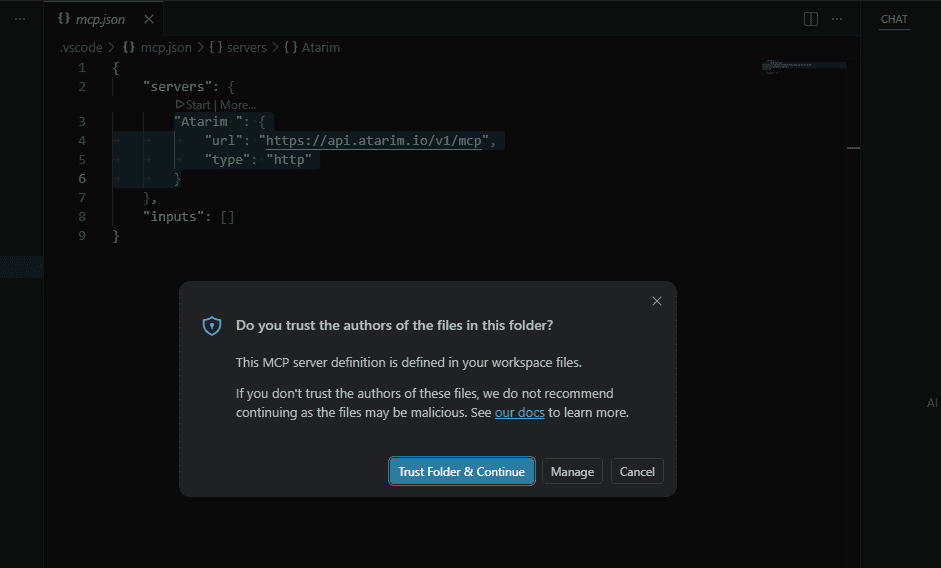
VS Code mcp.json showing the Atarim HTTP server, with a folder-trust dialog
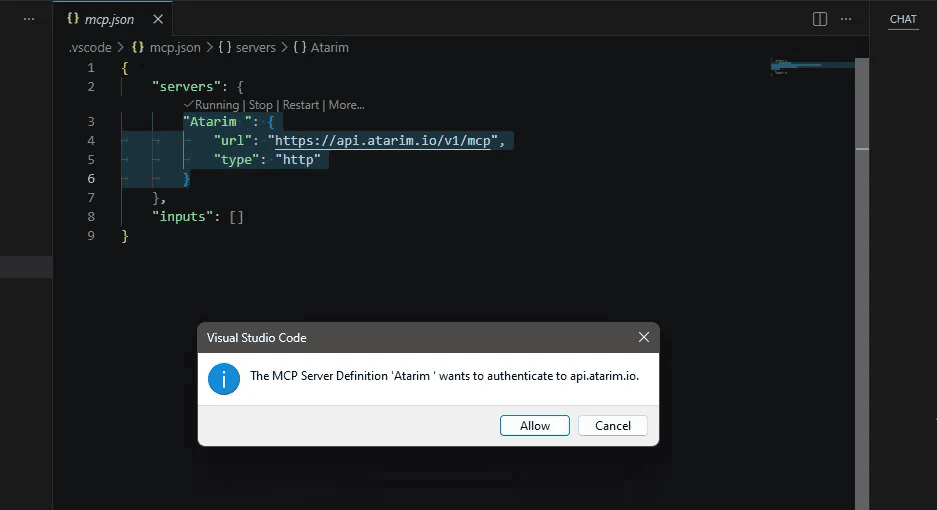
VS Code asks to authenticate to Atarim.
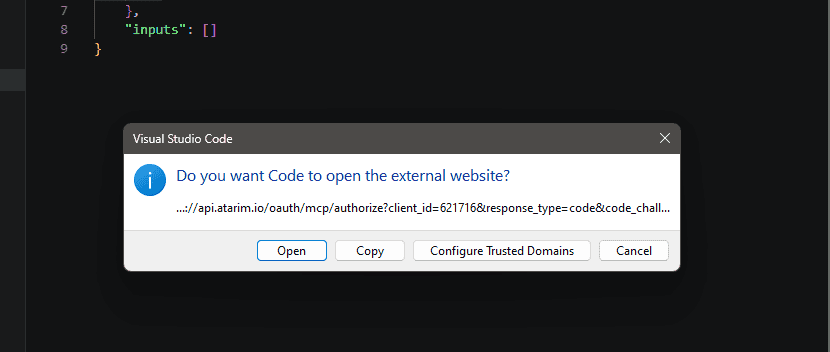
Dialog asking whether to open the external Atarim authorisation website
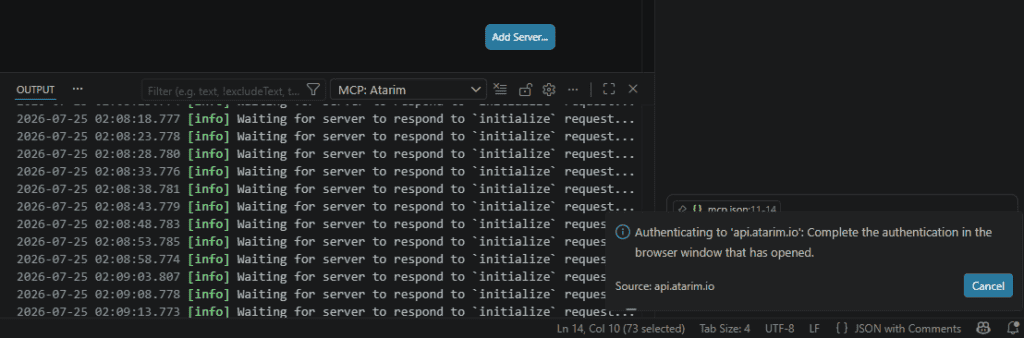
Complete the authentication in the browser window that opens
Atarim approval page headed “Connect your AI to Atarim,” with a Connect button.
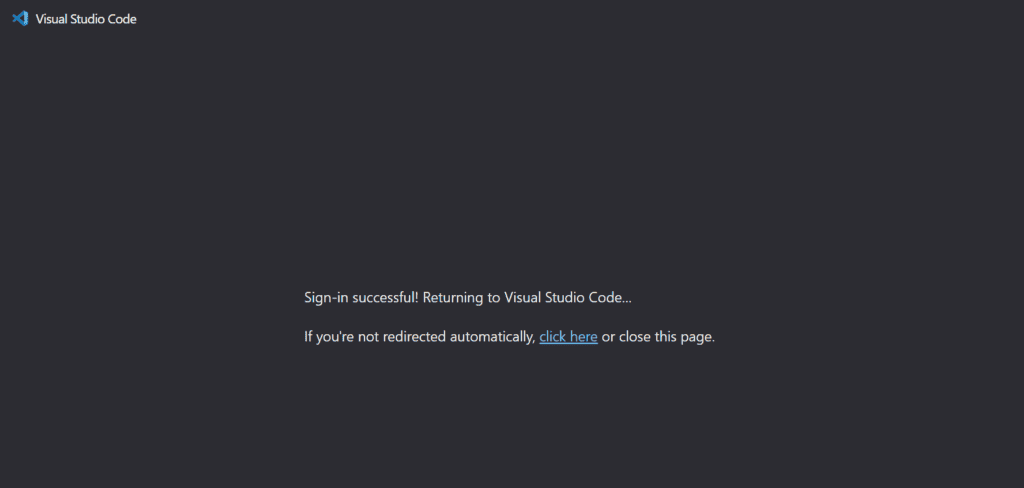
‘Sign-in successful’ confirmation after authentication completes, with a fallback link to return manually if the redirect doesn’t happen automatically.
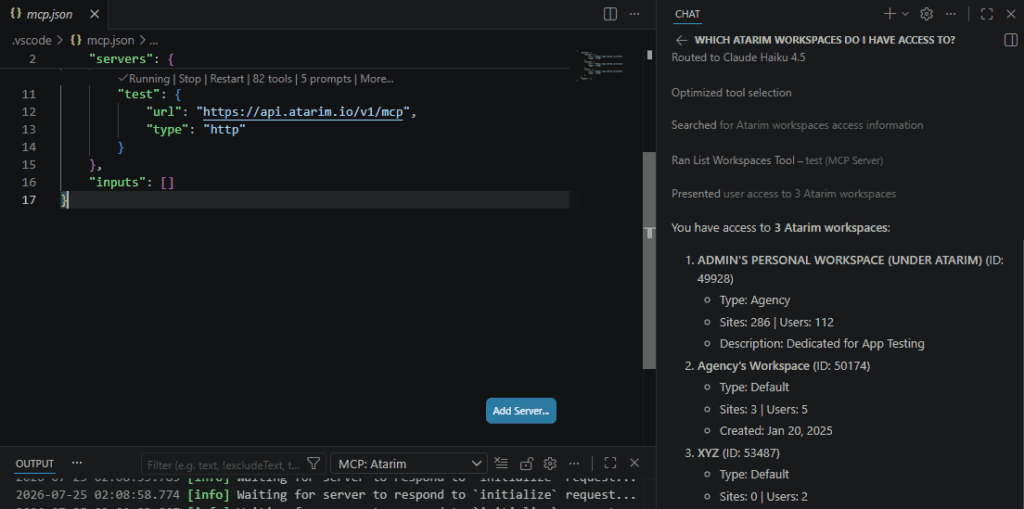
VS Code editor showing an open mcp.json configuration file with an Atarim MCP server URL, and the Command Palette listing MCP-related commands including ‘MCP: List Servers’
Once connected, the server identifies itself as Atarim, so that’s the name to look for in your assistant’s server list.
Confirming it worked
Worth doing properly — a connector that reports as connected can still be pointed at the wrong workspace.
Instructions:
Check that your assistant lists Atarim as connected. In Claude Code, enter /mcp; in Codex, run codex mcp list.
Ask a question that confirms both the connection and what it can reach:Which Atarim workspaces do I have access to?You should see the workspaces your Atarim account already has — and nothing else.
Then try a real lookup:List the open tasks on [site name] in Atarim.
If the assistant answers generally without naming real workspaces or tasks, it isn’t reaching Atarim. Check that it lists Atarim as connected, and that you completed the approval step rather than closing the browser tab early.
Tip
If nothing shows up right away, try starting a brand-new conversation with your assistant — sometimes a connection added mid-conversation doesn’t get picked up until the next one.
What your assistant can access
Nothing extra. A connected assistant can see and act on exactly what your own Atarim account can — no more. There’s no separate permissions screen to configure; the connection follows the access rules your account already has.
Each person connects with their own Atarim account, so everyone’s assistant is limited to their own access. If you want to limit what an assistant can reach, adjust what that person’s Atarim account can reach.
Anything that would normally need your approval stays gated. Your assistant can tell you a request needs a decision, but it can’t make that decision for you.
Working with WordPress sites
Reading and managing Atarim data works for any site in your account. Acting on a website itself — editing content, changing settings — requires the Atarim plugin installed and connected on that site.
Your assistant identifies a site by its Atarim record rather than its web address, so it will usually list your sites first to find the right one.
Installing or activating a plugin always needs your approval. When your assistant tries one of these actions, it pauses and asks you to approve or decline before anything happens on the site. It won’t decide on your behalf.
Note
Backups come through the same bridge. There is no backup tool on the Atarim side. On a site running JetBackup, your assistant reaches that plugin’s own backup actions the way it reaches anything else on the site — reading which snapshots exist, starting a run, then noting or locking the one it made. Starting a backup runs; restoring one is held for your approval. Three things are worth knowing about a restore point: its readiness is tracked until it is actually ready to use, so a point that has only just been asked for is not yet cover; on hosts where the server’s own scheduler does not pick the job up, Atarim drives the queue itself rather than waiting; and a snapshot can be restored by name instead of by id. JetBackup also holds only one restore point per site, so arming a new one replaces the existing one. The Stack records which backup plugin a project is meant to use, but it does not take a backup itself. Explore the Atarim WordPress plugin.
Disconnecting
Disconnect from within your assistant:
Claude: Settings → Connectors, then remove the Atarim connector.
Claude Code:claude mcp remove atarim
Codex: remove the Atarim entry from your MCP server list or configuration file.
Removing the connector there ends that assistant’s access to Atarim.
FAQs
Can more than one person on my team connect their own assistant?
Yes, among the people who are eligible. Connecting requires Owner or Administrator on the workspace, so Team Members, Website Owners and Collaborators cannot set one up. For everyone who can, the Server URL is the same — each person adds it to their own assistant and signs in with their own Atarim account, and every connection is limited to that person’s own access.
Does this replace the WordPress plugin or the Chrome extension?
No. The plugin is what makes website actions possible — your assistant reaches a site through the Atarim plugin installed on it. Without the plugin, the connection still works for Atarim data such as tasks, comments and sites, but can’t act on the website itself. The Chrome extension is unrelated and unaffected.
What can my assistant actually see?
Only what you can. The connection acts as you, using your existing Atarim permissions. Connecting doesn’t grant new access to you or anyone else.
Can my assistant change things, or only read them?
It can make changes — creating and updating tasks, adding comments, and on plugin-connected sites, editing the site itself. Actions that install or activate plugins always pause for your approval first.
Conclusion
Setup takes a few minutes per developer: copy the Server URL, add it to their assistant, approve the one-time browser prompt, then confirm it actually works with a real question. Once that's done, it fades into the background — your developers just ask their assistant about a site or task, and it already knows, with every gated action still routing through your Approval Queue exactly as before.
Tips & best practices
Set this up individually for each developer's own assistant rather than trying to share one setup across the team.
Always do the final "ask it something real" check — don't assume it's working just because it shows as connected.
To provide the best experiences, we use technologies like cookies to store and/or access device information. Consenting to these technologies will allow us to process data such as browsing behavior or unique IDs on this site. Not consenting or withdrawing consent, may adversely affect certain features and functions.
Functional
Always active
The technical storage or access is strictly necessary for the legitimate purpose of enabling the use of a specific service explicitly requested by the subscriber or user, or for the sole purpose of carrying out the transmission of a communication over an electronic communications network.
Preferences
The technical storage or access is necessary for the legitimate purpose of storing preferences that are not requested by the subscriber or user.
Statistics
The technical storage or access that is used exclusively for statistical purposes.The technical storage or access that is used exclusively for anonymous statistical purposes. Without a subpoena, voluntary compliance on the part of your Internet Service Provider, or additional records from a third party, information stored or retrieved for this purpose alone cannot usually be used to identify you.
Marketing
The technical storage or access is required to create user profiles to send advertising, or to track the user on a website or across several websites for similar marketing purposes.