Understanding User Roles and Permissions in Atarim
Every role in Atarim, what each one can actually see and do, and the three separate layers of control that decide it.
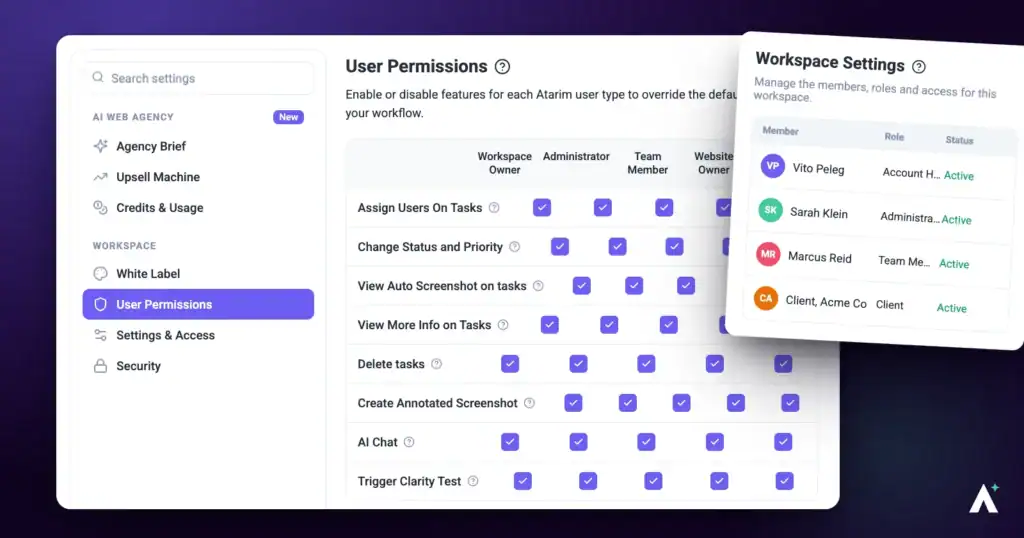
Atarim organises access around one core distinction: are you on the agency side or the client side of a relationship? Five roles cover both sides.
On top of the roles sit two further layers — a workspace-wide capability grid, and per-project access controls. Understanding which layer is responsible for what is the difference between fixing an access problem in thirty seconds and hunting through the wrong screen.
In this guide you'll learn what each role can do, where to change someone's role, how the two permission layers work, and what a Website Owner account can and can't reach.
The Five Roles
Every person in Atarim holds exactly one of these. The internal value is what you’ll occasionally see in an export or an integration payload; the display name is what appears in the interface.
| Role | What it means |
|---|---|
| Owner | The workspace’s own account holder. Full access, including plan and billing screens. |
| Administrator | Full access to every settings screen, including plan and billing. |
| Team Member | Internal staff. Works on tasks and projects, but does not see People, Settings, Workflows or Analytics by default. |
| Website Owner | A client who holds their own account, with their own plan and their own small team. |
| Collaborator | The lightest-weight role. Invited to one project, with the narrowest default access of any role. |
Step-by-Step Guide
Step 1: Knowing Which Layer Controls What
Three separate layers decide what someone can do. Most access confusion comes from checking the wrong one, so it’s worth learning the split before anything else.
| Layer | What it controls | Where to change it |
|---|---|---|
| Role | Broad access — whether someone is an admin, staff, a client, or a guest. | People screen |
| Workspace capabilities | Specific in-task abilities, per role, across the whole workspace. | Settings > Workspace > User Permissions |
| Project access | Who can open one particular project, and how. | That project’s Share panel |
| Project permissions | What the people who can already open a project are allowed to do inside it, per role, for that project alone. | Project Settings > User Permissions |
| Site-level role | Your effective role on one specific website, which can differ from your workspace role. | That site’s own team list |
What the User Permissions screen can’t change
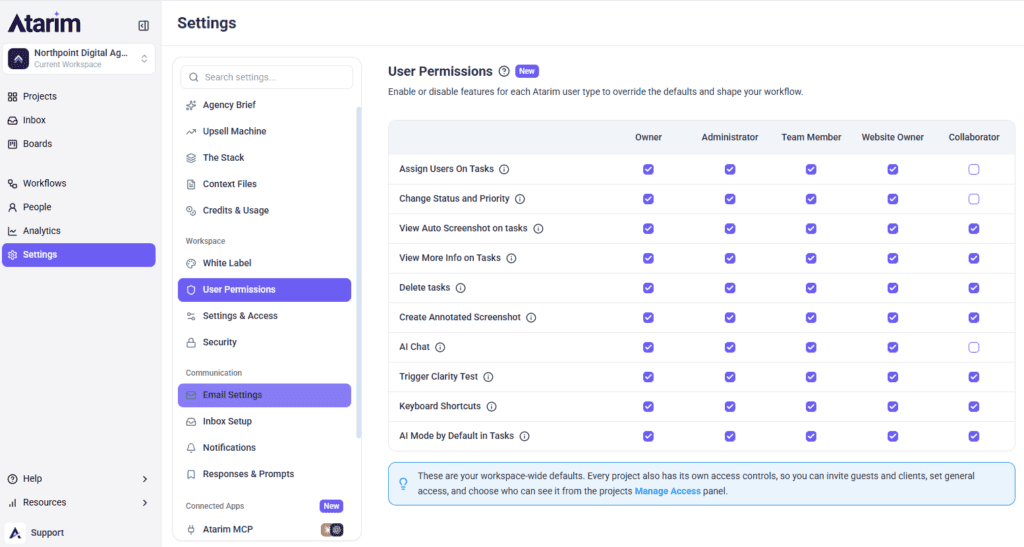
The grid covers in-task capabilities. It does not cover which sidebar items a role can see — those are set at account level and don’t appear on that screen at all.
Roles are also resolved per site
There’s a fourth layer that only surfaces occasionally. Your effective role is worked out per website rather than once for the whole workspace: if you own a site you’re treated as an Administrator on it, otherwise Atarim uses the role you were given on that specific site. Where no role exists for you on a site, it falls back to Collaborator — the most restricted option.
Step 2: Viewing and Changing Someone’s Role
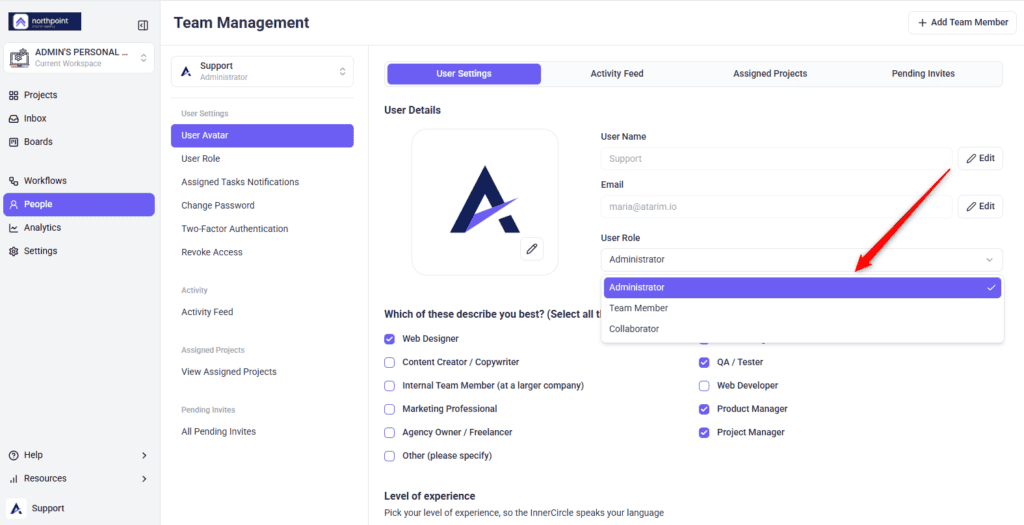
Roles are managed from the People screen, which lists everyone in the workspace with their role beneath their name.
Instructions:
Three roles can be assigned from this invite:
| Role | Described in the invite as |
|---|---|
| Administrator | A project manager or team member |
| Team Member | A team member or contractor |
| Collaborator | A stakeholder or client |
Step 3: Setting Workspace-Wide Capabilities
Beyond the broad role definitions, the User Permissions screen lets you override specific capabilities per role. The grid runs capabilities down the left and all five roles across the top.
Instructions:
What a Clarity Test actually is
One capability on that grid is worth explaining, because the name is easy to misread. A Clarity Test is an AI check that scores how clear a task is and suggests how to make it easier to action — it works on the wording of the task, not on the website.
Step 4: Controlling Access to a Single Project
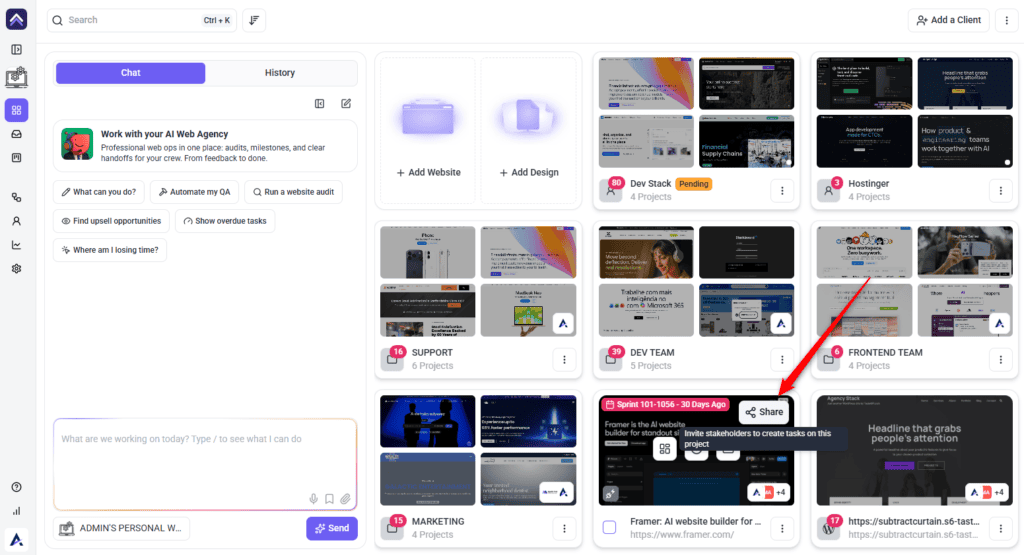
Every project has its own access controls, separate from the workspace-wide defaults. They live in the project’s Share panel, which has three tabs.
Instructions:


Setting what those people can do, for one project only
The six steps above cover the Share panel, which decides who can open the project. What those people are then allowed to do inside it is a separate screen: open the project, go to Project Settings, and choose the User Permissions tab.
It is the same grid of capabilities and roles as the workspace-wide screen, resolved for this one project. While a project is still inheriting, the screen says so. The first toggle you change creates an override, and from then on this project follows its own grid rather than the workspace default — the workspace grid is unaffected, and so is every other project.
Two things to know before you rely on it. The tab only appears when that project is not using the workspace-wide global settings, so if you cannot see it, check that toggle first. And there is currently no control on this screen for clearing an override and returning the project to the workspace default, so treat setting one as a decision to manage this project separately from now on.
Step 5: Understanding Website Owner Accounts
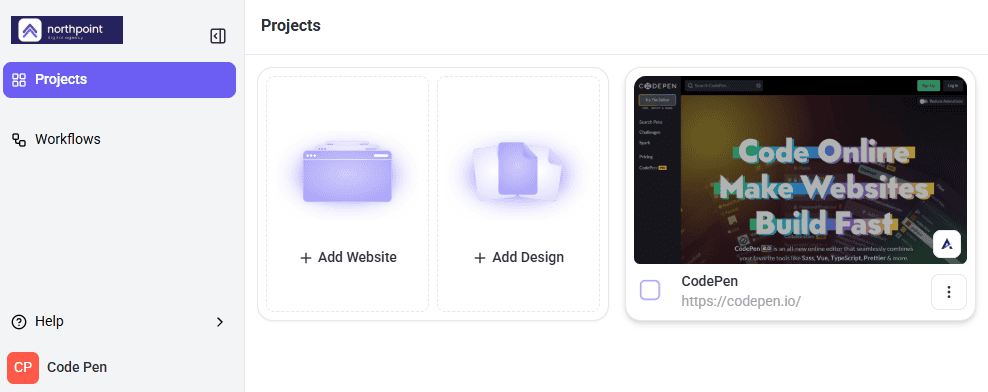
Website Owners are clients who hold their own Atarim account rather than being guests on yours. They run on a separate plan with its own caps, described in the plan itself as a “minimal website-owner experience scoped to managing up to five websites with an AI agency.”
| Limit | Website Owner plan |
|---|---|
| Projects | Up to 5 |
| Seats | Up to 10 — 1 owner plus 9 team |
| Workspaces | 1 |
| AI credits | 2,000 |
They keep the collaboration essentials: AI chat with Claro, AI reviews and approvals, the Chrome extension, the WordPress plugin, image and URL-based collaboration, annotations, page approvals, and attachments.
Agency-side features are not included. A Website Owner account has no access to white labeling, analytics, workflows and automations, forms, multiple workspaces, Kanban boards, the shared email inbox, canned responses, time tracking, task tags, project stages, integrations, or the Atarim API.
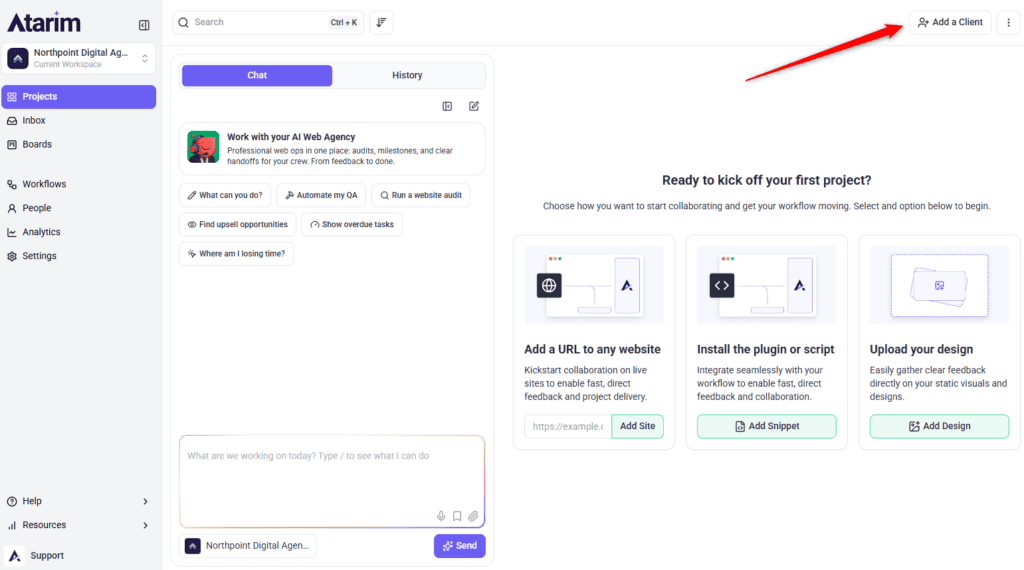
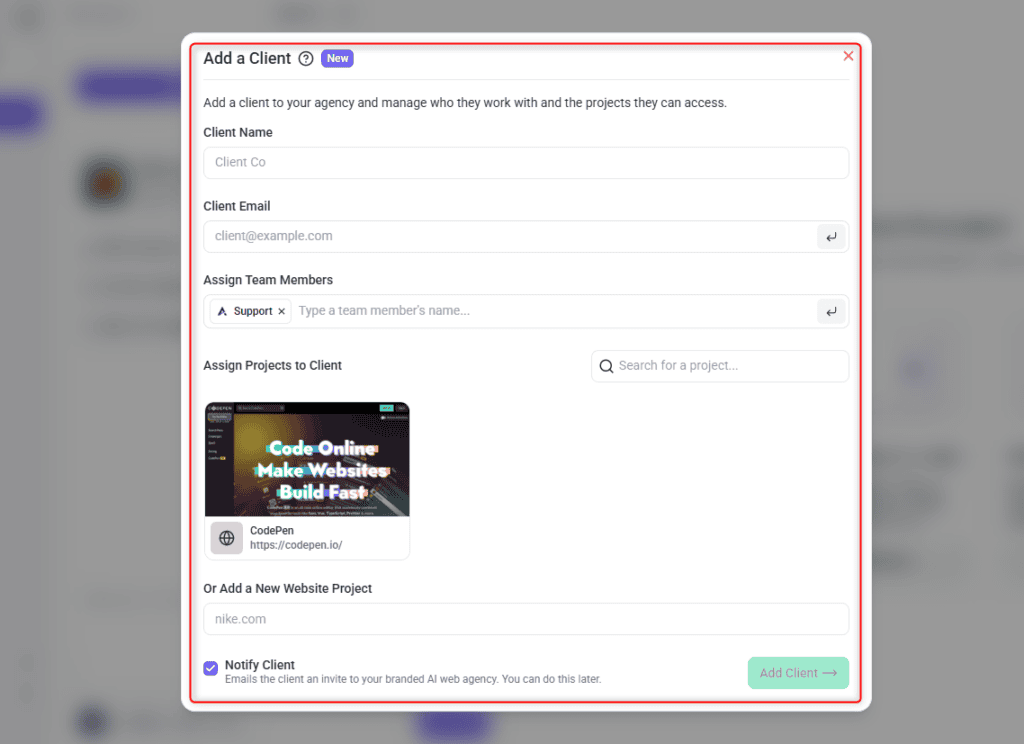
A client invite creates a Website Owner account for them in your agency. The dialog is headed Add a Client and describes itself as: “Add a client to your agency and manage who they work with and the projects they can access.” Credits are not part of this step — they are allocated afterwards, from the client folder’s Set Budget option.
Before you start
Nothing, beyond the client’s email address. Credits are not requested when you add a client and no minimum balance is enforced at this stage — the budget is set separately once they have accepted, where the 1,000 to 10,000 monthly range applies.
Sending the invite
Only the email address is required, so an invite can go out before you know anything else about the client.
Instructions:

What’s included
They keep the collaboration essentials: AI chat with Claro, AI reviews and approvals, the Chrome extension, the WordPress plugin, image and URL-based collaboration, image annotations, responsive mode, design versions, page approvals, attachments, and the ability to edit and delete their own comments.
What’s not included
Agency-side features are outside the plan. A Website Owner account has no access to white labeling, analytics and reporting, workflows and automations, forms, multiple workspaces, Kanban boards, the shared email inbox, canned responses, time tracking, task tags, project stages, integrations, activity logs, or the Atarim API.
Some task-level features are also excluded, and these are the ones a client will notice first. Website Owners cannot set task status or priority, and don’t have the task inbox, internal tasks, notes, starred tasks, list view, task filters, or the Clarity Test.
FAQs
How many roles are there?
Five: Owner, Administrator, Team Member, Website Owner, and Collaborator.
What’s the difference between Owner and Administrator?
Owner is the workspace’s own account holder. Both reach every settings screen including billing, so day to day they behave the same way.
Which roles can I assign when inviting someone?
Administrator, Team Member, or Collaborator. Website Owner accounts are created through the client flow instead.
Why does someone have more access on one project than another?
Roles are resolved per site. If you own a site you’re treated as an Administrator on it; otherwise Atarim uses the role you hold on that specific site, falling back to Collaborator where none exists.
Why does an export say “contributor” when the interface says Team Member?
Team Member is stored internally as contributor. It’s the same role — only the label differs.
Can I change someone’s role after inviting them?
Yes, from the People screen, within the constraints of the account type they were invited under.
Is a Clarity Test the same as Microsoft Clarity?
No. A Clarity Test is an AI check that scores how clear a task’s wording is. Microsoft Clarity is a third-party heatmap tool that appears as the Heatmaps default in The Stack. Unrelated.
Can a Website Owner see other clients in my workspace?
No. Their account only ever shows their own users and projects.
Can a Website Owner configure permissions themselves?
No. Both User Permissions and Project Permissions are switched off at the plan level for Website Owner accounts.
Do guests need an account?
No. A guest invite is a link scoped to a single project, with no login required.
Can I upgrade a guest to a full client account later?
Not automatically. You’d set them up as a client separately, so it’s worth deciding which one they need up front.
Conclusion
Knowing which role someone holds tells you most of what they can see and do. The five roles cover both sides of the agency-client relationship, and the capability grid on top lets you adjust specific abilities without changing anyone's role.
The one thing worth carrying away is the three-layer split. Role decides which screens exist for someone, workspace capabilities decide which controls appear inside them, and project access decides which projects they apply to at all. Almost every "why can't they do this?" question resolves once you know which of the three you're looking at.
Tips & best practices
- Assign Administrator sparingly — it carries billing access, not just full feature access
- Check the User Permissions grid directly rather than assuming defaults; any administrator can have changed them
- Decide between a Website Owner account and a guest link up front — there's no automatic upgrade path from one to the other
- Audit the People with Access list on long-running projects; guests rarely get removed once the work is done
- When someone reports missing access, identify the layer first — role, workspace capability, or project — before changing anything
- Remember that hidden isn't broken. Two people on the same workspace will see different sidebars, and that's by design
- Don't hunt the User Permissions grid for sidebar access — it doesn't control that layer