Jira
Push tasks to Jira, pull them back, and keep client feedback flowing into the backlog your developers already work from.
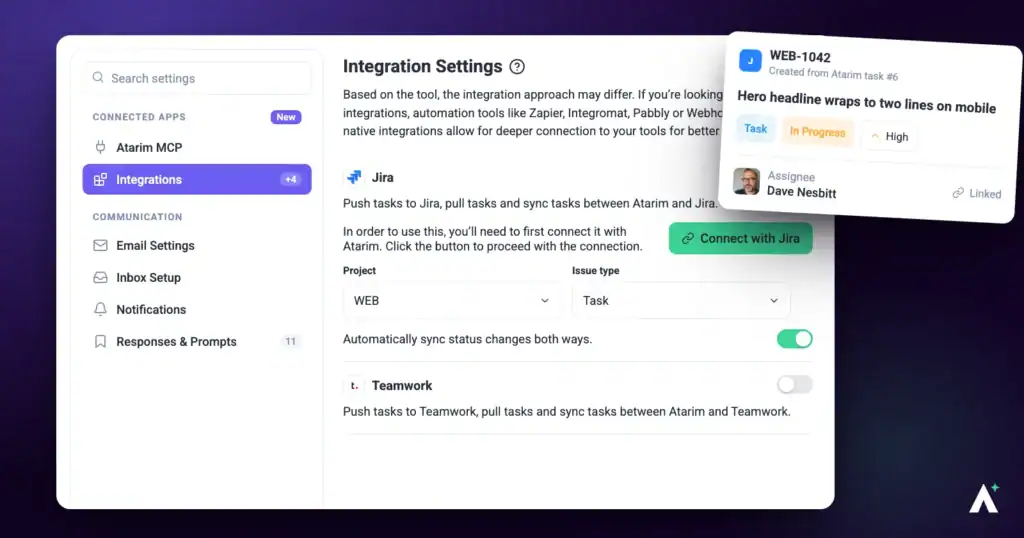
Client feedback captured visually in Atarim becomes an issue in the Jira project your developers already plan from. Setup has two parts — connect your Jira account, then decide which Atarim website feeds which Jira project. The destination is chosen per website, not once for the workspace.
Each Atarim website is mapped to a Jira project.
The Jira integration lets you push tasks to Jira, pull tasks back, and keep the two in sync. Client feedback captured visually in Atarim becomes an issue in the project your developers already plan from, with the task’s details carried across.
Setup has two parts: connect your Jira account, then decide which Atarim website feeds which Jira project.
Connect Jira
Connecting is account-level. Which website maps to which Jira project is configured separately, below.
Instructions:
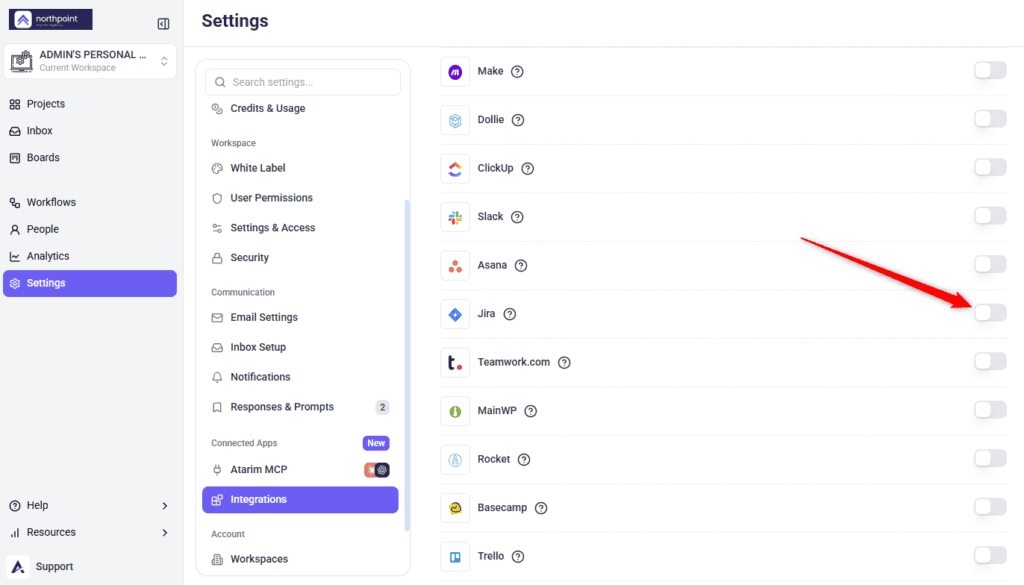
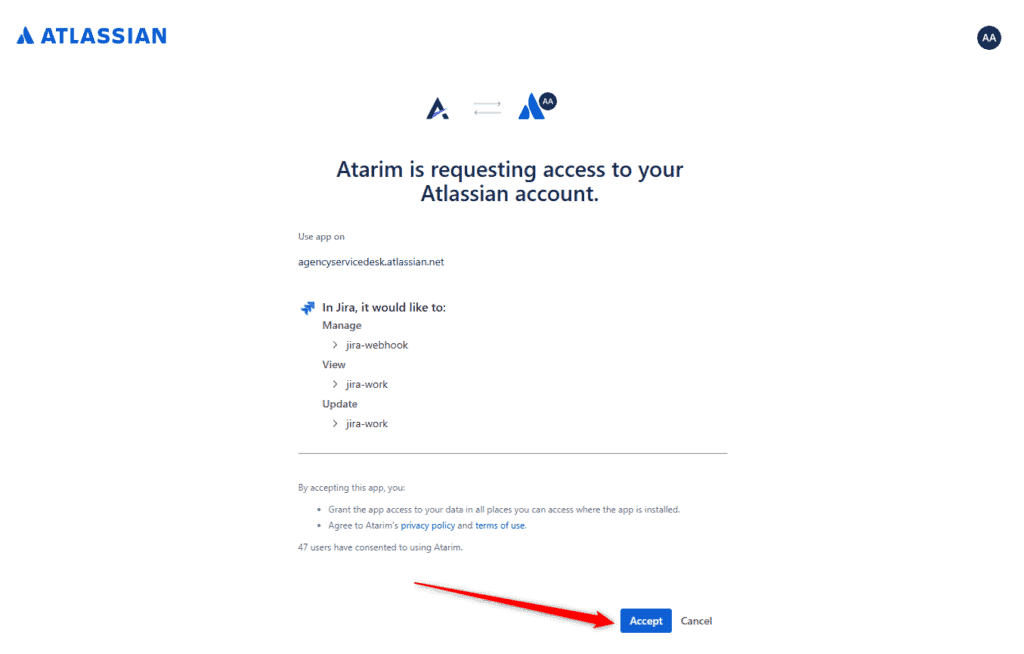
manage jira-webhook, and view and update jira-work. Accepting grants access to your data in all places you can access where the app is installed, and agrees to Atarim’s privacy policy and terms of use.
Choose the Website and Project
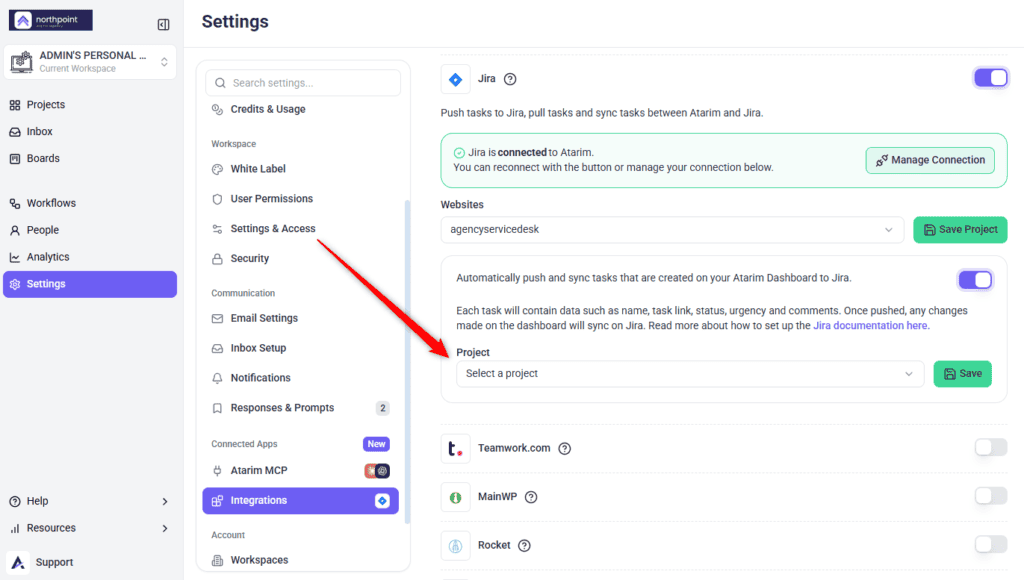
Configuration happens in two saves, which is easy to miss because they look similar. First you pick the website, then you pick the Jira project it feeds.
1. Select the Website
Each Atarim website maps to its own Jira project, so this choice scopes everything that follows.
Instructions:
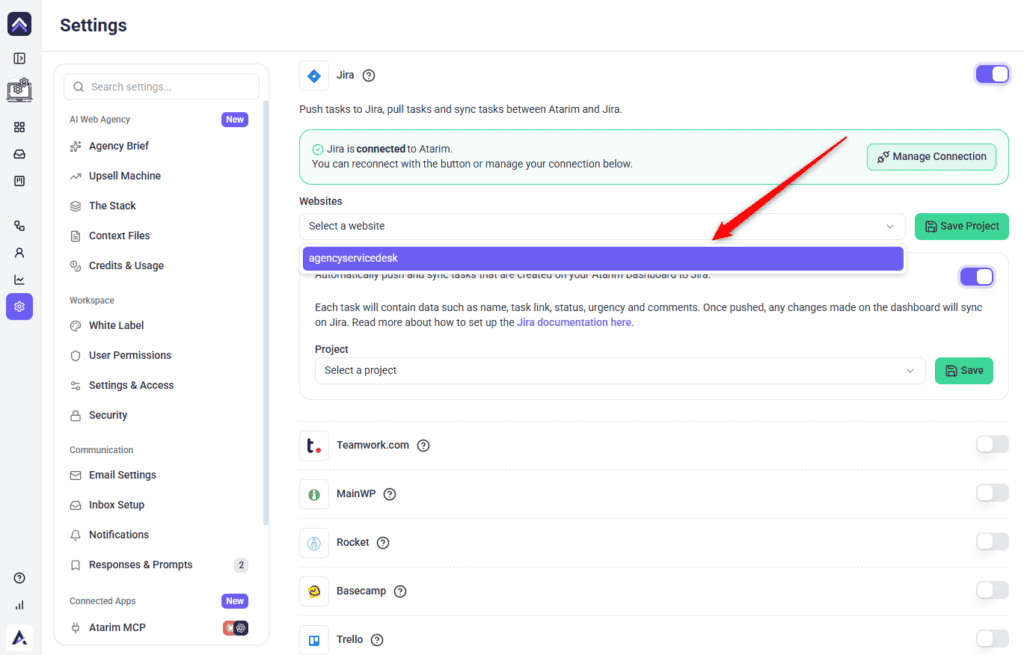
2. Turn On Syncing and Pick the Jira Project
Syncing runs both ways once it is on, so updates made in Jira come back to Atarim as well.
Instructions:
What Gets Pushed
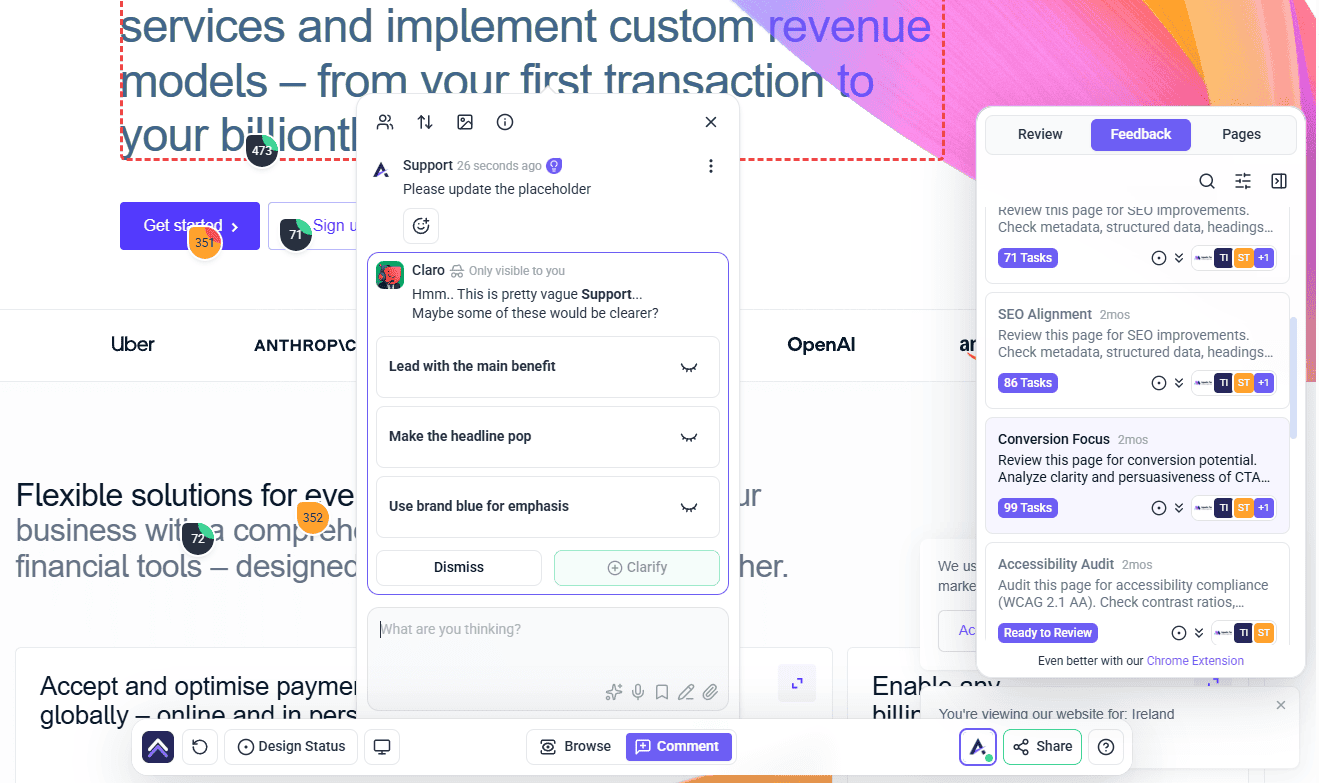
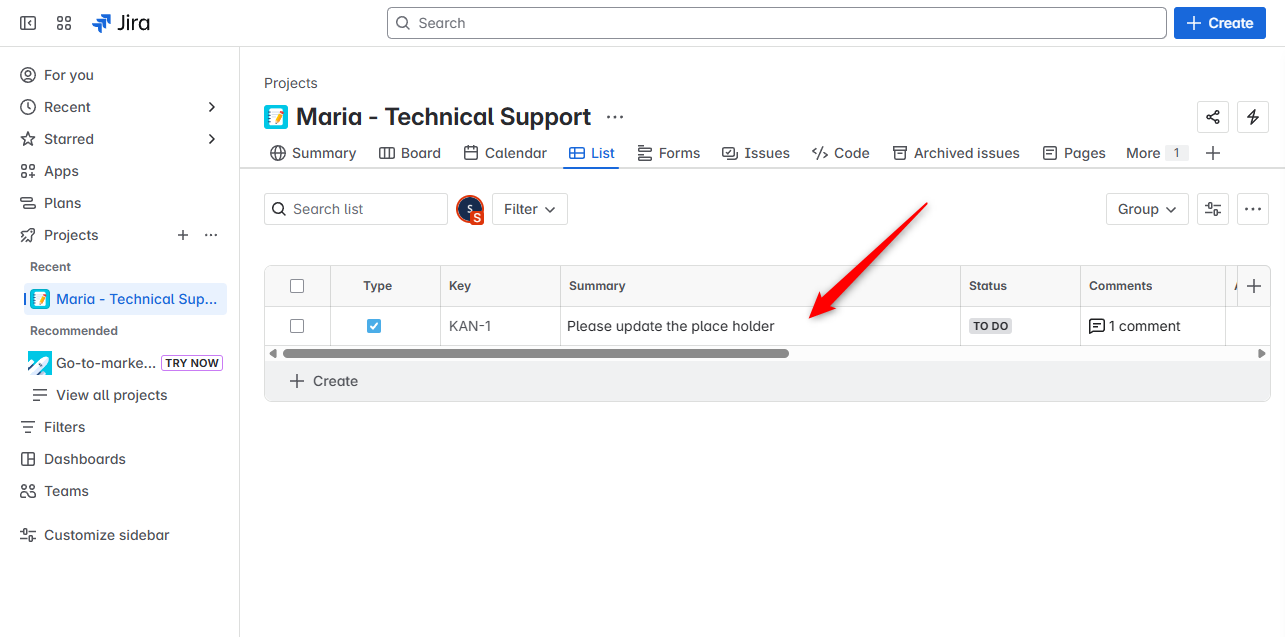
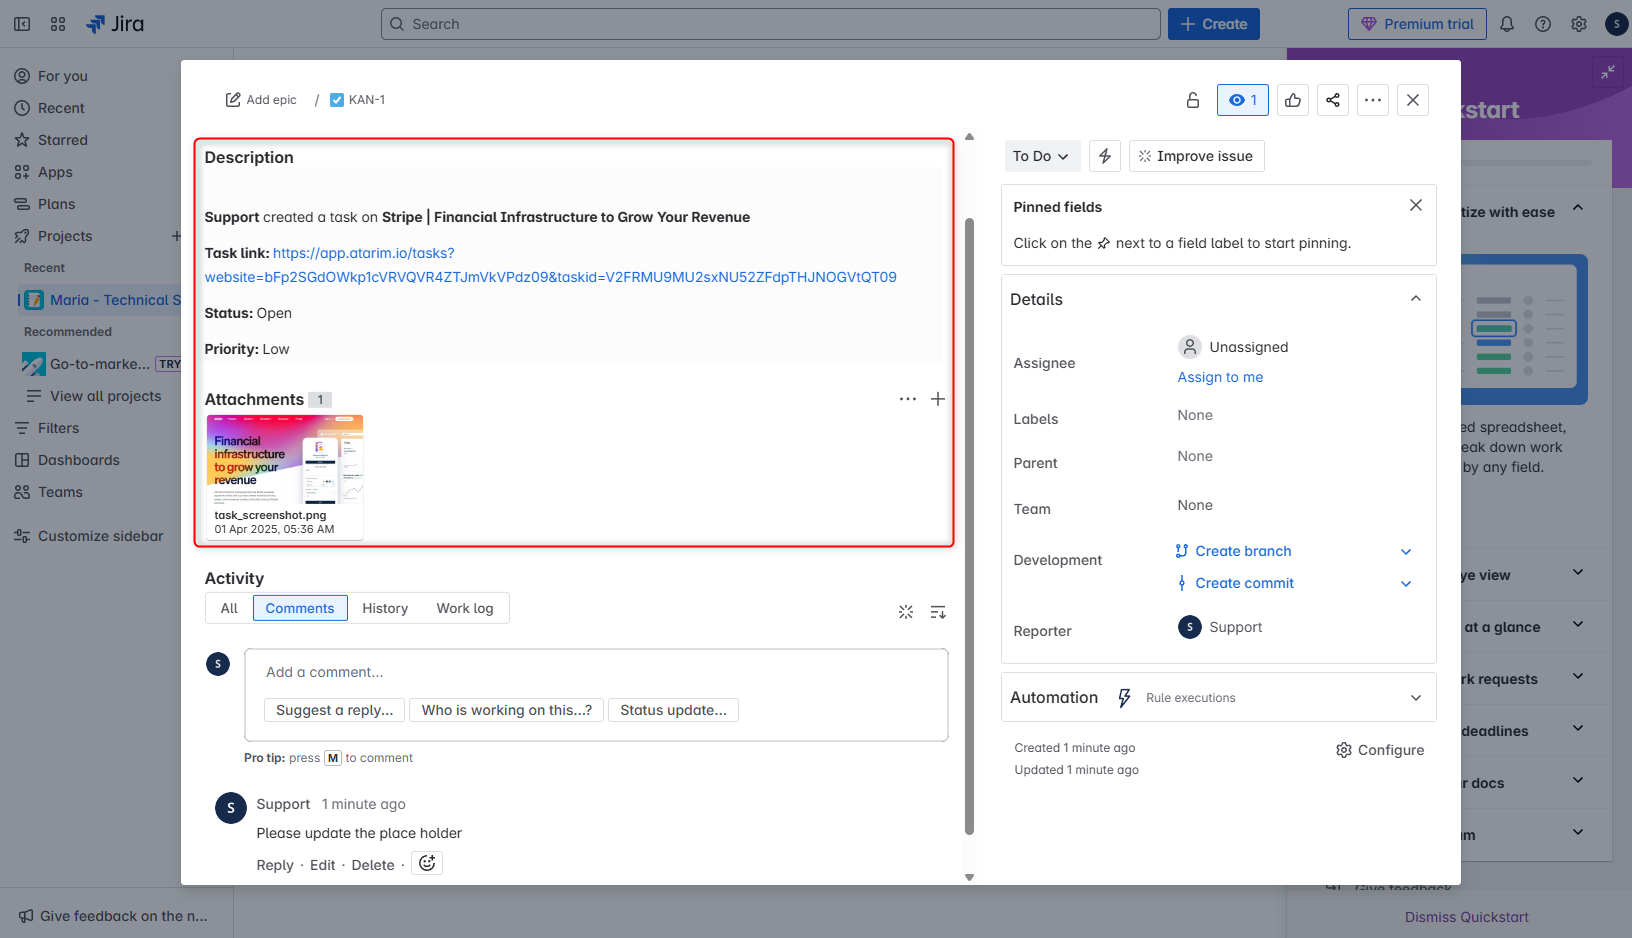
Each task pushed to Jira carries its name, a link back to the task, its status, its urgency and its comments. After the initial push, changes made on the Atarim dashboard continue to sync across to Jira.
Using Jira in a Workflow
The per-website mapping above pushes everything from that website automatically. If you would rather be selective, Jira is also available as an action inside Workflows — so you can send only the tasks that meet conditions you set.
Instructions:
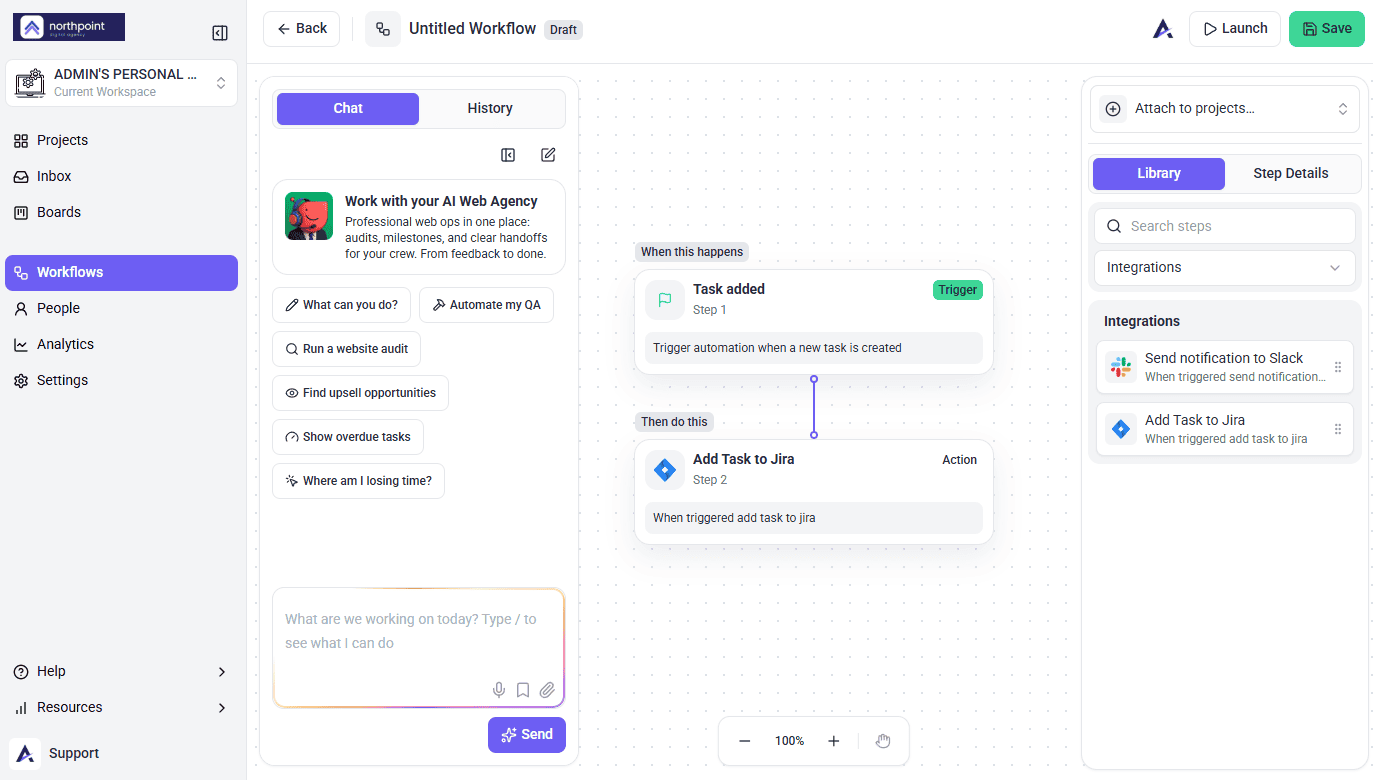
Setup at a Glance
| Step | Where it happens | What it needs |
|---|---|---|
| Switch Jira on | Atarim → Integrations | A plan that includes it, and permission to manage integrations. |
| Accept the access request | Atlassian | The right Atlassian site under Use app on. |
| Select the website | Atarim | A website in your workspace. |
| Save Project | Atarim | A website selected. |
| Turn on automatic syncing | Atarim | The website saved. |
| Select the Jira project | Atarim | A live connection, so projects can load. |
| Save | Atarim | A project selected. |
| Repeat per website | Atarim | Each website configured separately. |
Benefits
| Benefit | In practice |
|---|---|
| Feedback reaches the backlog | Client requests arrive where development work is actually planned. |
| Sync works both ways | Tasks can move from Atarim to Jira and back. |
| Per-website mapping | Different clients can feed different Jira projects from one workspace. |
| Context travels with the task | Issues arrive with the task’s details rather than a bare title. |
| Clients stay in Atarim | They never need a Jira seat for their feedback to be tracked. |
Example Use Cases
| Situation | How to set it up |
|---|---|
| Developers plan sprints in Jira | Map the client’s website to the delivery project so requests enter the backlog automatically. |
| Several clients, several Jira projects | Map each website to its own project. |
| Clients giving visual feedback | Let them work in Atarim while issues appear in Jira. |
| Separating client work from internal work | Point the mapping at a dedicated project rather than a shared one. |
| Reporting from Jira | Sync feedback in so client requests appear in existing reports. |
FAQs
Does sync work in both directions?
Yes. Tasks can be pushed to Jira, pulled back, and kept in sync.
Can different websites use different Jira projects?
Yes — that is how the mapping works. Each website is configured separately.
Do I need to create the Jira project first?
Yes. Atarim can only choose from projects that already exist in your connected Jira account.
What does Atarim push to Jira?
The task name, a link back to it, its status, urgency and comments. Later dashboard changes continue syncing across.
Why is the Save button greyed out?
Because no Jira projects have loaded. That usually means the connection is not returning data — reconnect and try again.
Do clients need a Jira account?
No. Clients work in Atarim; syncing happens between your two accounts.
Can I send only some tasks to Jira?
Yes. Use the Jira action inside a workflow instead of the per-website mapping, so only tasks meeting your conditions are pushed.
Can I change the mapping later?
Yes. Choose a different project for that website and select Save again.
What if the connection breaks?
Use the reconnect option in the Jira row of the Integrations panel.
Common issues
- The Project list is empty and Save is disabled — Atarim cannot retrieve your Jira projects. Reconnect the integration.
- The Jira option is locked — your plan does not include native integrations. The lock names the minimum plan required.
- Integrations is not in your settings sidebar — your role does not have access. Ask an Administrator.
- Your project is not in the list — create it in Jira first, then reconnect so the list refreshes.
- Tasks are not reaching Jira — confirm you used both saves (Save Project for the website and Save for the Jira project) and that automatic syncing is switched on.
- Tasks landed in the wrong project — the mapping points elsewhere. Change it and save again.
- Issues are being created twice — the website is mapped and a workflow is pushing to Jira. Use one or the other.
- The workflow will not save — a Jira project is required on the action. Choose one before saving.
- Only some websites sync — each website is mapped separately. Check the ones that are not syncing have a project set.
- The wrong Jira site got connected — the site under Use app on was the wrong one. Use Manage Connection to reconnect and accept on the right site.
- You cannot authorise Atarim in Jira — your Jira account may not have permission to approve apps. Ask a Jira admin.
Conclusion
Jira setup is short but has one detail that catches people out: the destination is chosen per website, not once for the workspace. Connect the account, then map each website to the Jira project it should feed.
Point the mapping at a project your team genuinely grooms — syncing runs continuously once configured, and an unwatched project quietly fills up.
Tips & best practices
- Create the Jira project before you start, so it is selectable during setup.
- Map each website deliberately rather than pointing everything at one project.
- Use a project your team actively grooms.
- Use both saves — Save Project for the website, then Save for the project.
- Reconnect rather than reinstall if projects stop loading.
- Choose either the per-website mapping or a workflow for a given site, not both.
- Check each website’s mapping when adding a new client.